Why tie it up at all?
With the help of proper tying, you can correctly form bushes. A correctly carried out procedure helps to increase productivity, faster ripening of fruits and prevent the death of the bush from one of the most common problems - a broken trunk.
Tying is necessary for medium and tall bushes. Tomato garter will help in solving the following problems:
- Watering the root zone of the bush, without damaging the tops and fruits. This is necessary to prevent sunburn.
- Formation of more ovaries.
- Protect the flowers and fruits of the plant from ants and other pests in the soil.
- Checking the plant to reduce the risk of rotting of the trunk and leaves from excess moisture.
- Strengthening the stem, taking the correct shape without bending.
- Prevent stems from becoming brittle under the weight of ripening fruits.
- Ensure uniform penetration of sunlight.
- Make the spraying procedure easier and more effective.
- Make the processes of weeding and pinching easier.
Purpose
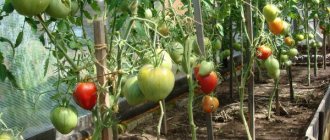
On a trellis, plants receive more air and sunlight necessary for good fruiting. The vertical garter prevents contact of leaves and fruits with damp soil and protects against fungal and bacterial diseases. First, the stem is tied up, and then the branches with the filling fruits, which reduces the load on the main trunk. If you don't do this, the stem will fall to the ground and the tomatoes will begin to rot. In high-yielding hybrids, loose branches will break under the weight of the fruit, the bush will suffer significant injury, and the yield will decrease.
Advantages of using trellises:
- movement around the site is made easier - the row spacing is cleared of plants lodged in the aisles;
- The bushes are easy to care for - pruning, spraying, normalizing brushes, harvesting, pollinating;
- The fruits do not rot, ripen faster, and set better.
Types of trellises for closed ground
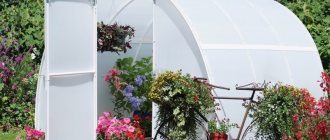
When growing tomatoes in a polycarbonate greenhouse, varieties specially designed for this purpose are most often used. Most of them are tall - bushes can reach a length of 2 m or more. Such plants need a garter.
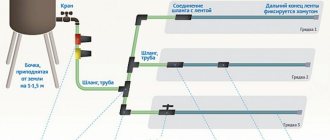
Typically, gardeners install supports inside the greenhouse on which a horizontal bar or wire is attached. Pieces of cord are tied to such a primitive trellis, on which the tomato stems will subsequently be attached. How to do this correctly is shown in detail by the instructions in video 1.
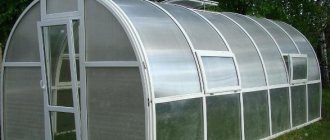
If you slightly improve the design of a simple trellis in a polycarbonate greenhouse, you can build a moving support (Fig. 5). It allows you to comfortably place even very tall tomatoes without pinching their tops when reaching the top bar. In this way, you can get a larger harvest if weather conditions permit. In addition, the load on the plant stem during fruit setting and active growth in its lower part is significantly reduced. Tomatoes laid on a net ripen and remain healthy, as they do not have contact with the ground.
The mobile trellis is based on the usual design for a greenhouse: posts and a crossbar attached to them under the ceiling. At the bottom of the support pillars, at a height of about 70 cm from the soil, you need to install crossbars to secure the mesh. The mesh bed is located horizontally.
Hang hooks with twine attached to them on the top crossbar. The length of the thread should be much greater than the height of the trellis. For the initial stage of growing tomatoes, the twine is tied so that its length corresponds to the height at which the hook is located. The knot should be easy to untie. Excess twine can be folded and attached to a hook.
As the tomatoes grow, the knot is untied, part of the twine is released from the skein, and it is secured again. In this case, the stem is placed obliquely on a mesh bed, and the hook is moved slightly. The same procedure is done with the next bush. As a result, the distance between the stems remains the same, the fruits are placed in the net without pulling down the tied part of the stem. When the top of the bush reaches the crossbar, the procedure of lowering part of the stem is repeated, giving the plant the opportunity to continue its growing season.
By using trellises of different designs in the garden and greenhouse, you can significantly save space by narrowing the row spacing. By arranging tomato bushes in a vertical direction, the gardener will be able to collect ripening fruits in time and easily remove shoots and excess leaves. Thanks to the free access of air, even in the lower tiers there are no conditions for the development of late blight and other fungi.
Features of care
Cucumbers are not a fussy crop. If you properly care for the beds and take into account the developmental characteristics of the plant, it will not be difficult to grow a decent harvest.
Watering
Cucumbers are moisture-loving crops, so they do not allow the soil to dry out too much. Otherwise, the green mass will dry out, and the ovary will turn yellow and fall off. However, waterlogging the soil is also undesirable, since the root system will rot and fungal infections may occur. Basic rules of watering:
uniform watering promotes the formation of beautiful, even fruits
Alternating drought with waterlogging can lead to bitter fruits and their deformation; It is important to take weather conditions into account. In dry, hot weather, the beds are watered every day; if the plants have not been watered for a long time, the volume of watering is increased gradually. It is advisable to water the bushes with warm water
Morning and evening hours are the optimal time for watering plants. Wet soil needs to be slightly loosened
It is advisable to water the bushes with warm water. Morning and evening hours are the optimal time for watering plants. The wet soil needs to be slightly loosened.
Mulching
The benefits of mulching cannot be underestimated: mulch maintains soil moisture, looseness and fertility, and prevents overheating and cooling of the plant root system. Different materials are used to mulch cucumber beds:
- depleted soils are mulched with an organic mixture (manure mixed with hay or straw);
- A common option is mowed grass. It is not recommended to use freshly cut greens (mulch cakes, does not allow air to pass through well and can rot), or grass with seeds. Dry material is applied in a layer of at least 7 cm, otherwise the soil in the cucumber bed will dry out quickly;
- mulch from rotted sawdust improves the structure of the earth;
- Cover the ground with a special black perforated film before planting cucumber seedlings. Holes for seedlings are marked in advance. To prevent the ground from overheating too much, a white covering material is laid over the black canvas.
The dug up beds are covered with mulch in the spring. Pre-litter is removed, fertilizer is applied and the soil is moistened.
Fertilizer
During the season, the beds are fertilized at least four times. When choosing top dressing, you need to take into account the fertility of the land, climate characteristics, and season:
- after planting, manure, saltpeter, and potassium salt are used to stimulate the growth of green mass;
- When the first flowers appear, ash and superphosphate are used. The composition is added to the soil or simply sprayed on cucumber bushes;
- to prolong the growing season, use organic matter or diluted urea (15 g of fertilizer is diluted in 10 liters of water).
If the soil was well fertilized in the spring or the area is fertile, then fertilizing the cucumber bed can be applied twice (at the beginning of the season and to prolong the growing season).
Trimming
Experienced gardeners know that increasing vegetable yields is possible not only by adding fertilizers to the soil. A simple pruning procedure allows you to reduce the growth of green mass and direct nutrients to the formation of the ovary and the growth of fruits. Basic rules of procedure:
- It is better to do pruning in the morning;
- use special sharp garden shears;
- if the growth of the stems has slowed down, you need to thin out the leaves - carry out lightening pruning.
In greenhouses on a cucumber bush below the 6th leaf, all stepsons and leaves are torn off. With further growth of the plant, you can leave several side shoots (no more than six), but you need to make sure that they do not grow longer than 25 cm.
In open ground, cucumber bushes form into several stems, since bee-pollinated varieties have male flowers on the central stem, and female flowers on the side shoots.
Supports for seedlings after planting in open ground
Gardeners most often opt for trellis structures, where the main material for installation is wood: the supports are posts and horizontal wooden slats. You need to know some points regarding how to position them correctly and extend their use:
Since the tree deteriorates faster, such tomato supports should be removed at the end of the season. Storing in a dry place will extend the life of the trellis. In addition, you need to cover them with paint, not for beauty, but to extend their service life. Moreover, next year the support can be installed in a different place, which complies with the rules of crop rotation.
Installing tomato stakes
Rows of tomatoes when grown on a trellis should be planted from north to south. With this planting, the bushes will be illuminated by the sun throughout the day. A good option is to plant seedlings in two rows with a staggered arrangement.
Important! The paths between the supports should be wide: the wider they are, the more nutrition the plants receive. And it will be easier to care for tomato bushes
When the seedlings are already planted in the ground, the slats are deepened by 20 cm with a sharp edge. A nail is driven in at a distance of 20 cm from the top edge on the post; this will fasten the transverse slats. A distance of no more than 2 meters is maintained between the posts. After a week or a week and a half, a garter is attached to horizontal slats.
trellises of different types make it easier to care for tomatoes, provide access to air and sunlight, since ultraviolet radiation kills infections and pathogens; tomatoes love hot weather and sun, so trellises and supports are placed in the direction from north to south, the sun will heat the bushes all day. Wide passages should be left between the supports to increase the feeding area and ease of care and harvesting; the condition of the trellises must be monitored by covering them with antiseptics and removing them, if possible, for the winter to extend their useful life; You should also tear off the lower leaves of tomato plants; in contact with the ground, they can be affected by diseases. To prevent the infection from spreading, they must be removed.
It is necessary to pick off the lower leaves of tomato plants
Although you can buy almost any kind of tomatoes in supermarkets and markets, many gardeners prefer to grow these nightshades themselves, investing their own energy. In constant search for improved methods of cultivation, more advanced devices (for example, trellises), they put a lot of effort into obtaining a decent harvest. This is why homemade tomatoes taste so much better.
» Tomatoes
This is the name of a specially made vertical support intended for plants in the garden or garden. Structurally, it can consist of wood or metal posts dug into the beds,
between which a plastic or metal mesh is stretched.
It is allowed to replace the mesh with stuffed wooden planks. Today, such supports can be purchased in stores or made independently using available materials. In this review we will talk about making tomato trellises with your own hands and their design features. In fact, tomatoes mounted on supports receive more oxygen, are illuminated by sunlight,
which is necessary for the formation of the ovary and ripening of the crop. At the same time, contact of leaves with moist soil is completely excluded, which helps prevent many diseases. During the formation period, the stem is tied up, then it is the turn of the branches with vegetables. Thus, the load on the main trunk of the bush is reduced.
Tomato plants on a trellis, grown in an open bed, feel better, increase yield, and can withstand unfavorable climate conditions. Their fruiting season is becoming longer.
In addition, the use of trellises provides its advantages in caring for tomato crops:
- you can move freely between the rows
; - the plants are well ventilated
and are easier to plant; - Harvesting
is made easier and fruits are not damaged.
Tying methods
Tomatoes in the central climate have to be grown in seedlings. By the time they are planted in open ground (hereinafter referred to as OG), they are already ready for flowering and fruiting. For growing in such conditions, gardeners prefer low-growing and medium-growing varieties, since it is much easier to provide them with support without constructing complex structures.
Why do tomatoes need support?
Some gardeners choose low-growing varieties and do not tie them up. This is acceptable, the harvest will also be good. But, as has already been noted, with support, plants develop and bear fruit better.
Plant tying is necessary for the following reasons:
In exhaust gas conditions, bushes are exposed to significant influence of natural factors - strong wind, rain, hail. All this will probably put even varieties capable of growing vertically on the ground. All above-ground parts of tomatoes should not touch the ground. Otherwise, various diseases begin to develop, slugs and insects gain easy access to the plant, and the fruits rot.
Tomatoes need to be watered only at the root; they do not like water getting on the leaves and fruits. Vertically located bushes are easier to spray with appropriate preparations against diseases and pests. It’s also easier to weed, plant, and harvest.
A vertically growing plant receives more sunlight and heat. And freely circulating air masses prevent the occurrence of many diseases.
As you can see, gartering tomatoes in open ground is absolutely necessary!
Let's look at effective ways to create support for growing pets:
Wooden stakes are one of the simplest and most affordable tying methods. Instead of wood, you can use a material that is more resistant to natural influences - metal rods (fittings, corners), remains of rigid plastic pipes.
It is important to calculate the length of the peg. To do this, add 30 cm to the height of an adult plant.
This is exactly the size that the stake will need to be driven into the ground for reliability. For medium-sized varieties, a length of 1 m is sufficient. The stake is driven into the ground during planting of seedlings or after no more than 1 week, so as not to injure the roots. This method is the leading one because it is the cheapest and even women’s hands can do it.
Horizontal trellises are an effective but labor-intensive method for open ground. The bottom line is that strong supports made of wood or a metal profile are dug in along the edges of the bed at approximately 0.7-1 m. There may be several such supports, in which case they are installed in increments of 1.5–2 m along the line of planting seedlings. Twine is pulled between the stakes with a horizontal step of 0.4 m. As the shoots grow, they are either passed between 2 ropes located on the same line, or directed either from one side of the rope or from the other, located at different levels.
The first method is dangerous because the “figure eight” formed by the rope can cut the tomato trunk. Additionally, shoots and fruit clusters can be fixed to horizontal trellises.
Vertical trellises are also often used. Their construction will require strength and a lot of material. A structure similar to the previous one is being built. Strong supports 2 m long are dug in along the planting line. A reliable crossbar is required on top, to which the bushes will be tied. It can be made from thick steel wire, wooden beams or other material.
Loosely tie twine to each bush, wrap the plant around it and tie it to a vertical support. As they grow, the shoots will either wrap themselves around the rope, or you will help them with this.
The support can be made into a more stable structure like this.
Fixation to a mesh, lattice, or cage is often used. Around each bush a certain support of cylindrical or rectangular cross-section is built. The easiest way is to take a piece of chain-link mesh, wrap it around the plant, and lightly dig the edges into the ground.
Or use any available material.
So, gradually, we will figure out how to tie up tomatoes in open ground. Photos of common designs will help you complete them yourself on your site. There are many other fixation options, but they are all derivatives of the above methods.
Look at some photos of exotic support models.
Please note the general tying rules:
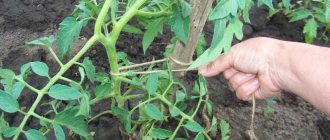
Fixation of shoots occurs several times per season as the plant grows. The number of fixation points is 2–6, depending on the height of a particular variety. Be sure to tie not only the stems, but also the clusters with fruits or even single large fruits, otherwise the stems will break off.
Do not pull the shoots too tightly, leave room for them to thicken.
How to build a trellis for open ground?
One of the support options is shown in the photo (Fig. 2). To make a simple trellis from poles, you need to stick them into the soil at an angle and tie them in pairs, crossing the upper ends. Place another stick in the fork. Attach the cords to the horizontal pole. It is better to plant tall tomatoes in one row and form them into 1-2 stems, subsequently carefully removing all the shoots. Medium-sized tomatoes can be placed on both sides of the central pole and tied to inclined cords.
To make your garden look beautiful, it is better to spend a little time and money by building trellises from timber or pipes. Such supports will be quite strong, they can be used for various crops that need support. It is best to make a trellis at least 2 m high. This will allow you to plant tall tomatoes, cucumbers or peas near it in subsequent years.
To the height above the ground you should add the depth to which the block or pipe will be dug. On medium-density and clayey soils, 50-60 cm will be enough for the supports to support the total weight of the plants even in the event of strong winds. On sandy soils, the digging depth of support pillars should be increased to 1 m.
The number of supports depends on the length of the ridge. It is advisable not to leave a distance of more than 2 m between the posts, since a stretched mesh or cord may sag under the weight of the green mass of the tomatoes. Cut the prepared material for the posts into pieces of the required length, dig holes for their installation. When installing the supports, you can fill the hole with fragments of brick, large crushed stone to ensure their stability, or simply carefully compact the previously removed soil around the pillars.
After the pillars are installed, you can proceed in different ways (Fig. 3):
- Nail a horizontal bar on top and tie the cords onto it. Plant tomatoes in 1 or 2 rows (photo above).
- Stretch several horizontal rows of cord or wire onto the supports (bottom left). As the bushes grow, they can be tied to a thread located above.
- Attach plastic mesh between the posts (bottom right). Tomatoes can be tied directly to the cells.
When tying tomatoes, you need to use soft material, as the juicy stems break easily. Tapes made from rags or used plastic bags are very convenient.
If frosts often occur in the region where the gardener lives, then growing tomatoes on a trellis in open ground becomes a necessity. Try to build a universal transforming support (Fig. 4). You need to attach 3-4 rows of crossbars to the support posts. For a metal structure, it is convenient to use a corner and brackets with bolts, as in the diagram. Drill holes in the corner.
If wooden blocks are used for posts and crossbars, then fastening is carried out using nails or self-tapping screws of sufficient length. Pull horizontal cords tightly at the ends of the crossbars to tie up bushes and hang film if necessary.
At the beginning of the season, such a support can serve as a greenhouse for tomato seedlings or protect young plants in case of cold weather. Closer to autumn, the gardener can slightly extend the growing season of plants by stretching the covering material onto the topmost cords. In this case, the trellis is converted into a greenhouse where the tomatoes ripen.
Stationary structures for gartering vegetables
In a small garden, it is advisable to install trellises that can be used for many years. If you follow crop rotation and move vegetable crops from place to place every season, you can use a trellis to tie up cucumbers and peas, pumpkins and other plants that require support. The poles do not interfere with low-growing crops and, if necessary, can be used to stretch film or lutrasil.
To install supports for stationary trellises, use a block of 5x5 cm or thicker, as well as a metal pipe with a diameter of 5-7 cm. In addition, you will need:
- shovel;
- cord or wire;
- crushed stone and cement;
- construction level;
- fastening materials.
Install vertical posts at the opposite ends of each ridge. For reliability, they need to be dug to a depth of about 70 cm, and the hole around the support should be filled with crushed stone mixed with dry cement in a ratio of 4:1. Compact the backfill. When installing supports, you need to check the verticality using a building level.
After this, horizontal parts are attached to the trellis. The simplest thing is to strengthen a crossbar on top of the posts, to which you can tie garter cords or attach a large mesh plastic mesh. But tomatoes on a trellis in open ground can also be grown using more complex and beautiful designs:
- Attach short pieces of timber or pipe to the vertical posts, placing them perpendicular to the axis of the bed. In this case, as the tomatoes grow, horizontal cords are stretched between the ends of the bars, on which the tied stems rest. Depending on your own ideas about ease of care, the bars can be made the same length (the stems are tied vertically, as in the photo), or with a decrease in the height of the column up or down (the tomatoes will be inclined inward or outward from the center of the ridge).
- An interesting variant of the above-described support for tomatoes. When planting, the bushes are positioned so that they are inside a rectangle formed by horizontal bars and cords. In the northern regions, such a trellis allows you to quickly protect young plants from spring cold snaps or hail. To do this, just throw a film or lutrasil over a tier of cords stretched above the tops of the seedlings and secure it with clothespins. In the fall, such a shelter will help the last tomatoes ripen.
- For garter, you can use a plastic mesh (it is usually used to fence an area). In this case, a horizontal beam is attached on top of the pillars along the entire ridge. The mesh is tied to this part, securing its lower edge with wire hooks stuck into the ground. To secure the lower edge, you can also make an additional bar at a height of 15-20 cm from the soil. Tie the tomatoes directly to the cells.
- You can attach cords to a horizontal beam, to which you can tie tomatoes, like on a trellis made of poles.
To ensure that stationary trellises last a long time and look aesthetically pleasing, the wood is painted or varnished, and metal pipes are primed with special compounds to protect against corrosion.
Making a trellis
Many will say that building trellises is not very convenient, although hardly anyone would argue that the pegs to which each individual tomato bush is tied look much worse. In this case, the tomatoes are tied to a trellis stretched horizontally, and the vertical part of the structure, which usually rises 1.5-3 meters, is located on the sides of the structure. The most important thing is that you don’t need to buy expensive materials to make it, because a good owner can find all this in his pantry.
The main point when growing tomatoes on trellises is that, in order to avoid damage to the plant, it is advisable to install the structure before planting the seedlings. To do this, wooden stakes or used pipes are dug or driven into the ground at a certain distance. The optimal distance between them is 2 meters, but it can be less often, depending on the variety of tomatoes and the predicted harvest. Several rows of trellises are attached to the main structure parallel to the ground, which can also be made from improvised means. When manufacturing a structure, all wooden elements must be treated with a special compound that prevents rotting. The metal parts of the structure must also be protected from premature failure.
How to make a trellis for cucumbers with your own hands
Let's look at how to make a comfortable support for cucumbers with your own hands. Typically, summer residents rely on available materials and their own construction skills.
Simple rectangular
The basis of this design is timber up to 3 meters long. The usual height of the structure is 2 meters, which is exactly how tall the stems of cucumbers grow. Preparing the frame:
Corner supports are made from bars with a diameter of 50 millimeters, deepening them into the soil by 70-80 centimeters
The length of the bed and the distance between the corner supports is 5 meters. To prevent the structure from collapsing under the weight of the lashes, the corner posts are reinforced with guy wires. Intermediate columns are deepened by 50-60 centimeters, their thickness is less - 40 millimeters
After installing the frame, it is important to correctly tension the wire - 2 millimeters thick, the first row at a height of 20 centimeters, the next after 30-40 centimeters.. The top wire is thicker - at least 3 millimeters, since it is this that will hold most of the weight when the cucumbers trudge and sing
The top wire is thicker - at least 3 millimeters, since it is this wire that will hold most of the weight when the cucumbers begin to weave and sing.
From lumber
With a sufficient amount of high-quality lumber, you can make a beautiful lattice that will securely hold the vines and make it easier to grow cucumbers in open ground.
The work flow is as follows:
- Corner supports are dug in (the thickness of the timber is 50 millimeters, the depth is 70-80 centimeters). Strengthened with wire anchors.
- After 1-2 meters, additional racks are made, with a smaller diameter.
- A cross member is laid on top between the corner supports and secured rigidly, so the grill slats will be attached to it. If desired, you can make a drawing to immediately cut out the slats of the required size.
The size of the grid cells is 15 centimeters, the sufficient width of the slats is 3 millimeters. Such a pergola for cucumbers, with good woodworking skills, can become a decoration for your dacha.
From a metal profile
Metal structures are more durable; if fastened well, they will last a long time for gartering cucumber stems. The basis is made up of reinforcing bars more than 2 meters long. They are driven into the ground along the edges of the bed.
The easiest way to attach the top cross member from a pipe is to weld it with a welding machine. If this is not possible, twist the edges with wire or a thick cable. In this case, the frame will not be too reliable.
Between the supports, metal stakes are driven into the ground, to which the wire mesh will be attached. The pegs should be installed at a distance of 15 centimeters from each other. Wire is attached to the top pipe, side supports and stakes so that the cells are 15-20 centimeters in size.
Tip: all metal parts are painted and treated with anti-corrosion agents.
From the tire
A cucumber trellis, made with your own hands from scrap materials (tires and wheels), turns out to be small and convenient. A large diameter tire is cut lengthwise, laid on the ground, the middle for a bed of cucumbers and the tire is covered with prepared soil. A metal reinforcement is inserted into the center, onto which the wheel rim will be attached.
The ground is covered with burlap, in the slots of which cucumber seedlings are planted. When cold weather is possible, agrofibre is used for shelter. The wire is pulled through the holes for the spokes and the tire.
When the cucumbers entwine the device, it becomes like a canopy or hut with a round top. Such growing stands are mobile; next year they can be moved to another place, beautifully decorating the area.
From a special mesh
To create supports for cucumbers, several types of meshes are used:
- trellis;
- plastic made of polycarbonate;
- metal.
Each type has its own characteristics in fastening and caring for the material, which can be read in the instructions.
Installation rules:
- install reliable supports along the edges - pipes (metal or plastic), wooden poles;
- make intermediate posts for additional rigidity;
- on top, strengthen the rail into a spacer with a mesh pre-strung on it for attaching cucumber lashes;
- The sides of the mesh are attached to the supports with wire or twine, stretching without sagging.
The side supports require stretching and significant deepening.
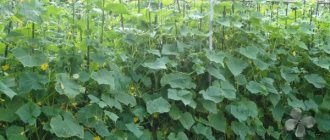
Horizontal trellis for cucumbers: photo examples of design
This is the easiest option and is great for beginner gardeners. For such a garter you will need two metal pipes or wooden columns. They should be placed along the edges of the bed. Between them you need to stretch strong twine, twine, wire or rope. The optimal distance between stretched rows should not exceed 25-30 cm.
Next, you should carefully pull out the sprouts of the young cucumber towards the lower support and secure them to it. This support can be improved with vertical ropes, then it will be more comfortable for the plant to grow upward.
On a note! The horizontal garter of cucumbers has one single drawback: after reaching the top bar, the stems of the plant will fall down and shade the bush itself. But this can be avoided by making the support high enough or cutting off too long stems. Cucumbers on a trellis are better ventilated and less susceptible to mold and fungal diseases.
Options for trellis construction for vegetables in open ground
After installing the frame, you can begin making direct support for the “movement” of the shoots towards the sun.
The following requirements apply to trellis netting for vegetable crops:
- the optimal cell size is 10x10 or 15x15 cm;
- the material must be sufficiently strong and rigid;
- the cells should maintain their shape and not move to the side;
- resistance to sunlight and precipitation;
- environmental Safety.
The easiest and fastest way to make a trellis is to purchase a ready-made PVC mesh from a gardening store and attach it to an installed frame.
However, such a support will only last a few seasons. The mesh is prone to sagging, especially if the thickness is incorrect, which complicates harvesting. At the same time, making a reliable and durable trellis with your own hands is not so difficult.
Trellis made of construction twine
The use of twine in gardening is very common. Of course, after a season it will have to be changed, but this will not take much time and money.
A simple, but at the same time original support for cucumbers
To make a full-fledged trellis, you will need minimal construction skills. First, low pegs are dug in next to the seedling bushes. If the frame is wooden, then nails are driven into the top bar opposite the pegs installed below, bending the heads so as to form hooks. For a metal frame it is convenient to use pieces of rigid wire. Cut the twine 2.5 m long. Then tie one end of the twine to the hook and the other to the peg. The grown plants are then guided along the twine.
Another option: cut the twine into 5 m lengths, fold it in half and wrap the central part around a peg, and tie the two ends to adjacent nails. The result is a cross trellis with better conditions for shoot growth. In the fall, the twine can simply be cut off along with the withered lashes.
Trellis made of wooden slats
A trellis in the form of a wooden lattice is a very fast and low-cost way to make a support for tomatoes or cucumbers. The grille is assembled from slats 2-3 cm thick using screws or nails.
First, vertical slats are attached to the frame, and then horizontal ones, which divide the structure into cells. The result is a rather decorative and durable support.
Metal wire trellis
You can also make a strong and durable trellis from wire. Horizontal rows are made of steel wire with a thickness of 2 mm. It will serve as the main support to which the vertical threads will be screwed. For these purposes, aluminum or copper wire, which is corrosion-resistant and quite flexible, is better suited.
At the first stage of manufacturing, staples are made from nails on horizontal strips and vertical posts. The distance between the staples will correspond to the selected cell size. The prepared pieces of wire are first stretched horizontally and then vertically. To secure the cells, vertical threads need to be twisted around each horizontal wire. As an alternative, you can use ready-made metal mesh from an old fence.
Trellis net for tomatoes, cucumbers and peas
After the frame is installed, proceed to placing the trellis mesh. When placing a trellis on the open ground with your own hands, observe the practical requirements for it:
- choose a mesh with a cell size of 10x10 or 15x15cm;
- mesh material with high rigidity and strength;
- the cells should not be deformed under the weight of the plants;
- resistance of the material to moisture and sun;
- environmental cleanliness.
The easiest way to make a country trellis with your own hands is to buy a factory-made PVC product. We hasten to disappoint those who choose simplicity and speed: polyvinyl chloride mesh is short-lived, sags a lot, and quickly becomes unusable. It is better to make a trellis yourself, and we will tell you what materials it can be built from. The materials are quite affordable and can be purchased at any gardening, construction or hardware store.
Construction twine for trellis
Twine is often used in the country and not only for arranging trellises. The material is inexpensive and accessible, but it is one-year-old and quickly loses its properties over the season, and next year you will have to install a new trellis.
This has its advantages: fruit-bearing plants can be easily removed along with the twine. When organizing a trellis using rope, you do not need any special skills. First of all, you need to dig small pegs near the plants.
If we plan to install a frame made of wooden beams, we hammer nails onto the top bar, bending them in the form of hooks. In the case of a metal frame, we make hooks from wire. We cut the twine into pieces of 3 meters, attach the top to the hooks, and the bottom to the pegs. When the seedlings grow, we guide them along the ropes. You can make a cross trellis by cutting 5 meters of twine. This design is suitable for both peas and tomatoes. We fold the cut piece in half, fasten it to the hook, making one turn, and attach the ends to adjacent pegs.
Wooden slats for trellises
A lattice made of wooden slats is also a popular trellis design in the country. This system is used for cultivating cucumbers and tomatoes. When making it, take slats 20-30mm thick and fasten them with nails or self-tapping screws. They start by attaching the vertical partitions, then attach the horizontal parts so that their intersection forms cells. The result is a reliable design with a decorative effect.
Metal wire for trellis
Assembling a trellis using wire is a more labor-intensive and expensive process, but it turns out to be reliable and durable. Obviously, this is an overkill option for peas. Vertical rows can be made of soft wire. For horizontal rows, which increase the reliability of the fastening strips and create additional support, use steel wire with a diameter of 2-3mm.
In order to secure the wire to the frame, staples made of nails are installed on the stakes and strips. The staples are placed at the same distance as the stakes. The wire is cut into pieces and alternately stretched, first parallel to the ground, then perpendicular to the ground. Wires running vertically are wrapped around horizontal lines, forming cells of the required size.
Construction twine
Twine is widely used in summer cottages to solve many problems. This inexpensive and accessible material is optimal for growing tomatoes. Of course, its service life is no more than one year. But the material also has some advantages. So, the twine can be removed along with plants that have already bloomed. Making a trellis from rope is quite simple.
The manufacture of a trellis from twine is carried out in the following sequence:
- Make a frame. For this, wooden blocks or metal plates are used.
- Make hooks for attaching construction twine. In a wooden frame, nails are driven into the top strip and bent. In metal frames, hooks are made from wire.
- Cut the rope into pieces, the length of which is 3 m. In this case, it is worth considering the distance between the hooks and the lower pegs or crossbar.
- Attach the twine to the horizontal jumpers. To ensure that the structure is strong and can easily withstand the load from plants, the rope is folded in half.
Thus, the construction of a simple trellis from construction twine is carried out. The design is updated every year. A wire trellis mesh is made in the same way. Of course, the process will take a lot of time and effort. But the result will be a durable structure that will have high strength and durability.
How to make your own tomato supports
The basis for arranging any support are posts with a cord, wire or polymer mesh attached to them. Most often, two options are used: a simple design of racks for semi-determinate (medium-growing) tomatoes and a more complex device for indeterminate (tall) varieties and hybrids.
Note! Supports for tomatoes are installed before planting, sometimes after. But the main thing you need to pay attention to is not to crush the planted seedlings during installation.
Trellis for short tomatoes
Trellis for short tomatoes
To grow not very tall varieties, a simple trellis option is used, for which you will need:
- metal or wooden poles about 2.5 meters high (including 50 cm for digging);
- skein, twine, cord or wire;
- tape measure, building level, hammer and nails.
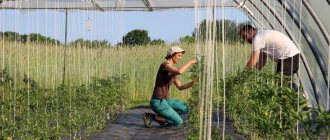
Installation of racks for future tomatoes begins with the installation of poles, which are located in one row at a distance of 1.5 - 2 meters. The method of tensioning the wire or cord is three-row. The lower segment is located 20 cm above ground level, the distance between subsequent rows is approximately 20-40 cm. As the stems grow, they are tied vertically to the wire, the stepsons, specially left when forming the bush, are also attached to it.
You can use a similar method - arranging supports in the form of a trellis for tomato seedlings, in which there is no need to pull the wire. The difference lies in the laying of slats at the top and bottom, which are nailed to the posts. Sections of rope are tied vertically to the slats. Tomatoes can be secured to them using ribbon or twine. Such wooden stands are more suitable for tomatoes in open ground.
Trellis for tall bushes
Trellis for tall bushes
Self-made supports from lumber material and reinforcement will be more durable and suitable for tall representatives of the crop in open and closed ground. In order to install them, you need to stock up on:
- timber (or metal pipes) 2.5–3 meters long, 50 cm of which will be dug into the ground;
- metal rods or fittings;
- polymer mesh;
- tools: construction meter, tape measure.
A DIY tomato trellis for tall tomatoes is assembled in the following sequence:
- Dig concrete, metal posts or bars at least 2.5 meters high (preferably pine or oak) into the depressions in the ground to a depth of 50 cm, compact the soil well. You can concrete it or simply fill it with pieces of brick or crushed stone for greater stability during watering.
- Attach a plank or beam to the top of the pillars, and do the same on the bottom of the pillars, retreating 20 centimeters from the soil surface.
- Pull the cords along the top and bottom strips, securing one end.
- Pull the other end of the cord through the cells of the plastic mesh and secure.
- Do the same at the bottom edge of the mesh, distributing it in such a way as to avoid sagging.
If desired, a trellis for tomatoes in open ground can be made without the use of a polymer mesh. To do this, it is enough to stretch the twine between the pillars in 3-4 rows, located at a distance of 40-50 cm from each other. Moreover, the lower segment should be at a distance of 20 cm from the soil. To make a more complex version of trellis supports for tomatoes, you will need a drawing.
Important! Wooden posts, planks, beams and slats must be treated with an antiseptic substance and paint. This will help protect them from the influence of weather conditions and insects, and will protect them from excess moisture and fungal infections that can migrate to the plants.
The trellis must be covered with paint or an antiseptic substance
What you will need
You will need timber or thick reinforcement rods to create a kind of support. Also, as additional elements, rope tension elements will be needed.
To understand how much material needs to be spent for each specific case, pay attention to the variety of tomatoes:
- For medium-height ones, that is, for semi-determinant ones, you will need to build a simple structure.
- For tall indeterminate tomatoes, a more complex structure will be needed that can also support the increased mass of the entire plant.
Consumables
For a simple design you need to take:
- Metal rods or wooden beams 2.5 m high. Of these, 0.5 m will go underground, and 2 m will rise above the ground.
- A ball of thick twine or cord.
- But for tall tomatoes, metal fittings, pipes or massive wooden beams are prepared, the height of which starts from 2.5 m to 3 m. In this case, 0.5 m is also dug into the ground.
- Also in this case it is better to use a polymer mesh rather than a rope.
Tools
Hammer, screwdriver, nails or screws for fixing elements. You will also need a shovel or album to form holes of sufficient depth. In addition, they stock up on a long tape measure and a level to form even vertical posts and horizontal crossbars.
In the greenhouse: DIY tomato trellis
The greenhouse uses trellis technology. It is possible both in polycarbonate greenhouses and in film greenhouses. It is not difficult to make such a system.
- At all ends of the bed, one and a half meter pegs are driven into the ground, which organizes the stability of the structure (profile or reinforcement);
- A trellis is placed between these pegs - it must be strong so that it is easy to support the weight of all the bushes; the bushes are tied to it;
- The tops of the bushes are attached with a rope, and then rise higher - as the plants grow, they will unravel along all the attached ropes, that is, there will be no need to tie them again.
The easiest way is to make trellises in a greenhouse from ropes or wires attached to a frame.
Less popular, but still possible, is the lattice garter method. This is a wire stretched between stakes in several rows, and at different heights. The lattice will be located perpendicular to the bed. It turns out that first the tomato branches will lie on a low wire, and then they will be fixed to the second one on the other side. The entire bush will be in a vertical position, but it will be clamped on both sides with wire. This method is otherwise called chess.
Common mistakes
Now a few words about the mistakes that summer residents make when tying up tomatoes.
- Using the wrong material. Here we can mention too hard and thin ropes, and the use of last year’s materials.
- The garter is done incorrectly: too low or too high.
- Using the wrong supports: too low, or, conversely, too high.
- The timing of the procedure was chosen incorrectly. It’s unnecessary to say anything here. Bushes need to be tied up in time to direct their growth and ensure stability.
TOMATO ON A TRELLE
Tomato - growing on a trellis.
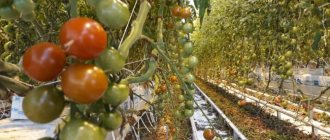
First, let's dwell on why tomatoes should be grown on a trellis, and not in the usual bush way. Everything is very simple - this has a beneficial effect on the plant itself, it becomes less susceptible to all kinds of diseases, the amount of commercial products obtained increases due to the fact that the plant has a much longer growing season. Even the fact that the fruits practically do not come into contact with the ground and this does not lead to their rotting is already worthy of starting to grow tomatoes on a trellis.
Many gardeners, instead of a trellis, usually use tying tomato plants to a driven stake, each individually. This is not recommended, as this contributes to the accumulation of moisture inside the tied plant, which, in turn, leads to an increase in plant disease. It’s still better when the tomatoes are tied to a trellis - this helps to constantly blow fresh air through the leaves and minimizes moisture stagnation.
When growing tomatoes on a trellis, you can successfully use the technology of narrow beds. The combination of these two technologies will provide significant advantages - the plants will be well ventilated, which will lead to a decrease in fluctuations in daily air temperatures, and this in turn will help reduce the formation of moisture on the leaves. Also, during the entire growing season of tomato development, the soil surface between the rows will remain unoccupied by plants. Plus, to all this, the time required to care for tomato plants is reduced several times - it is easier to root the plants and remove diseased leaves and fruits from them, which, in turn, are less injured during the harvesting process. Also, with this growing method, tomatoes are more evenly illuminated by the sun and warm up better.
Now let’s talk about how to properly install a trellis in your garden. Let's take as an example the length of a bed with tomatoes - 10 meters. To do everything correctly, you will need 6 slats with a cross section of 20x40mm and a length of 2 meters. On one side, the slats should be pointed, and on the other, at a distance of 20 centimeters from the end of the slats, it is necessary to drive in a nail, onto which we will subsequently lay horizontal slats, on which we will hang our trellises. We drive our slatted posts two meters along the entire length of the row, lay horizontal slats on the nails, and when the seedlings take root (in about 7-10 days) with soft synthetic or natural twine, we tie the plants to the horizontal slats. This is, as it were, all wisdom. All that remains is to twist and tie the side shoots to the trellis as the tomato grows.
Do I need to make trellises for tomatoes? Of what? How?
There are varieties of tall tomatoes. Do they need a trellis?
If yes, then how and from what to make it?
Svetlana 100
As a rule, tall tomatoes grow in greenhouses. It is most convenient to use small metal hooks made of thick wire (35-40 cm), we stick the sharp end near the tomato, and tie a strong rope to the hook. We attach the other end of the rope to the ceiling of the greenhouse. This is reusable a trellis that does not require periodic gartering of a growing tomato. We simply wrap it around a rope.
Low-growing tomatoes are more suitable for open ground, because tall ones do not have time to ripen all the tiers of tomatoes, cold weather sets in, and late blight attacks. Therefore, for tomatoes in open ground, you don’t have to bother with trellises, pegs are also suitable. Unless you save on stakes like this.
Irina Agapova
I do this as follows: I thoroughly dig in or hammer in a corner or piece of pipe with a sledgehammer at a distance of about 2 or 2.5 meters. I screw a wooden beam vertically to each pipe or corners. Then, at the same level, using a drill, I make 4 - 5 holes in each beam, which are located at a distance of 30 cm. from each other. Through these holes I stretch 4-5 rows of wire or a very strong (non-stretchable) cord and secure it well. Then I plant tomatoes in a row in front of this trellis, maintaining intervals. Shoots: I tie the central stem and side shoots with rags to these rows of wire or cord - as they grow higher and higher! I’ve been doing this for 30 years and I think it’s the most convenient!
Tju
In general, traditionally, if tall tomatoes are grown in open ground, in beds, then they are simply tied to strong stakes (such plants have a decent weight), which are prepared in advance.
dydySacha
If the variety is tall, then you just need to tie them up! Otherwise, all the fruits will lie on the soil, which will lead to their spoilage. If you have tomatoes under the greenhouse frame, then there are fewer problems with tying; you can tie them directly to it. If there is no greenhouse, you need to make a frame above each row, something like this: