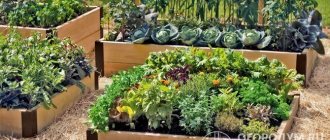
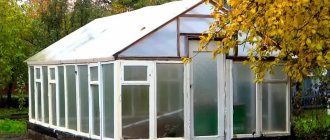
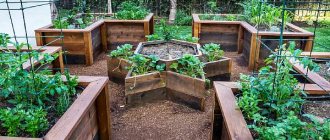
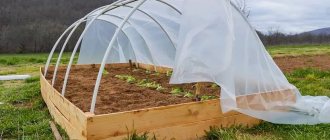
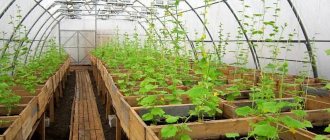
A greenhouse at the dacha is a structure where it is possible to engage in farming even in winter. And for many, it is the relationship with the earth that gives strength and peace. Therefore, in this article I would like to talk about how to make a greenhouse with your own hands, without resorting to the services of craftsmen. Although the latter will do everything efficiently and with a guarantee of long-term operation.
DIY greenhouse Source: pinterest.com
Types of greenhouses
Before moving directly to the answer to the question of how to make a greenhouse, let us indicate what types of this structure there are. This means what materials it can be made from. In principle, there are many options; let’s note the main ones that summer residents use today:
- polypropylene pipes;
- galvanized steel profile, which is used for installation of plasterboard sheets;
- wooden blocks with a cross section of 50x50 mm;
- boards;
- and even old window frames.
As for the size, greenhouse structures for dachas are small in terms of the space they occupy. After all, you just need to plant greens, cucumbers and tomatoes in them. And for these plants height is important.
For example, for greenery, you can build a low structure that includes a hinged lid. The photo below shows this option. Let's look at how to build this type of greenhouse.
Greenhouse with a hinged lid Source homius.ru
Greenhouse for greenery
For construction you will need boards 50 mm thick; used ones will do. The main task is to assemble a box that will enclose the area for planting. Therefore, the boards installed on the edge are knocked together using self-tapping screws and metal corners. You can do without corners by using bars.
If the width of one board is not enough to provide the required height of the greenhouse, then you will have to make two or three boxes, stacking them on top of each other. To fasten them together, perforated metal plates or wooden blocks are used. The latter are installed on the inside of the joint corner and attached to the boards with self-tapping screws, which can be screwed in from the inside of the box or from the outside.
Connecting two boards in a box Source t6x4.blogspot.com
Now we need to make a lid for the greenhouse. For this, the same boards are used, only 30 mm thick. They are cut to the size of the box: two long elements, two short. And they are connected to each other with metal corner plates, screwing in short self-tapping screws. The result is a kind of frame, which must be covered with plastic film, as the cheapest option for the transparent material used.
If you decide to install glass on the lid, then the boards will have to be reworked. Or rather, make a groove on one side where the glass will go. You can make the groove yourself using a chisel. Or you can take the boards to a carpentry shop, where they will make it on a machine. Such an element will be smooth, unlike the homemade version:
- If a greenhouse of this type has a large area, then the surface of the lid is divided into cells by bars, which are covered with small glasses.
- Or install two or three small covers.
So, the boxes are ready and installed, all that remains is to attach the lid to them. To do this, you will need ordinary door hinges, which are attached with one side to the lid and the other to the upper frame of the greenhouse base.
Attention! It is recommended to treat wooden elements with an antiseptic and protective composition so that they can withstand the negative effects of moisture.
It should look something like this Source homeli.ru
Greenhouse made of polypropylene pipes
Another inexpensive option is how to build a greenhouse with your own hands. For this you will need:
- polypropylene pipes with a diameter of 15 or 20 mm;
- boards 50 mm thick and 200 mm wide;
- steel reinforcement with a diameter of 10-12 mm.
Why were polypropylene pipes chosen? They bend well without breaking.
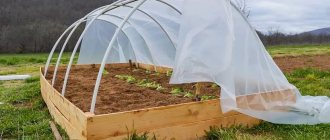
The first stage is to assemble a box from boards, as was done with the greenhouse in the previous section of the article. The second stage - pieces of reinforcement 40-50 cm long are driven into the corners of the box every 50-70 cm along the length of the structure on both sides of the box. The ends 15-20 cm long should stick out above the ground.
Now you need to cut the polypropylene pipes to the required size. Their length will depend on the width and height of the greenhouse being built. The higher and wider the structure, the longer the pipes will have to be used.
Next, one end of the pipe is inserted into the fittings, a bend is made, after which the second free end of the pipe is inserted into the protruding end of the fittings located on the opposite side of the box. That is, an arch forms above the ground. The same must be done with other pipes.
Installation of greenhouse pipes Source orchardo.ru
If the height of the greenhouse is large enough, for example, within 1.5-1.8 m, then there is a possibility that the pipe arches will collapse. To prevent this from happening, you need to lay another solid pipe across them under them, which is tied to the arches with binding wire or using standard clamps.
Connecting pipes with clamps Source dcgate.pp.ua
See also: Catalog of companies that specialize in the installation of metal structures.
So, let's move on to the topic of how to build a greenhouse from polypropylene pipes, and move on to the final stage - covering the pipe frame with plastic film.
Everything is quite simple here. But the main thing is that the coating must be completely sealed so that precipitation does not get inside the greenhouse. That's why:
- the film is cut so that its length covers the length of the arched structure;
- the width is selected based on the installation pitch of the arches, that is, on each arch, two strips of films should converge with an overlap of 15-20 cm.
As for attaching the film to the pipes. Today there is a fairly simple option - these are special clamps made of plastic. They work like clothespins, but with a high guarantee of fastening.
Fasteners for greenhouse film Source maja-dacha.ru
Attention! Greenhouses covered with plastic film will last a year, maybe two. After which the film will have to be changed. If you choose from the offered range of film products, then preference should be given to reinforced or multilayer types. They have a longer service life.
So, we figured out how to make a greenhouse with your own hands cheaply. We move on to more complex structures that fall into the stationary category. That is, they are built for several years.
Stationary greenhouse made of polypropylene pipes
If in the previous case, answering the question of how to make a greenhouse with your own hands at home, we solved a simple problem, then in this section I would like to talk about the option of constructing an almost permanent building. And under it you will have to pour a solid strip foundation.
Greenhouse made of polypropylene pipes with a gable roof Source homeli.ru
How the foundation is built:
- a trench 30-40 cm wide and 30-40 cm deep is dug along the perimeter of the greenhouse;
- formwork is installed on top of the ground with a height of 20 cm;
- concrete solution is poured;
- after a week the formwork is removed;
- after 5-10 days the foundation can be loaded.
Now, regarding the assembly of the greenhouse. Firstly, its shape can be almost any. Secondly, fittings are needed to connect the pipes to each other. Their number is determined by the number of joints, so it is better to sketch out the greenhouse schematically on paper. For example, let it be a structure with a gable roof, as in the photo above.
Assembly begins with the lower trim, which is formed directly on the foundation. That is, polypropylene pipes cut to the required size are laid on the surface of the foundation structure. If the length of one pipe, which is 4 m, is not enough, then it is extended using a double-sided sleeve.
Diagram of connecting pipes to each other Source strsezon.ru
Location on the site
Before you move on to building a greenhouse, you need to decide on its location. Especially if it is stationary and not portable. The choice of location determines the size, shape, and amount of material consumed.
When choosing an area for a greenhouse, you need to consider the following:
- Pre-level the area. The structure cannot be installed on a slope. When there are stumps, snags and other obstacles, they will need to be removed before constructing the greenhouse.
- Crops need sunlight. Therefore, you cannot build a warm shelter in the shade. This will adversely affect the development of seedlings and further fruiting.
- Agrotechnical work will need to be carried out in the greenhouse. Therefore, it is necessary that it is easy to reach with equipment so that it opens easily.
- It is recommended to build the structure from east to west. Thanks to this, the plants will receive maximum sunlight. When it is necessary that this occurs only in the morning and evening, the structures must be installed in a north-south direction. This will provide protection from the midday sun.
- If you plan to constantly grow tomatoes or cucumbers in a greenhouse, it is recommended to install another one nearby. This is due to the fact that these crops need to be replanted annually in a new location. Thanks to the presence of a second greenhouse, crops can be swapped every year. When there is no space for so many structures, you can create mini versions of them.
Helpful information! It is best to start construction in mid-spring. There is no more snow, and the plants have not yet had time to reach full growth. You can, of course, build greenhouses any time you want, except in winter (the work will be complicated by severe cold and frozen soil).
Video description
The video shows the sequence of assembling the profile for the greenhouse:
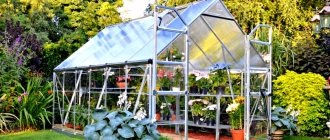
So, the galvanized profile frame is ready, all that remains is to install the polycarbonate. This material is also interesting because when laid on the frame it creates a sealed surface, because the material includes a special joining element, which closes the joint of the polycarbonate sheets from above.
The sheets are laid on top of the frame in even rows and secured to it with self-tapping screws with rounded heads. A neoprene rubber washer must be placed under the latter, which does not crack at both sub-zero and positive temperatures.
Joining polycarbonate sheets Source pinterest.ch
Other materials for constructing greenhouses
What else can you use to make a greenhouse inexpensively with your own hands? In principle, there are not many materials:
- Wooden blocks that are assembled according to the type of building with a gable roof. That is, it is the same as a greenhouse made of polypropylene pipes or galvanized profile. Only here you can use either self-tapping screws or nails as fasteners. Perforated elements are increasingly being used.
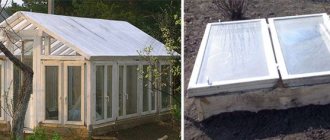
- From old window frames. In general, an interesting cheap option if you got the windows themselves for free. Let's look at this type of greenhouse.
Greenhouse made of wooden blocks Source es.dreamstime.com
Greenhouse made from old windows
Let's start the analysis with the same question as the other options - how to make a greenhouse correctly. Here the word “correct” is the most important. The thing is that old windows are heavy material; they cannot stand assembled without a frame. Therefore, the first thing to do is to build this very frame. Why do you need beams and boards, the width of which is no less than the width of the window frames:
- The beams are assembled into a box at the site of the greenhouse construction and fastened together with perforated fasteners and self-tapping screws.
- A frame made of boards is installed on the assembled box. These are the racks and the top trim. The type of fastener is the same. Here it is important to install the racks in increments equal to the width of the frames. That is, the latter must fit clearly between the posts to which they will be attached.
- This will need to be done at this stage, having first removed the glass.
Greenhouse made from old window frames Source in.pinterest.com
Attention! Old frames are not new, with all the elements intact. Therefore, after installing the windows, gaps will remain in the frame. The latter can subsequently be filled with polyurethane foam.
As for the size of the greenhouse, the height of the structure can be increased. That is, this is not necessarily the height of one frame. You can stack the windows on top of each other, you can trim one of them and mount the cut part onto the whole one located below.
A greenhouse made from window frames has one big advantage - the windows are ready-made and openable. That is, if, using other materials to build greenhouses, you have to make openings, which is not always easy. With a frame greenhouse everything is much simpler.
As for the roof, the easiest option is to cover it with plastic film. To do this, you need to make a roof structure if a gable roof is chosen. Or form a deck located at an angle of at least 15° - you get a pitched roof.
The film on the roof is secured with slats Source homeli.ru
How to make a greenhouse with your own hands from stretch film with a wooden frame
stroydachusam.ru
- Assembly difficulty: average.
- Foundation: not required.
- Cost: low.
Another way to quickly build a greenhouse. A wooden beam is used as a frame, and stretch packaging film is used as a covering material. With a large number of layers, it transmits light a little worse than ordinary PVC film, but on hot days this is even a plus.
- The film is sold in rolls, so the dimensions of the greenhouse are selected according to the cutting of the timber and taking into account your wishes.
- For the base, steel corners 40 × 40 mm are used, in which holes for attaching the frame posts are pre-drilled. They can also be treated with bitumen or painted to extend their service life.
- The corners are driven into the ground, and pieces of timber are screwed to them with self-tapping screws. A lower frame, in turn, is attached to the beam, on which the side walls and roof are assembled. All corners are reinforced with additional inclined sections of timber.
- The door is assembled on a wooden frame in one of the side walls and installed on hinges.
- Film wrapping is done in parts, in several layers and overlapping. First, the gables are installed, then the roof slopes, and only then the walls. You need to start wrapping them from the bottom so that running rainwater does not get inside the greenhouse.
- After wrapping with glazing bead or river, the door and its outer contour of the door are trimmed, and then the film around the frame is cut through. In the same way you can make a window in the opposite wall.
Attached greenhouse
This type of greenhouse at dachas is not often built, because suburban areas in Russia have sufficient area to build a house, outbuildings and plant a garden, vegetable garden and flower beds. But if the plot is small, then a greenhouse attached to the house or garage is the best option.
That is, this structure already has one load-bearing wall. All that remains is to build a frame, which will be attached to this wall on one side and to the ground on the other. For example, the photo below shows one of these options.
The main condition for building a greenhouse is to choose the right wall. It should face south and not cast a shadow on the greenhouse structure. Otherwise, there is no point in building a greenhouse. Without the sun, nothing will grow in it.
Video description
The video shows a comparison of an attached and a free-standing greenhouse:
The advantage of this option is the reduction in material costs due to that very wall. It is important to attach the frame to its plane as much as possible, making the joining points strong and reliable.
As for materials, there are no restrictions here either. All of the products described above can be used to assemble a frame structure. And such a greenhouse can be covered with films, glass or polycarbonate.
Greenhouse attached to the wall of the house Source pinterest.com
Creating a frame
Place polypropylene pipes on the protruding parts of the fittings. First we put the pipe on one end, then we bend it and do the same at the other end of the greenhouse. This must be done with all protruding rods. After this, the shape of the greenhouse will already emerge.
Check it out here too!
How to make a pump with your own hands - step-by-step manufacturing of a pump and options for making simple and effective pumps (95 photos + video)Do-it-yourself hot smoked smokehouse: 100 photos, review of the best drawings, project selection and construction options
- How to make a cage for a parrot: basic requirements, tools and materials, step-by-step photo instructions. Tips from experts on arranging a cage
Now it is necessary to install transverse pipes to strengthen the entire greenhouse structure. Take the tees and cut off the back wall from them. The easiest way to do this is this way - heat the knife on a gas burner and cut it off, this will turn out much faster.
Heat the cut tee from the inside for 5 seconds and press it against the installed pipes. Polypropylene will expand when exposed to strong heat and is securely sealed to the pipe. Do this with all the tees at approximately the same distance.
Now we insert short pieces of plastic pipes into the soldered tees and fix the tubes in place with self-tapping screws.
If you use a soldering iron, the structure will not be dismountable, but if you use self-tapping screws, you can disassemble the greenhouse if necessary.
Briefly about the main thing
So, we figured out the question of how to make a greenhouse with your own hands at home. As you can see, there are many options, each of them has pros and cons. The only big advantage is self-construction, which does not require large expenses. But it should be noted that not every greenhouse made independently has a highly reliable design. Professionals will even make “candy” out of waste materials.
| A little more attention! I would like to hear in the comments about someone who has already had experience building greenhouses with their own hands. What materials were used for this, how quickly the construction took place. And also about how effective such a greenhouse is. |
Design selection
The first thing they do before building a greenhouse with their own hands from wood and film is drawings of the future structure. To build them, you need to choose the shape of the structure and its dimensions.
To optimize costs and not waste money on unnecessary materials, sizes are selected in accordance with the standard length of lumber and the width of the film. As a rule, bars and boards are 6 meters long, so the optimal dimensions for a wooden greenhouse will be:
- 2x4 m;
- 2x6 m;
- 3x6 m;
- 3x12 m, etc.
The height of the side walls is 1.5 or 2 meters.
