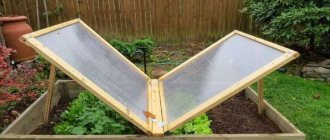
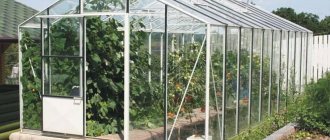
Long and cold Russian winters force plant growers to leave the fields for greenhouses - this method of growing plants is called indoors. However, to get good results when growing indoors, you will have to create ideal conditions for your plants. Today we’ll talk about the right equipment for lighting your home greenhouse.
More warmth
You may need it not only if you are going to turn the greenhouse into a tropical greenhouse with exotic fruit plants and flowers. If your region has harsh not only winters, but also springs and autumns, you should take care of heating to extend the growing season of your indoor pets. Only additional heating guarantees the full ripening of many long-term crops such as peppers, eggplants, cabbage, melons and others. But even in regions with average climatic indicators, heating may not be superfluous. It will create the most comfortable climate, which is so important for plants, and provide the greenhouse effect they need without harmful changes and pauses that delay their development.
Heating a greenhouse in winter
Heating equipment
The modern world of greenhouse heating systems is rich and diverse. The heating principles depend on the equipment used. Therefore, the systems have different options, among which it is necessary to choose the one that is acceptable in terms of characteristics, efficiency, and price. To do this, you need to consider all the methods.
Consider the electrical method
The first most popular method that comes to mind for anyone who thinks about additional heating of a greenhouse.
Heating a greenhouse using electric fans blowing warm air
The category of electrical equipment for heating greenhouse structures includes numerous devices:
- electric heating type;
- heater type;
- convection type.
What they all have in common is that for uninterrupted operation they require a constant source of power in the form of electricity, which is not the cheapest “fuel”. That is why the electric method of heating greenhouses is used mainly by owners of profitable greenhouse businesses.
On a note! As an alternative to electricity, craftsmen can use additional sources, for example, solar collectors.
Solar heating of a greenhouse
Soil heating system for a greenhouse
Prices for electric fans
electric fans
Consider the infrared method
This method is new to many summer residents and is not yet popular among the people. However, it is infrared heating that helps to really reduce the cost of heating a greenhouse, while making it as uniform as possible. Infrared heating devices installed around the perimeter of the greenhouse contribute to its systemic filling with heated air to the same degree.
Infrared lamps for heating greenhouses in winter
On a note! The operating principle of infrared heating devices is simple: they first heat objects from which the heat spreads through the air. This is a more economical and efficient method than the electric one.
Heat distribution diagram from an IR heater in a greenhouse
What is air heating
An ordinary summer resident will probably not install air heating, which is a complex ventilation system to install and belongs to the category of professional equipment. But for large private farms, this system can be very effective and quickly pay for itself thanks to excellent yields.
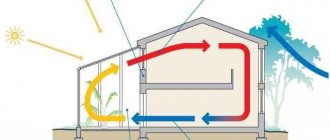
Heat distribution in a greenhouse
Important! It is necessary to install ventilation equipment at the initial stage of greenhouse installation. At the same time, ensure that the supply of air masses occurs evenly. Only this will protect the plants from unwanted burns.
Let's analyze the gas heating method
A favorite method for many summer residents, which gives an ideal ratio of quality to cost. The gas option assumes the presence of a gas generator, the operating principle is similar to a thermal one. The advantages of this method are the relative cheapness of natural gas and high heating efficiency.
Gas stove
On a note! Catalytic propane burners are what are beginning to be widely used to replace conventional gas burners. Even with a small volume (and therefore low gas consumption), they demonstrate high efficiency.
Another option is a gas heat gun.
We will not consider stove and other similar heating methods due to the fact that they are already a thing of the past and are not particularly popular.
Smart garden
In a greenhouse or winter garden, where happy homeowners not only grow flowers or berries, but also spend a lot of time relaxing in any weather, all year round, along with heating, other systems are required - lighting (the length of daylight is important for the process of plant photosynthesis), watering, ventilation (by providing air exchange, it also reduces condensation), humidity control, and management. This equipment of a modern greenhouse allows it to be integrated into the “Smart Home” system, which, using temperature, light, air and soil humidity sensors, automatically maintains the optimal climate for the crops grown.
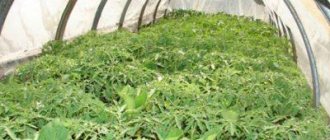
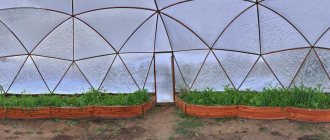
Lettuce is planted directly into the soil
It is quite possible to attach a winter garden to an already occupied house. However, it is preferable to provide for its presence in the design of the building itself - then they will be harmoniously combined into one whole, both from an engineering, technical and aesthetic point of view.
More moisture
Watering greenhouse pets is no less, and even more important, than heating them. If you can rely on nature, rely on the sun and do without additional heat, then plants will not survive without moisture. That is why various irrigation systems are so popular today, making it easier for the greenhouse owner to care for the plants. There are several ways to give greenhouse crops the moisture they need. To determine the optimal one, you need to study them.
Watering in a greenhouse
Studying subsurface irrigation
This method, despite its labor-intensive setup, is popular with owners of a well, borehole, standpipe or other water supply system directly to the site. You can equip it yourself, using inexpensive improvised means.
Scheme of capillary subsurface irrigation
You will need:
- water container;
- watering can;
- measuring container;
- hose of the required length.
Subsoil irrigation. Construction of an underground water supply system
The process consists of supplying water to a system of subsoil holes, the depth and width of which depend on the moisture needs of a particular greenhouse crop. Although the method does not look expensive, it is not widely used, especially for greenhouses (more for open ground).
An example of a do-it-yourself subsurface irrigation scheme
Subsoil irrigation in a greenhouse from plastic bottles
Consider drip irrigation
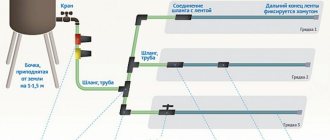
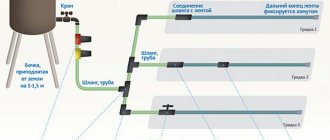
Everyone has heard about drip irrigation. And many people dream of equipping it, since the drip method of supplying water is one of the most economical for the owner and convenient for plants. The same cannot be said about the equipment - with this method, a complex system of pipes and drippers will be required in the greenhouse, which will be “powered” with moisture from a centralized water supply or well. In addition, you will need a pump.
On a note! Polyethylene and polypropylene are the best materials for pipes and dropper dispensers, but the system can also be mounted from metal. A metal pipeline will be cheaper.
Drip irrigation in a greenhouse
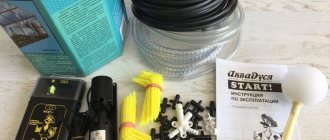
But drip irrigation also has its own choices, which are based on its options. As you know, any water supply system begins with a hose through which water is supplied to capillary microhoses. A garden hose cannot be used - it must be special, since filters are installed inside. Micro hoses end with droppers, which supply water in the most favorable way for plants - drops. A filter will definitely be needed, since impurities in the water will very quickly clog microhoses and droppers. But as the latter, craftsmen successfully use medical devices for IVs, which are quite inexpensive.
The system is very economical - only up to three liters of water are consumed per hour, and the soil around the plants is saturated with moisture thoroughly, deeply and for a long time.
Drip irrigation for a greenhouse based on droppers integrated into the pipe
The choice lies in the chosen control method. There are three of them.
- Manual is the simplest and cheapest. You will have to fill the container with water yourself at the beginning of watering, and then open the tap and supply water to the main hose.
Manual drip irrigation
- Semi-automatic - the container will also have to be filled with water, but then the automation works, which, according to a given program, will open the shutter and begin watering. This control method is good to use in the absence of a central water supply and in the presence of a well or borehole.
- The machine does everything itself: fills the container, carries out and controls watering. Of course, the price is higher, but how much useful time is freed up for the summer resident for other effective work!
Diagram of an automatic drip irrigation system
Irrigation and sprinkling
What gardener doesn’t dream of installing a “smart” system that knows how much water to give to plants and when. In this case, water is supplied according to the principle of irrigation or sprinkling. Plants love light rain. In principle, the same droppers and pipes are involved here as with the previous method, but the use of a control panel makes the system significantly more expensive. It is also advisable to have a pumping station and various sensors. All this makes an automatic irrigation system more suitable for professional greenhouse structures than for amateur ones.
“Artificial fog” for microclimate in a greenhouse
More light
Do plants in a greenhouse need additional light? It is definitely needed, but only if you are going to grow (grow) seedlings in a greenhouse. With short daylight hours, which occurs at the beginning of the growing season, additional lighting is an urgent need, without which the sprouts will not be able to develop into full-fledged plants.
The second case when additional light may be needed is additional illumination of light-loving plants to obtain maximum yield and full ripening of fruits.
Greenhouse lighting
How to choose lighting equipment for a greenhouse? To do this, you need to compare different lighting methods in order to settle on the most acceptable one.
Table. Types of lighting lamps and their characteristics.
| Name | Description of action |
| Incandescent lamps | May differ in the type of radiation. They cannot be used for all plants. For example, they are contraindicated for cucumbers and tomatoes - they contribute to cell deformation and cause burns on the leaves when used for a long time. Mainly used for growing early greens. |
| Mercury vapor lamps | These high-incandescent light sources are also used in greenhouses, but they have a significant drawback - too much radiation. UV rays are not suitable for the near spectrum and can harm plants rather than help. In addition, the lamps become very hot, which also causes burns. |
| Fluorescent lamps | Most often used. They have virtually no flaws, and the price is low. In addition, the lamps are economical and durable. The disadvantages are low heat transfer rates, but the lamps cope with the task of lighting. |
| Sodium lamps | These high-pressure lamps are famous for their most economical efficiency and the highest quality of light output. They create a monochromatic light field that has a beneficial effect on plants in all phases of development. The light emanating from sodium lamps is exactly what the green inhabitants of greenhouses need for a full and comfortable life. |
| Metal halide lamps | Without reservations - an ideal option. The cost is low, durability is high. All luminescence indicators create an absolutely natural “natural” lighting background. |
| LED bulbs | This is rather from the category of expensive whims. LEDs are installed in winter gardens and tropical greenhouses, but rather for beauty, since there is no single competent opinion among farmers about the advisability of using LEDs for the benefit of plants. |
How to arrange a greenhouse
Home conservatories can replace gazebos and become free-standing living rooms. In design you can use not only plants, but also small architectural forms, miniature ponds, mini-fountains, artificial waterfalls and streams.
Dendroplane and arrangement of the work area
The layout of a greenhouse begins with drawing up a planting plan - even before construction begins, it is important to determine which plants will be grown in order to create ideal growing conditions for them. It is important to understand that the proximity of some crops may be problematic and will require more investment in the project. It is equally important to take care of the ease of maintenance of flower beds and beds, otherwise it will simply be impossible to approach the plants freely.
Mini fountain decorates and creates additional humidity
For small greenhouses, vertical beds arranged in several tiers are ideal. For this purpose, pallets and racks made of moisture-resistant materials are used. You can complement the picture with hanging pots with hanging crops.
The greenhouse should not be cluttered with plants; first of all, it should be a place of relaxation, in which green spaces are present for beauty, and not for practical purposes.
More air
If you are concerned about arranging a greenhouse with the latest technology, do not forget about the ventilation system. Why is it needed, because you can get by with windows? You cannot create full air exchange with simple vents. Especially if the greenhouse is large.
Special fan for greenhouse
You will need:
Ventilation in the greenhouse
And it is advisable to combine all this into a forced ventilation system that will work without your intervention. You don’t have to open/close the windows and control the cleanliness and freshness of the air - the automated process will do everything for you.
An alternative option is to ventilate greenhouses with roll-up film curtains
Drip irrigation "Beetle"
This system of root drip irrigation got its name for a reason - the fact is that the arrangement of the droppers is reminiscent of the arrangement of the legs of a living beetle. Many small ones diverge from the main (main) pipes. Read more here.
Why do you need a ventilation machine?
Perhaps this simple and inexpensive unit will become your best assistant. A special mechanism designed to automatically open and close vents to maintain temperature and ensure fresh air circulation.
Automatic ventilation in the greenhouse with a thermal drive system
The device operates without batteries - the operating principle is based on the expansion and contraction of a liquid placed in a black cylinder, which occurs under the influence of the heat of the sun's rays. Heating expands the liquid, pushing the piston out, opening the window. Cooling compresses and hides the piston back, closing the source of cold and draft.
Reinforced automatic ventilator Vent L 01 and 02
For polycarbonate greenhouses, this is an excellent and inexpensive ventilation option. The service life of this simple device is 10 years. It is placed on the side (not gable) windows, and for the winter it is removed and put away.
Video - Thermal actuator for a greenhouse
Something about thermostats
Automatic regulation of greenhouse temperature is very convenient, especially during a long absence of the owner and sudden temperature changes outside the greenhouse. To carry out this process, you need a thermostat (thermostat).
Greenhouse thermoregulation diagram
Table. Types and properties of thermostats.
| View | Description |
| Electronic | A high-precision option with a liquid crystal display, the use of which makes it possible to always see reliable information about the temperature in the greenhouse and respond to changes in a timely manner. |
| Sensory | Not as good as an electronic one, but you can set a program in it that will provide the opportunity to create the temperature required at a certain time of day. |
| Mechanical | The installation is as simple as possible, but still allows for sufficient control of soil temperature. For a mechanical thermostat, the temperature is set once and then adjusted depending on the needs of the plant. For small private greenhouses, this option is the most acceptable. |
How to choose a thermostat
Thermostats are devices that are easy to use. There is a menu scroll button. Manual temperature adjustment. Function of recording quick launch settings into memory. Monitoring the operation of the heating system and the ability to set heating parameters. In models with a display, you can monitor the current temperature status.
Step 1. First choose the appearance. It can be different, and it’s not only about aesthetics, but also about size, as well as ease of use.
Step 2. Then we study the power. This parameter needs to be given special attention. It is always better to take a device with more power than is required to heat your area of soil.
Thermoregulator TP 600 for soil heating systems in greenhouses
Step 3. Select the installation method. Installation can be different - mounted or hidden, which is not easy to do yourself. Please pay attention to this when purchasing.
Step 4. Select a control system. The operation of the device is controlled by a sensor, which can be either external or hidden. Pay attention to what is more convenient for you.
Step 5. Next comes installation and configuration.
- The adjustment block and the temperature control block - the two main components of the device - are made using transistors.
- Use the switch to set temperature options.
- Connect the relay to your heating device using the contacts.
- Set up your device. To do this, calibrate the resistor scale.
Schematic diagram of a greenhouse thermostat
Prices for a thermostat for greenhouses
thermostat for greenhouses
Storing vegetables
Humidifiers and dehumidifiers for vegetable storage
Maintaining optimal humidity and temperature conditions is necessary, among other things, to ensure long-term storage of vegetables without losing their presentation and consumer properties.
Vegetable and fruit storage facilities need a good ventilation system, specific temperature and air humidity. The conditions depend on the type of vegetables/fruits; dehumidifiers and air humidifiers (for example, so that the fruits do not dry out - if the warehouse is located in a warm, dry climate, do not rot - if the vegetable storage is located in a humid environment). Below is a table with temperature/humidity requirements and shelf life for vegetables and fruits.
NTP APK 1.10.12.001-02 Standards for technological design of enterprises for the storage and processing of potatoes and fruits and vegetables
Design temperature, humidity and gas conditions
| Products | Temperature in the product mass, °C | Relative humidity, % | Estimated shelf life, days. |
| 1 | 2 | 3 | 4 |
| Potato: | |||
| - food, | +3 | 90-95 | 270 |
| - seed | +3 | 90-95 | 240 |
| Root vegetables (carrots, beets, radishes, rutabaga, turnips) | |||
| food | 0 | 90-95 | 270 |
| Queen cells | 240 | ||
| White cabbage | |||
| food | 0 | 90-95 | 270 |
| Uterine | 0 | 90-95 | 210 |
| Food onion | 0 | 70-80 | 270 |
| Mother onion | +3 | 60-80 | 240 |
| Onion sets, onion selections | |||
| warm storage method | +18 | 50-70 | 240 |
| cold storage method | 0 | 70-80 | 240 |
| warm-cold storage method | +18 | 50-70 | 120 |
| 0 | 70-80 | 90 | |
| Food garlic | 0 | 70-80 | 210 |
| Seed (spring) | +18 | 60-70 | 195 |
| +2 | 60-70 | 45 | |
| Pomaceae: | |||
| Apples | |||
| early varieties | 0 | 85-95 | 60-120 |
| late varieties | 0 | 85-95 | 150-240 |
| Pears | |||
| early varieties | 0 | 85-95 | 30-60 |
| late varieties | 0 | 85-95 | 90-120 |
| Grape | 0 | 90-95 | 90-120 |
| Stone fruits: | |||
| Cherry | 0 | 90-95 | 10-25 |
| Apricots, peaches | 0 | 90-95 | 15-30 |
| Plum | 0 | 90-95 | 30 |
| Berries: | |||
| strawberries, raspberries | 0 | 85-90 | 5 |
| currants, gooseberries | 0 | 85-95 | 15 |
| Relative humidity, % | Estimated shelf life, days. | |||||
| CO2 | O2 | N 2 | ||||
| 1 | 2 | 3 | 4 | 5 | 6 | 7 |
| Pome fruits: | ||||||
| - apples | 1 | 1-5 | 3 | 92-96 | 95-98 | 180-270 |
| - pears | 1 | 2-3 | 3 | 94-95 | 95-98 | 120-180 |
| Stone fruits: | ||||||
| - cherry | 1 | 3 | 3 | 94 | 95-98 | 50-60 |
| - cherries | 1 | 3 | 3 | 94 | 95-98 | 50-60 |
| - plum | 1 | 3 | 3 | 94 | 95-98 | 50-90 |
| - peaches | 0 | 2-3 | 3 | 94-95 | 95-98 | 30-45 |
| Grape | 0 | 3 | 3 | 94 | 90-95 | 120-210 |
| White cabbage | 1 | 1-5 | 3 | 92-96 | 95-98 | 210-240 |
| Carrot | 1 | 3 | 3 | 94 | 90-95 | 150-210 |
| Beetroot | 0 | 1-5 | 3 | 92-96 | 90-95 | 150-180 |
| Onion | 0 | 1-5 | 2-3 | 92-97 | 95 | 210-240 |
| Garlic | 0 | 3-5 | 3 | 92-94 | 85 | 180-240 |
| Tomatoes | 12-15 | 0-1 | 3-4 | 95-96 | 95 | 45-60 |
What equipment to install in the greenhouse
Now you have come close to solving an important question - what equipment to buy and install, and what equipment you can do without. In order to make the right choice, follow the simple instructions.
Step 1. Determine your priorities, find out what is more important to you:
- automate watering;
- carry out temperature regulation;
- provide clean air;
- organize additional lighting.
The choice depends on many factors - the type of greenhouse, the nature of the work in it and the type of plants grown.
Arranging a greenhouse requires an improvement in the irrigation system.
Step 2. Select the parameters of the equipment you need. Consider price and quality, ease of use, and the degree of assistance that the device will provide you with caring for plants.
Step 3: Select a supplier. This is the most crucial moment - you need to find a company that sells exactly the equipment that interests you, and sells it in a specialized manner and for a long time. Most devices require careful transportation, professional installation and debugging. Do not let these actions take their course, monitor all processes.
Drip irrigation system "Zhuk"
Step 4. Try to study all the capabilities of the purchased equipment in order to use it as efficiently as possible. Follow safety precautions and precautions that will help extend the life of the purchased “assistant”.
