Facade mesh is now found everywhere, and not only as a facing and covering element of buildings. This budget option has reliably proven itself due to its strength characteristics, low cost and easy installation. In popularity it has overtaken its main competitor - chain-link mesh and has become a good alternative to iron structures. Also, the demand for fencing areas with façade mesh is explained by the opportunity to make a beautiful small-sized fence instead of an ordinary fence with a dry, faceless surroundings.
In addition, a fence made of façade mesh does not in any way contradict the construction standards of garden associations - it is not an obstacle to ventilation and lighting of the area. Plus, it visually increases the area in dense buildings, adding this advantage to its treasury of advantages.
This is largely why home craftsmen install with their own hands a simple and beautiful fence made of facade fabric that can adapt to any landscape conditions on the territory.
Content
1. Features
2. Where it can be used
3. Forms of release
4. Pros and cons (for fences)
4.1. pros
4.2. Minuses
5. Do-it-yourself installation of a façade mesh fence (step-by-step instructions)
5.1. Type of design (standard)
5.2. How to choose a mesh
5.3. Tools for extra work
5.4. Step-by-step installation process
Conclusion
About varieties
Weaving or welding are the main technologies used during installation.
- Rabitz.
The most famous type of wickerwork. Galvanized wire with a round cross-section is the main manufacturing material for such products. The size of the cells and the thickness of the wire are the main differences between the different types. You cannot do without periodic touch-ups if the base is black steel mesh. In the case of galvanized products, painting can be omitted.
- Twisted mesh for fence.
These products are rarely found in the case of fences. In this case, the wire is twisted at a certain angle, resulting in hexagonal-shaped cells.
- Channeled or corrugated mesh.
It is implemented in the form of so-called karts. The composition of the raw materials means that the products cannot boast of particular flexibility. The main material used in production is carbon steel, black. The wire is bent using a special technique before weaving begins. In this case, the strength will be maximum.
A chain-link fence is well suited for installation between adjacent areas. Twisted mesh is used to reinforce heat-insulating mats for caged fur farming (fencing small pens for animals and birds) Corrugated mesh
- Made from galvanized steel wire, which helps provide excellent protection from destructive processes inside.
4 millimeters is the smallest wire thickness. The maximum figure is three times more. Products with the highest strength are created based on reinforcing mesh. Spot welding is a technology that helps to fasten the joints of rods that intersect perpendicularly. Square and rectangle are the most common cell shapes.
- Expanded mesh.
Made from a whole steel sheet. Cutting and drawing of steel is performed using special equipment. The standard cell shape in this case is a rhombus. The thickness of the material and the width of the cutting determine how rigid the product will be. If possible, it will provide strength and stability for several years.
- Gabion.
It has the form of cylindrical, rectangular boxes made of cells of different types. The internal filling is selected by customers to their taste. Stone and wood cuts are the best choice.
- Plastic fences.
- Woven products.
Expanded metal mesh Gabion mesh Plastic fence copes well with excess moisture without succumbing to corrosion
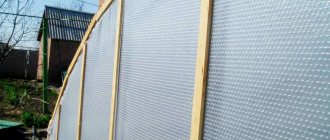
Peculiarities
Construction façade mesh is a solid fabric made under pressure. It is made from polymer strips reinforced with synthetic threads, due to which it is amazingly resistant to stress and practically does not tear. This ability of a material to be integral directly depends on its three special technical characteristics:
- The size and shape of the mesh cell can be either with tiny micro-holes (they have better resistance) or with wide square-shaped holes;
- The mesh weave can be either standard or in the form of three-layer knots. The latter option is used with rare exceptions and is inferior in reliability to the first;
- The thickness of the mesh depends on the width of the section. Therefore, the wider it is, the stronger it is.
Summer residents and gardeners have long chosen façade mesh as a temporary fence and hedge for their garden beds.
A simple, full-fledged fence, made by hand, came into use relatively recently. Although the facade network, especially the one in a tiny lattice, quickly turned into an indispensable element for fencing due to:
- Ability to impair visibility in the area;
- Does not prevent the wind from easily passing through walls;
- It breaks with difficulty;
- Is a good obstacle for uninvited guests;
- It has excellent flexibility and does not require leveling or adjustment to the curves of the earth;
- You can buy the mesh in rolls, which makes transportation and future installation easier.
Ventilation
Photo – Janna Barabash
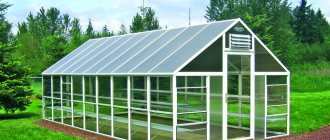
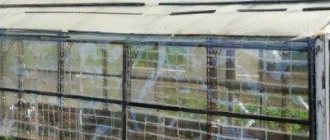
The easiest way to normalize the temperature in a greenhouse is ventilation. However, often the windows, even if they are installed not only at opposite ends, but also near the ceiling, do not cope with this task. This is where a special cooling system comes to the rescue - fans with temperature sensors.
Install two fans in the greenhouse. Place one at the entrance, at the bottom of the greenhouse; the second is on the opposite side, at the top. The fan at the entrance works to draw air from the street, and the one located at the exit works to remove hot air from the room. When the set temperature is exceeded (for example, above 30°C), the sensors are triggered and the fans start working. When its level drops to normal, they stop. This is how the temperature inside the greenhouse is constantly regulated. The power of the fans should depend on the volume of air they need to pump, and therefore on the size of the greenhouse.
Installing fans is one of the most effective ways to reduce the temperature under polycarbonate. However, it has a serious disadvantage , due to which only a few summer residents can afford such a pleasure - the cost of the equipment itself and the cost of electricity.
Where can it be used?
The facade fabric owes its appearance to technologists who developed the material for organizing safe activities.
Fixed vertically, the mesh prevents objects from falling. Over time, the structure began to play a decorative role.
Then it gradually appeared not only on the restored facades, but also in such areas as, for example:
- For transportation of bulk materials and their safety during transportation;
- Shade fencing in the garden and sheltering seedlings from excessive sunlight. As a shady area for balconies and loggias, protection from dust, etc.;
- For zoning space or marking the boundaries of livestock enclosures;
- The canvas can be used as fencing for playgrounds and sports facilities;
- Some types of facade mesh improve the strength of the finishing layer, serve as protection against mechanical damage, and are sometimes used for thermal insulation;
- Rolls up to 2 meters high are used as temporary or permanent walls in personal gardens. They make fences with their own hands in areas ranging from small to large areas, etc.
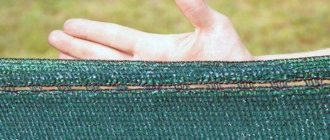
Why do you need a shade net?
Depending on the scope of application, the shadow mesh performs a number of functions:
- Protects plants in open ground from direct exposure to hot sunlight. The material evenly reflects and scatters light, absorbs ultraviolet radiation, creating optimal conditions for the growth and development of garden crops.
- Protects greenhouse plants from sunburn and overheating. Using heat accumulation, it maintains the optimal temperature in the greenhouse at night.
- Creates shade in gazebos, verandas, playgrounds, carports.
- Protects construction sites from the sun and prying eyes during repair work.
- Protects building facades from fading in the summer.
Pros and cons (for fences)
4.1. pros
Installing a fence with your own hands from a façade mesh gives the owner enough advantages to choose it.
Of the main ones:
- The cost is affordable. The price, for example, for a low mesh with large cells, is budget-friendly;
- The rolls are light and small in size, so they are easy to carry and stretch as needed for the frame of future walls;
- Long service life. A mesh that has not been damaged can last up to 5 years inclusive. The high-tech polymer material does not rot, is not afraid of humidity, precipitation and almost all environmental influences;
- The fence is as reliable as possible, because even a thin mesh structure is designed to withstand pressure several times greater than its own weight;
- Simple installation of a fence with your own hands from facade mesh does not require special tools, skills or long periods of time;
- A polymer fence is fireproof. It does not burn, releasing harmful substances into the atmosphere;
- By choosing a façade mesh as a fence, you can stylize the space to your taste, creating a pleasing appearance for the fence. This is possible using different colors, weaves and lattice sizes.
4.2. Minuses
If you understand the disadvantages in detail, then no matter how hard you try, perhaps you can highlight only two:
- The mesh is transparent. True, this quality is considered both an advantage (the plants will receive a sufficient amount of sun, and the air will not be stagnant) and a disadvantage - there is no talk of confidentiality here;
- If high pressure is applied to a façade mesh over a small area, it will damage its integrity. The material reacts poorly to sharp objects, despite its good reliability indicators.
But, if we consider structures made from façade mesh as temporary reinforcement, it has no equal in this role. Minor deficiencies are easily correctable and can be eliminated with additional protection. Then a simple do-it-yourself fence will perfectly fit into the life of a country house, garden and homestead, becoming a durable and attractive fence.
Covering material
Photo by Anna Panina and Marina Zaitseva
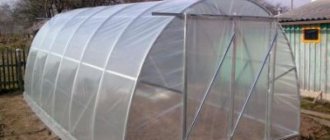
The most common way to shade a polycarbonate greenhouse is to use a covering material. There are two options here: buy it or take what is at hand.
Option 1 – buy covering material
To shade the greenhouse from the scorching sun, use spunbond or any white agrofibre. The density of the material can be from 17 to 23 g/sq.m. Most often, spunbond is stretched inside the greenhouse. In this case, it protects the plantings not only from the sun, but also from condensation that occurs on the roof of the greenhouse and provokes the development of fungal diseases in plants.
Some summer residents from hot regions use covering material together with a shading mesh: a not very dense spunbond is stretched inside, and a mesh is thrown over the outside of the greenhouse.
- Spunbond - how to choose and use agrofibre correctly
We choose the appropriate agrofibre to protect plants from frost, hail, insects, birds and weeds.
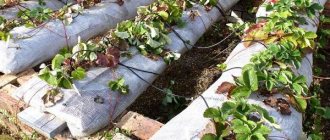
Option 2 - use improvised materials for shelter
There can be a great many options here. When choosing, you should consider the following points: the material should be white and not very dense, because... our goal is to reduce the amount of sunlight, and not to deprive the plants of light altogether. Usually, summer residents use old sheets and unnecessary tulle. They can be secured both inside and outside the greenhouse. The easiest way to fix the material inside the structure is this: on the sunny side, closer to the ceiling, stretch a rope along the entire greenhouse; Place the second one under it, near the floor. Now take the prepared fabric and use clothespins to secure it to the top and bottom ropes.
If the available material is not enough, you can combine it with agrofibre: attach agrofibre under the ceiling, and shade the walls with tulle or a sheet.
Do-it-yourself installation of a façade mesh fence (step-by-step instructions)
Anyone can install a fence made of façade mesh with their own hands. Installing a fence is not difficult, but you need to make an effort by making preliminary calculations and preparing the place.
5.1. Type of design (standard)
If the design is standard (a common option), then the view is as follows:
- Load-bearing metal or wooden frame made of posts;
- Cloths made of wire, usually steel. They must be stretched along the lower and upper edges of the mesh to avoid deformation.
5.2. How to choose a mesh
- The material is selected according to density and shape, cell size;
- The color is selected. For fences, a neutral green shade is usually relevant, looking harmoniously on the territory;
- The length of the canvas is determined in equal proportion to the length of the fence. For the reserve you need approximately 0.5-1 m;
- Calculating the number of supports is easy. They must be placed one by one, walking a distance of 2 m.
5.3. Tools for extra work
- Yardstick;
- Construction level);
- Plastic clamps for fixing the canvas;
- Sledgehammer, hammer.
5.4. Step-by-step installation process
- Step 1. It is necessary to determine the location of the outer columns and indicate the markings with pegs. Next, you need to clear the area of weeds, stones and other things along which, according to the plans, the fence will stand. Next, they begin to pull the twine or twine between the previously installed pegs;
- Step 2. At this stage, the columns are prepared. For support you need a steel profile with a square cross-section. Can be replaced with metal pipes, but with a diameter of at least 40 mm. Wood posts are susceptible to rotting and are best used temporarily. The cable should not slide on the supports; metal hooks are welded into the profile and a hole is drilled. The lower part of the posts is treated with an anti-corrosion agent, the length of the blanks is about 3 m (taking into account that 1 m of the part will be buried in the ground);
- Step 3. You will need a helper to install the stand along the edge. Its role is to hold the support in the desired position while the pipe is leveled. Next, you need to drive it into the ground using a sledgehammer or a hammer, keeping the vertical guide under control. When the ground is too loose, a hole is first prepared with a hand drill, and the support installed in it is concreted;
- Step 4. Now, having measured approximately 2 m from the first post, drive in the next one. The remaining columns are mounted using a similar method, controlling their equal height and location along the same trajectory;
- Step 5. After work with the supports is completed, you need to tension the wire. It is important that the row at the top is 5-10 centimeters below the edge of the pillars. The bottom row is located 15 centimeters above the soil level. In the case where the fence is higher than 1.7 m, it is desirable to fasten the wire at an even distance of 3 or even 4 rows. Such measures will eliminate the further possibility of the mesh sagging;
- Step 6. At the final stage, the frame is thrown onto the canvas. It must be carefully and carefully straightened to its full length and secured using clamps (thread through the cells of the façade fabric) to the wire. Do not tighten the clamps too tightly, as in windy weather the mesh in the fastening areas will wear out faster. It is necessary to leave free movement, the limits of which do not exceed 10-15 centimeters.
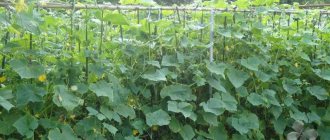
Plant protection
Another way to shade a polycarbonate greenhouse is to plant tall plants on the sunny side. Most often, gardeners use vines, which grow quickly and create a real green wall. Before planting, take care of plant support. Don't forget to also leave some distance between the greenhouse and the plantings.
- 11 plants that will disguise an unsightly fence and significantly transform the area
Review of popular climbing plants and the secrets of their cultivation.
How do you protect your greenhouse from the sun?
Conclusion
By installing a simple fence made of façade mesh with your own hands using the instructions described above, you can get a structure (decorated if desired) with low windage, which will maintain its given position even in the wind at maximum speed.
Given the fairly good permeability indicators, the mesh will not stretch or break, and in winter it will not become clogged with snow. Therefore, for such operation, facade mesh is the optimal solution without high costs, designed for many years of service.
How to stretch the shading mesh?
The green shading mesh is easy to attach, so even a beginner can handle the job. The material is stretched in several stages:
- Special vertical supports are installed on the beds. These can be wooden beams or metal rods. Small plantings can be covered using semi-arc supports.
- In greenhouses, the frame of the building itself serves as support for the shading mesh.
- If the length of the purchased product is not designed for the entire bed, then the required size of the fabric can be sewn with nylon threads yourself, connecting sections of material.
- The material is secured with special fasteners included in the kit, or with ordinary metal wire or strong rope.
- They begin to tighten from one edge, for example, the left. The rest of the material is often evenly laid out around the perimeter. The mesh is lightweight, so it does not damage the plants even if it accidentally falls.
Purpose of the product
Shading mesh is produced for use on cucumbers, tomatoes, for greenhouses, fences and camouflage.
- A tomato net can significantly increase the amount of harvest and protect seedlings from withering.
- The net for cucumbers has a shading degree of 45% and allows you to save the plants from drying out.
- The camouflage net is not used in the garden; it is intended to cover and camouflage secret objects.
Products for a greenhouse can have different degrees of shading, this will depend on how it will be installed. If it is placed inside the greenhouse, then you need to choose a small degree of shading, and if outside, then the shading should be 70-80%.
Fence mesh allows you to quickly build a fence; for these purposes it is best to choose a material with a level of 90%.
Before purchasing a shading net, it is necessary to clearly determine the location of its placement, the level of illumination of the area and the size of the shelter. In order for it to last for more than one season, it must be removed after harvesting and stored in a cool place, such as a cellar.