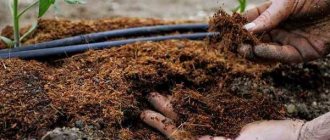
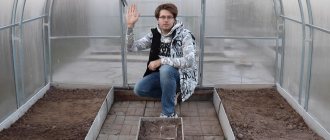
Preparing the greenhouse for spring takes me from 5 to 8 hours.
Tell me, is it a lot?
And I think that I can still cope quickly, given the considerable amount of work being performed.
But in the summer, my tomatoes get sick a little and require rare feedings.
Today I will share a step-by-step plan on how to properly prepare a greenhouse for planting and sowing.
Processing the greenhouse in the spring: drawing up a work plan
In spring, early greens can be grown around the perimeter of the greenhouse: watercress, onions, radishes
I divide the entire list of tasks in the greenhouse into two categories: those that are best done in the fall and those that can be postponed until the spring.
Autumn work includes:
- general cleaning plus washing all parts of the structure from visible dirt;
- soil replacement (if necessary);
- filling the soil with fertilizers and/or sowing green manure.
Then in the spring there will be:
- throw snow into the greenhouse;
- remove its remains from the roof and surrounding area;
- check the integrity of the coating and frame and carry out the necessary repairs;
- carry out disinfection of the ground, internal and external elements of the structure;
- prepare the soil for planting seedlings and sowing seeds.
If you were unable to complete the autumn part of the work before the onset of cold weather, it is permissible to transfer these tasks to the spring.
Let's look at all the points in more detail.
But then the order of operations changes slightly.
Acceleration of warming up of greenhouse soil
The spring sun warms up the air quickly, but the soil takes much longer. But to sow seeds or plant seedlings, the ground temperature needs to be at least 10-15°C - will you really have to wait until April? Not at all - there are a lot of tricks on how to warm up the beds faster and, as a result, get the desired harvest much earlier.
So, watering with hot water not only warms the soil well, but also activates many beneficial microorganisms and bacteria. It is better to do it twice, then the temperature of the earth quickly reaches 15°C. And if your greenhouse also has electricity, install a floor fan. This way you will get rid of cold air, which, as you know, always accumulates below.
Any black covering material will help to additionally warm the soil.
General cleaning in the greenhouse
If you grow vegetables in a greenhouse in containers, then there is no need to prepare the soil
I start this stage of work in early March. To begin with, I remove from the room everything that is not nailed or glued: pegs, garter ropes, planks, seedling containers, plant debris.
I usually burn everything except containers for seedlings. If the plants in the greenhouse were not sick last season, I put the tops and weeds in compost.
I inspect other durable items. If traces of rust are noticeable on metal elements, I treat them with store-bought or popular compounds and then paint them.
Here are some available recipes to help you get rid of rust for free:
- a mixture of vinegar and lemon juice;
- soda solution;
- sweet soda like Fanta or Cola;
- half a potato.
The wooden parts of the products are whitened with lime with the addition of paint glue.
Box and cover repair
After this, you need to carefully inspect all the internal and external elements of the greenhouse structure.
Advice. Try not to walk on the beds so as not to further compact the soil. Instead, step on a wide, long plank that you carry as you move through the greenhouse.
Subject to replacement:
- wooden parts with signs of rotting;
- metal parts that are damaged by deep corrosion.
It happens that in winter the frame of the greenhouse becomes deformed under a dense layer of snow. The reason for this is the low quality of the material or the extreme degree of wear of the greenhouse. Then the entire system has to be completely or partially disassembled, the bent elements straightened and the rigidity of the greenhouse improved with special devices.
To prevent trouble, the structure needs to be strengthened with supports in the fall.
Next, you should definitely check the greenhouse covering. Glass sections with cracks and broken pieces are replaced, the torn film is sealed or also replaced.
How and with what to wash a greenhouse in spring
Now the first priority is to remove all visible dirt, adhering leaves and twigs, and green mold from all internal and external parts of the greenhouse .
A soft cloth (sponge) and soap solution will help you with this. It is permissible to supply it from the outside with a hose, but inside you will have to work manually. It is undesirable for soap to get into the ground.
After this, the product is washed off with plain water. If you are dealing with cellular polycarbonate, it is useful to add a little potassium permanganate to the water.
It is good to additionally wipe the metal parts with hot water and vinegar.
Next, I disinfect the structure. Do not forget to cover the plots in the greenhouse with film so that the drug does not accidentally penetrate into the soil.
The coating and frame are treated with disinfectant compounds in several ways: sponges, soft brushes with rotating handles, large paint brushes. Or you can spray the liquid with a special fine sprayer that supplies water in the form of steam.
Here are a few recipes for cleaning your greenhouse in the spring:
- A strong solution of mustard powder.
- Household detergent with a disinfectant effect - for example, Belizna. Just keep in mind that it often leaves streaks, so you may have to wash it off again with water.
- Solutions of copper sulfate or Bordeaux mixture.
- Bleach solution - 400 grams per 10 liters of water, leave for 24 hours, filter. The sediment is applied to the wooden elements of the greenhouse, and the liquid is applied to the coating from a garden sprayer.
- Infusions of pine needles or nettles. Fill a bucket halfway with dry raw materials, fill it with water, leave for a day and wash the inside of the greenhouse. Instead of dry pine twigs, liquid pine concentrate in a 200 ml bottle (for 8-10 liters of water) is sometimes used.
Deciding if snow is needed
During the winter, the soil in an unattended greenhouse dries out greatly. It is strongly compacted, resulting in poor penetration of water and air through it. In such conditions, young vegetation will be, to put it mildly, uncomfortable. Moreover, even with abundant watering and intensive loosening before planting seedlings, the situation can only be partially saved. Seeds will have difficulty germinating through dense soil, and the seedlings will be thin and frail.
Therefore, planting in a greenhouse in the spring involves the preliminary use of snow, which needs to be thrown inside the greenhouse. It is applied to saturate the soil with melt water. Under natural conditions, vegetation receives melt water from the soil or from rain, but in a greenhouse, crops are deprived of this. Therefore, snow needs to be thrown onto the beds, and you can also fill containers and barrels with it.
Preparing soil in a greenhouse in spring
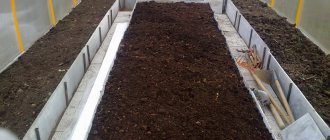
To make the greenhouse soil suitable for planting and sowing, in the spring I perform the following operations:
- Watering (use test to determine if it is needed) and surface loosening with a flat cutter.
- Add organic materials and phosphorus-potassium supplements, if you did not do this last fall.
- Adding dolomite, chalk or lime - once every 2-3 years
- Digging with a ½ bayonet shovel.
- Sowing green manure plants.
- Mow of green manure and treatment with a biological product to accelerate the decomposition of greenery and disinfection of the soil.
I do not carry out chemical disinfection of the soil in the spring , since it kills not only the harmful inhabitants of the greenhouse, but also beneficial insects and bacteria.
In addition, I am worried that the chemistry will not have time to deactivate before the seedlings are planted and will get into the plants and fruits.
Video on how to prepare soil in a greenhouse without digging, but with autumn mulching:
Replacing soil: when is it needed?
Some summer residents change the top layer of soil in the greenhouse every year. This seems too time-consuming to me. Moreover, with careful care of the soil, I am quite satisfied with the yields.
But sometimes it's simply necessary.
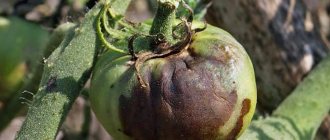
A signal that it is time to renew the soil in the greenhouse is the massive infestation of plants by diseases and pests in the previous year. This is when neither prevention nor treatment with semi-safe preparations like Fitoverm helps.
In such a situation, change 5-7 centimeters of soil.
It is good to mulch strawberries, berry bushes or crops of another family using soil taken from the greenhouse. But first, I still recommend frying it in the sun for 1-2 months.
A soil mixture is prepared for the greenhouse:
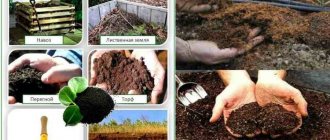
- loam, manure or humus, peat - 4:3:3;
- loam, humus - 6:4.
These recipes are universal, but if possible, different compositions are made for tomatoes and cucumbers:
- for peppers, tomatoes, eggplants: peat, sand, compost, 3:1:1;
- for cucumbers, watermelons, melons: peat, humus, turf soil, 6:2:2.
Before loading fresh substrate into the greenhouse, do not forget to loosen the bottom layer of soil with a digging fork.
Fertilizer application
The amount and type of fertilizer applied depends on what crop you intend to grow in the greenhouse.
But mature compost (or humus) is suitable for any vegetable. I scatter it in a 1-2 centimeter layer over the beds in the greenhouse. I dust the top with a mixture of wood ash and bone meal at the rate of one glass per square meter.
Sowing green manure
This is followed by shallow digging of the soil and continuous sowing of mustard.
So that the green fertilizer has time to gain strength, I try to complete all the previous stages before the beginning of March.
Then, when sowing on March 1-5, seedlings appear on March 10-15 and within a month the mustard grows to 15-20 centimeters.
I trim the grown stems with a hoe or flat cutter and cover them with a rake to a depth of 2-3 centimeters.
Along with mustard, other early-ripening and cold-resistant green manure crops are often sown in the greenhouse - oilseed radish, vetch, phacelia, peas and oats.
Treatment of greenhouse soil with biological products
Mustard is an effective phytosanitary, that is, it cleanses the soil of pathogenic microflora. At the same time, it is “friends” with helping bacteria and other soil fauna.
If, after mowing, you additionally spill the soil with a strong solution of a biological product, you will cleanse the soil of harmful elements in a reliable and safe way.
Biological products only work in a humid and warm environment. I bring them into the greenhouse in mid-April, when the soil has warmed up to +14-15 degrees. This is the minimum temperature for the use of all drugs with live bacteria and fungi.
1-2 days before harvesting green manure, I also water thoroughly to keep the soil slightly moist.
Most often I use Fitosporin M in paste. When it is not on sale, I buy Alirin, Gamair, Trichocin, Glyokladin or Trichoplan.
I have seen recommendations to cover the soil with dark material after adding a biological product solution. I've never done this. On a sunny day in a greenhouse, and even under a black film, a powerful greenhouse effect is created - the temperature goes beyond +35 degrees. As a result, the introduced bacteria do not multiply, but die.
In fact, this is one of the simplest methods by which you can sanitize the soil in a greenhouse without biological products and green manure. Cover the beds with black non-woven fabric and wait 5-10 days , depending on the weather. High temperature is guaranteed to kill off pests and pathogens in the upper arable layer.
I plant seedlings and seeds in a greenhouse 10-14 days after treating the soil with biological products.
Sequencing
Processing stages
Spring preparation of a polycarbonate greenhouse for the new planting season includes 6 main stages:
- General cleaning of the area where the greenhouse is located.
- Installation of the structure.
- Cleaning the frame and polycarbonate (acting as glass).
- Disinfection inside the building.
- If necessary, minor repairs to the structure (strengthening, strengthening of load-bearing foundations).
- Soil cultivation. It involves the introduction of chemicals, insecticides, fertilizing, digging or replacing the fertile layer.
If no treatment was carried out in the fall, spring cleaning should begin with the removal of old plants. These include not only tops and fallen fruits, but also weeds, their large seeds and roots.
Next, you should get rid of all pegs, trellises, ropes, pieces of twine and other garter material. Pathogenic bacteria can multiply in it and immediately attack new seedlings. They should be taken out of the greenhouse and burned. By leaving them on the site, gardeners risk the occurrence of diseases in other parts of the site.
After this, the polycarbonate structure itself is cleaned. The most thorough treatment will be if the structure is disassembled into its components and all surfaces are disinfected. If an epidemic of diseases has been noted inside the greenhouse, the structure must be treated with a disinfectant. It is recommended to treat metal structures with warm water and vinegar.
Polycarbonate is a transparent material that loses its appearance and transparency when exposed to moisture and dirt. To return it to its original appearance, it is necessary to wash the coating with soapy water or detergents without abrasive components. You can also use a light solution of potassium permanganate. At the end of the procedure, you should thoroughly rinse off the detergents with clean running water.
To clean the polycarbonate coating, do not use hard sponges, metal brushes or mechanical abrasives. The coating is vulnerable to scratches.
Inside the greenhouse, all racks, equipment and containers should be cleaned. To do this, you can use boiling water, as well as some chemicals (formalin, vitriol, bleach).
Fumigation as a method of cleaning a greenhouse
Fumigation is an effective method of pest control in a closed greenhouse structure. To do this, entrances and windows are tightly closed, small cracks are sealed and a smoky fire is lit. If this is not enough, you will need several sulfur bombs. They are laid out on metal sheets. You can replace them with lumpy sulfur, which should be combined with a small amount of kerosene.
Disinfection using fumigation is carried out for 4-5 days, after which the room is ventilated.
It is dangerous for a person to be in a greenhouse during such treatment, since the gas released during fumigation can cause serious respiratory diseases. If it becomes necessary to enter the greenhouse, personal protective equipment should be used.
Basic methods of soil disinfection
The next step is soil disinfection. Three types of processing can be used for this:
- temperature;
- chemical;
- biological.
The effectiveness of the fight against bacteria, fungi and insects depends on the chosen processing method. The choice of purification method is influenced by the type of crops grown in the greenhouse. This procedure is quite labor-intensive.
Changing the temperature
If the end of winter and the beginning of March are frosty, you can take advantage of this natural blessing and freeze the ground. To do this, you need to open the greenhouse and leave it open for several days. Low temperatures can lead to the death of harmful bacteria and fungi that abundantly infect plants. Frost can also neutralize insect larvae deposited in the ground in the fall.
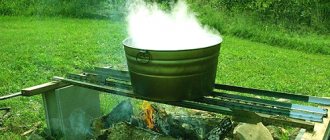
If we are talking about a small area for seedlings, then you don’t have to start working with chemicals, but treat the soil with boiling water. This is enough to destroy most types of pathogens and pest larvae. Find more information about tilling the soil before planting seedlings here.
Biological control method
Biological treatment is usually carried out using the following drugs:
- "Fitosporin";
- "Phytocide";
- "Biodestructor of stubble."
The following drugs are also used:
- "Baikal M", effective against rot, fungi and lichens;
- "Fitolavin" against rot and pathogens;
- “Carbation”, which helps cope with clubroot and blackleg, as well as verticillium and fusarium wilt;
- "Acrobat MC" to combat powdery mildew and late blight;
- "Bayleton" for gray rot.
To clean the soil, it is enough to shed only the top layer. For treatment, you need to prepare the solution according to the instructions, then carry out disinfection. After the solution is absorbed, use a rake to dig up the treated area a little. Then the disinfected soil must be covered with a covering material (film or spunbond).
After using biological preparations, it is necessary to take care of the soil structure and replenish it with beneficial bacteria artificially.

