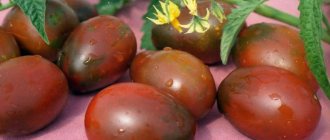
Dill is one of those greens that we enjoy eating all year round. The bright aroma of this plant is given by the essential oil contained in the stems, leaves and seeds. Fragrant branches are added to salads, first and second courses, used in winter canning, frozen, salted and dried. The fragrant seasoning is good in any form.
Unlike other types of greens, dill is surprisingly unpretentious. In summer it grows well both in sunny areas and in the shade, and in winter in greenhouse conditions. In this article we will tell you how to grow dill in a greenhouse and what nuances you should pay attention to.
Which varieties are best?
The yield of dill depends on the correctly selected variety. For growing in a greenhouse, varieties that are resistant to cold and lack of light are selected. Bush species that produce a lot of green mass are suitable.
Domestic varieties capable of producing large amounts of greenery include:
- Amazon.
- Kutuzovsky.
- Kibray.
- Grenadier.
- Frost.
- Redoubt.
- Carousel.
- Anchor.
- Diamond.
- Sevastopol.
Greenhouse requirements
Only a well-insulated balcony or greenhouse is suitable for planting dill. It is best if it is made of polycarbonate. There are also additional requirements for the premises:
- the presence of several windows for ventilation;
- height not lower than 2 m;
- complete sealing of cracks and joints to maintain normal temperature;
- presence of electrical wiring;
- phytolamps for illumination.
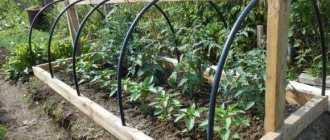
A polycarbonate greenhouse is suitable for growing greenery
The area can be anything from a few square meters to 50-100 m2 or even more. It all depends on the purpose for which the greens are grown. So, for planting for personal purposes, the balcony area is sufficient. If cultivated for sale, you will need a room of over 100 m2 for production to be profitable.
Choosing a greenhouse
There is a large selection of polycarbonate greenhouses on sale with a metal body. But it has been proven that it is more comfortable for plants to grow in greenhouses made of wood. In this case, a special frost-resistant film is attached to the wooden frame of the greenhouse. You can use reinforced film, which lasts 3 to 4 years.
To heat the greenhouse, pipes are laid around the perimeter into which hot water is supplied. A solar collector made of stones is also used for heating . During the day, stones accumulate heat, and at night they gradually release it.
Gribovsky
Gribovsky is one of the most famous varieties of dill among gardeners. Appeared in 1974 as a result of breeding work. Universal, suitable for both greenhouses and open ground. The variety is mid-season. From the appearance of sprouts to the first green shoots suitable for cutting, 30-38 days pass, until the spice is collected - 95-108 . By the time of flowering, the plant reaches 50 cm, moderately spreading.
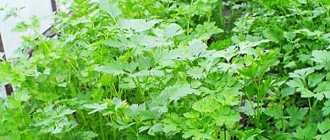
Sowing of crops begins at the end of April - the first half of May. During the growth process, erect compact rosettes up to 25 cm high are formed with large, highly dissected leaves, painted dark green with a waxy coating. Dill grows quickly and increases its green mass. The shoots have a delicate taste and rich spicy aroma .
The Gribovsky variety is endowed with high resistance to cold weather, droughts, and diseases. After harvesting, it retains its freshness and taste for a long time, and tolerates transportation well.
Due to the rapid ripening of seeds and excellent vitality, the plant quickly spreads throughout the greenhouse or area, so many gardeners specifically remove flowering umbrellas.
Endowed with high yield under different growing conditions. Cut 1.8-2.2 kg from 1 square. m – for greens, 3.5 kg per 1 sq.m – for spices .
How to plant?
Dill is an unpretentious plant, but you need to have the necessary skills to get a good harvest. There are two ways to plant dill in a greenhouse:
- Seeds.
- Seedlings.
Seed preparation
- For better germination of dill seeds, it is necessary to carry out preliminary preparation. The seeds are soaked in hot water for two to three days, the water is changed periodically to keep it hot. This procedure is necessary in order to remove the essential oils that cover the shell of dill seeds, which contributes to their rapid germination.
- Then the seeds are germinated by placing them on a thin cloth or gauze, covered with a damp cloth on top and left for 4 to 5 days in a warm place or windowsill exposed to sunlight. In a warm, moist environment, the seeds quickly swell and germinate.
- Germinated seeds are planted in boxes or in the soil of a greenhouse.
- The soil is well moistened, loosened and grooves are made every 15 - 20 centimeters and 3 - 4 centimeters deep, then fertilizer is added to them per square meter of soil:
- potassium salt – 20 grams;
- superphosphate – 25 grams;
- urea – 20 grams.
- Sprouted dill seeds are poured into the furrows, sprinkled with a thin layer of soil, and the soil is carefully moistened from above with a spray bottle.
- For the next two weeks, the soil is moistened daily until the first shoots appear.
- When the plant grows to 10 centimeters in height, the plantings are thinned out. They pull out strong plants, replanting them in a new place or using them for their intended purpose. The remaining poorly developed shoots begin to fully develop.
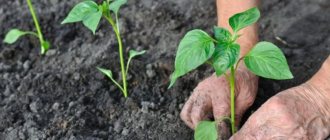
Preparing seedlings
- To get an earlier harvest of greens, ready-made dill seedlings are planted in the greenhouse. To grow it, sprouted seeds are planted one at a time in cells with soil with a volume of about 50 milliliters to a depth of two centimeters, watered and placed in a warm place.
- After the emergence of seedlings, the plants are left in the cells for another two weeks, then the grown seedlings are planted in a greenhouse.
- Replanting dill from cells must be done carefully so as not to damage the root system of the plant.
- Dill bushes are planted at a distance of 25 - 30 centimeters from each other.
You can find more information about growing dill seedlings here.
Which method is better and why?
When planting seedlings, the bushes are planted at such a distance as is necessary for the full development of the plant; there is no need to thin out the seedlings.
Another advantage of the method of growing dill in a greenhouse through seedlings is the quick harvest.
Possible pests and diseases
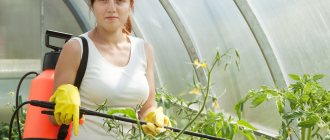
Improper care leads to the development of infections on the stems and leaves and damage to the roots. Signs of the disease can be noticed by changes in the appearance of the plant. It is difficult to fight the infection, because when using fungicides, toxic substances accumulate in the aerial parts, and folk remedies are not always effective.
At the first signs of disease, it is better to remove diseased plants, spray neighboring ones with a solution of ash, laundry soap, whey (1:10) with a drop of iodine, and sprinkle the soil under them with ash. You can lightly dust the plants with ash, after spraying them with water or soap solution.
May be interesting The medicinal properties of parsley root and its use How to grow parsley on a windowsill: planting and care How to grow strawberry mint and reviews of the variety
Dill diseases:
- high humidity and low temperatures lead to the appearance of a whitish coating on the stems and leaves - these are spores of the powdery mildew fungus; spraying with a solution of colloidal sulfur will help;
- with Phoma, dark spots appear on the leaves, which, growing, lead to the death of the entire plant; in the initial stage, 1% Bordeaux mixture is used; if the disease is advanced, the plant is removed, the soil is treated with a fungicide;
- damage to the roots during loosening, waterlogging of the soil contribute to the development of fusarium, which is manifested by the appearance of light spots on the leaves, wilting of the bush, the affected plants are removed, the soil is treated with a fungicide;
- sharp changes in temperature cause the rapid spread of the causative agent of peronospora, a characteristic sign is dirty yellow spots on the leaves, then they darken, become covered with a grayish coating, biological products Planrizom, Fitosporin-M, Baikal-EM will help to cope.
Among the insect pests for dill in winter, aphids are dangerous, they multiply quickly and, by sucking the juices, can destroy part of the crop. Aphids are clearly visible and when they appear, you need to spray the plant with a solution of laundry soap, ash, onion peel infusion, tobacco infusion (1:10). The interval between treatments is 7 days.
Care
To get a good harvest of greens, you need proper care for dill plantings.:
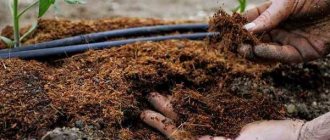
- Dill grows well in fertile soils with neutral acidity. To increase soil fertility in the fall or in the intervals between plantings, add humus or peat to the greenhouse soil at the rate of 2 - 3 kilograms per square meter of land.
- For normal growth of dill in the greenhouse, maintain a temperature of 15 - 18 degrees.
- Ventilation is carried out periodically, avoiding drafts and lowering the temperature.
- Water the plants with warm water from a sprayer once every 5-7 days, avoiding the soil drying out or being overly moistened.
- It is necessary to regularly loosen the soil and weed out weeds. This gives oxygen access to the roots of the plant, which promotes the growth and development of dill.
- When growing dill in a greenhouse, it is fed twice a month with ammonium nitrate or peat, which is distributed at the base of the bushes.
- Since in winter and autumn the light-loving plant lacks light to grow it, it is necessary to install additional lighting in the greenhouse, extending the daylight hours for planting. At the end of February - beginning of March, when daylight hours lengthen, additional lighting is removed.
From our special publications you can learn about the features of growing dill in open ground:
- Where is it better to plant - in the shade or in the sun?
- What can the plant be planted next to?
- When is the best time to plant seeds?
- How quickly does it sprout and what does it depend on?
- Do I need to soak seeds before planting in open ground?
- After what crops will dill grow well in the soil?
Optimal conditions
It is important to create optimal conditions for the plant that promote rapid growth of green mass.
Primary requirements:
- loose nutritious soil with a fertile layer of at least 0.5 m;
- lighting for at least 12–14 hours;
- average daily air temperature +20°С, soil temperature from +16°С;
- soil moisture 50%;
- air humidity 60–70%.
How quickly it grows and comparison with the growth rate in open ground
With proper care, the first harvest of dill planted in a greenhouse is obtained within two months after planting . Plants do not like sudden climate changes, therefore the stable temperature and humidity created in the greenhouse contribute to better growth and development of the crop in greenhouse conditions than in open ground.
To have fragrant fresh dill on the table all year round, you need to purchase a greenhouse and use the tips in the article. This is not difficult for even a novice, inexperienced gardener to do.
Germination time of dill at home on the windowsill
At home, the crop is grown for constant consumption of fresh greens. Unlike natural conditions, home cultivation can affect the germination period and yield of the crop. If dill receives enough light, then at a room temperature of about 20 degrees and good soil moisture in the container, it will sprout in 10-13 days.
Due to the inability to grow leaves instead of cut ones for a permanent harvest, it is recommended to sow dill every 10-12 days in a container on the windowsill.
When growing indoors, it is not so much the germination time of dill that is important, but the lush mass of greenery. Experts do not recommend choosing early-ripening crop varieties in order to achieve early germination. It is better to choose late-ripening species that will hatch a few days later than their early counterparts, but will provide rich foliage instead of long stems.
Redoubt
Redoubt is considered one of the most aromatic and rich varieties . Created by scientists for growing for herbs and spices. The variety is an early ripening variety, as full ripening occurs in approximately 39-41 days. It is best to plant seeds of this variety in late April-early May.
The plant is compact, the leaf rosette is slightly raised above the ground. It contains oblong, slightly dissected leaves of medium size, green color and strong aroma. They have a faint waxy coating.
From one bush, ready for pruning, you can collect up to 40 grams of greenery, and from 1 sq. m - 1.2-1.3 kg, inflorescences for spices - up to 2 kg.
After cutting, the Redoubt variety retains its freshness and taste for quite a long time, so it does not lose its presentation during long-term transportation.
The variety is recommended for fresh consumption, freezing and canning.