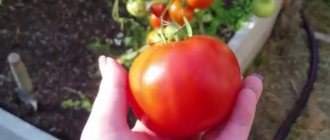
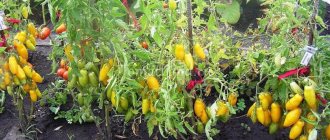
One of the fastest ripening among large-fruited varieties is the Batyanya tomato. The variety was created by Siberian specialists in 2008. Within a couple of years, in 2010, the new variety was awarded a patent as an outstanding achievement of domestic selection and quickly became a favorite of gardeners.
A large-fruited pink tomato, adapted to the conditions of Siberia, can be grown in other regions that cannot boast of many warm sunny days. The variety is recommended for cultivation in the middle zone in greenhouses, in more southern regions - in the open air. The description of the Batyanya variety and the characteristics of this tomato can be found in this review.
Description of the tomato variety Batyanya
Tomatoes of this variety are early ripening
– from the moment of germination of the seed material to the harvesting of ripe fruits, about 3.5 months pass.
Photo of tomato Batyanya
Tomato Batyanya belongs to the indeterminate type,
therefore, the growth of the central shoot is unlimited. Usually, at a height of 1.9-2 m (as in this variety), the tops of the shoots are pinched so that the side shoots of the bushes develop more actively.
However, for better yield, these plants form no more than 2 stems. To form tomato bushes with 2 stems, only one stepson is left on the plant - under the first formed inflorescence, from which the second stem will subsequently grow. All other stepsons should be removed as they appear.
THE BEST VARIETIES OF TOMATOES!
BIF tomato Nina Tomato Rocket Tomato Kiss
In closed ground, the height of the shoots of the Batyanya tomato can reach 1.8-2.0 m, and in open ground the bushes grow to a height of 1.3-1.5 m.
Description of the tomato variety BATYANYA - video
The shoots of this variety are strong and powerful, but they must be tied up as the fruits ripen so that the stems do not break off under their weight. The stems are medium leafy, the foliage is typical of tomatoes, large in size, elongated, with sharp tips, dark emerald color.
The flowers are small, yellow in color, collected in racemose inflorescences, the first such inflorescence is formed above 3-4 true leaves, and the next ones appear every two leaves. Each inflorescence can form up to 4-6 ovaries.
Pros and cons of the variety
| Advantages | Flaws |
| The fruits ripen early | Fruits are not suitable for whole preservation |
| The taste of tomatoes is sweet and rich | There are few seeds |
| The fruits are large, elastic, retain their shape well after ripening | It is necessary to carry out gartering and formation of bushes |
| Productivity is high | |
| Is immune to late blight | |
| Easy care |
Main characteristics of the variety
Ripe fruits are heart-shaped, with a small but pointed tip. There are practically no deviations in ripe fruits; they are all even, with a smooth, even glossy skin. At first, ripe tomatoes have a green color, which then changes to pink, and fully ripened Batyani fruits have a rich crimson color.
The pulp is compacted, fleshy, sugary, quite sweet, practically without sourness. The pulp does not lose its pleasant taste even in fruits that ripen at the end of the season. The pulp may contain 3-4 seed chambers with a small amount of seed material.
The weight of ripe Batyanya tomatoes is about 300 g, those fruits that grow in the lower part of the bushes can weigh more - up to 500-650 g, at the top the tomatoes grow much less - about 150-200 g.
They are not prone to cracking under normal growing conditions. But in rainy seasons or when watered too much, the tomatoes will crack.
Tomato "Batyanya" Siberian variety - video
Ripe fruits are universally used; they are eaten fresh, added to salads and other snacks. These fruits are also used in canning - for making juice, tomato paste, ketchup, sauces and lecho.
The harvested crop can withstand transportation well to any distance, but is not stored for a long time.
Therefore, it is necessary to process the fruits immediately as they are collected.
Useful video
In the table below you will find useful links about tomato varieties with different ripening periods:
| Mid-late | Mid-early | Super early |
| Volgogradsky 5 95 | Pink Bush F1 | Labrador |
| Krasnobay F1 | Flamingo | Leopold |
| Honey fireworks | Mystery of nature | Shchelkovsky early |
| De Barao Red | New Koenigsberg | President 2 |
| De Barao Orange | King of the Giants | Lyana pink |
| De Barao Black | Openwork | Locomotive |
| Miracle of the market | Chio chio san | Sanka |
Tomato yield Batyanya
On the bushes of this tomato, ripe fruits appear early, since Batyanya is early ripening, but fruiting continues throughout the season, and its duration directly depends on the care of the plants.
From garden beds, about 7-11 kg of ripe fruits are collected from each square, and in closed ground from 1 m2 you can collect up to 15-17 kg of ripe tomatoes.
Photos of growing tomatoes Batyanya
Advantages and disadvantages
Comparing the positive qualities of the “Batyanya” tomato with its likely negative characteristics allows you to more accurately assess the prospects of growing this crop on your site.
| Advantages | Flaws |
| Large fruits with good taste | The need for systematic removal of stepchildren and growth regulation |
| Early harvesting (90-110 days after the appearance of seedlings) | |
| Possibility of growing in different climatic zones both in open ground beds and in greenhouses | Tendency to cracking when tomatoes ripen on bushes |
| Good survival rate on different types of soil | The need for a strong support that protects the stems from breaking off under the weight of heavy fruits |
| Long-term fruiting | |
| Resistance to late blight and other diseases | |
| The use of tomatoes not only as salad fruits, but also for canning |
Advantages of the variety
The main advantages of the Batyanya tomato variety include:
- early fruit ripening;
- resistance to natural disasters;
- large size tomatoes;
- good yield;
- resistance to low temperatures;
- wonderful taste of tomatoes;
- Fruiting is extended throughout the summer season.
Tomato variety “Batyanya” / Characteristics and description of the variety - video
But the variety also has a number of disadvantages:
- Batyanya tomatoes are not stored for long; after picking they quickly become soft and spoil. Therefore, fruits should be collected before fresh consumption or use for canning;
- Ripe fruits are prone to cracking during the rainy season or with heavy watering.
Diseases and pests
diseases characteristic of tomatoes . Early ripening of fruits protects bushes from late blight.
Sometimes yellow marks appear on the leaf blades. This serves as a signal about a lack of potassium, iron or lighting deficiency in the soil.
Use potassium sulfate, dissolving 1 tbsp in 10 liters of liquid. l. fertilizers Consumption - 500 ml/bush. For irrigation, take 5 g of powdered iron chelate for a 10-liter container of water. The norm is 1 l/10 m2.
most pest is the mole cricket. The drug “Grom” is used to fight. You need to pour 1 tsp into the discovered holes. powder and then water the beds.
Planting tomatoes Batyanya for seedlings
Before planting, your own seeds must be disinfected; to do this, they are placed in a weak solution of potassium permanganate, and then in a growth stimulator.
Photo of planting tomato seeds
Typically, seed should be sown in such a way that no more than 2 months pass from the moment the sprouts appear until the adult seedlings are transplanted to a permanent place.
Overgrown seedlings will take a long time to acclimatize in a new place and get sick longer than normal seedlings. Such seedlings often do not develop the lower racemose inflorescences on which the largest tomatoes ripen.
How to care for tomatoes
The productivity of tomatoes depends on the organization of their care. In greenhouse conditions, before fruiting begins, tomatoes are kept at a temperature of +19...+22 °C. When entering the flowering phase, you need to reduce the air humidity to 50%.
The drier it is, the easier it will be to separate the pollen from the pistils. For pollination to be successful, aeration alone is not enough. It is necessary to shake the upper flower beds during the daytime so that the pollen settles on the lower ones, or transfer it with cotton swabs.
Otherwise, caring for tomatoes in a greenhouse and open ground is practically the same.
Feeding
During the season, 3 feedings are carried out:
- 10 days after planting the seedlings in the ground - liquid mullein + dusting the holes with ash;
- 10–14 days after the first feeding - 500 g of bird droppings + 40 g of superphosphate per 10 liters of water;
- during the formation of the ovary - 10 g of yeast per 10 liters of water.
Watering
Water is applied directly to the root. If liquid gets on greens, it can lead to a fungal infection. Water temperature for irrigation is +18…+20 °C. Use only settled soft water.
In open and closed ground, it is best to use a drip or ditch irrigation system. This will allow you to economically distribute water and maintain optimal soil moisture, eliminating waterlogging.
Stepsoning
Small lateral shoots do not bear fruit, but take away nutrients and water, which prevents the normal development of fruits.
Important! Sprouts 3–5 cm long must be removed. If they are larger, they should not be cut off - there is a high risk of infection.
In addition to the shoots, excess brushes are removed. In greenhouse conditions, pinch out leaves and brushes every 7–10 days.
In the open ground, they focus not only on these dates, but also on weather conditions. The procedure is not carried out immediately after watering or rain; you need to wait until the soil dries.
Scheme of stepsoning in 1 shoot:
- pinching the main stem after the formation of 5–6 clusters;
- on the second shoot, the top is pinched when 1 cluster is formed;
- after setting the main number of fruits - 6–10 clusters, the remaining inflorescences are removed;
- removal of old leaves under the ovary and one above it is carried out as they ripen;
- each shoot is securely fixed to the support.
Pinching small shoots is done with clean hands - this is less damaging to the plants than pruning with a knife.
Tying and shaping the bush
Tying is carried out immediately after transplantation to a permanent place. As they grow, all shoots are fixed to the support.
Find out how to properly tie tomatoes.
There are several options for tying:
- Stakes - plants are fixed to a wooden support, which exceeds their expected height by 20–30 cm. Suitable for bushes formed into 1 stem.
- Horizontal and vertical trellises - at the beginning, at the end and in the middle of the beds, supports are installed on which the wire is attached horizontally or vertically. As the plants grow, they are fixed at different heights.
- Mesh - a mesh is installed between the beds. The design is similar to the previous one, but allows you to fix 1 plant on each side, which will save time on organizing individual supports.
The formation of a bush is possible in 1, 2 or 3 stems.
In the first case, all side shoots and brushes are removed with a knife, leaving 6–8 ovaries on the main shoot. In the second case, one strong side shoot is left, formed under the first brush. In the third case, a shoot formed under the 2nd brush is left on the bush. Important! All work is carried out with clean tools disinfected in alcohol. The main thing is not to let the juice get on your hands, and treat the tool after each plant. The presence of fungal spores in the soil or on plants is not immediately noticeable, but they are transmitted with juice from a sick tomato to a healthy one.
Loosening the soil
After each watering, application of liquid fertilizers and rain, the soil is loosened and then mulched. The optimal aeration depth is 5 cm near plants, 10 cm between rows. Simultaneously with loosening, weeds are removed.
Preparing soil and containers
Many summer residents purchase ready-made nutrient substrate in specialized stores for growing vegetable seedlings. But you can cook it yourself. To do this, mix garden soil, humus and compost in equal proportions. To make the soil more fertile, wood ash and fertilizers containing phosphorus and potassium should be added to it.
Photos of soil and container preparation
A nutrient substrate prepared at home should be calcined in an oven heated to 180 degrees for 30 minutes to disinfect. This procedure should be carried out 12-14 days before planting the seeds, so that the beneficial microflora has time to recover in the soil. There is another way to disinfect soil - spill it with a weak solution of potassium permanganate; after complete drying, the substrate can be laid out in containers.
Before use, containers should also be washed with a weak solution of potassium permanganate, dried and filled with prepared nutrient substrate. Seeds are planted in grooves made in the soil - their depth is about 1 cm, and the distance between rows is about 2.5 cm.
The seed material is sprinkled with soil on top, sprayed from a spray bottle and covered with plastic film or glass. Containers with planted Batyanya tomato seeds are placed in a shaded, warm place with a temperature of about 24 degrees.
Stages of cultivation: from seedlings to harvest
The Batyanya variety is represented on the seed market. Since these excellent tomatoes are not a hybrid variety, gardeners can later collect seeds and propagate tomatoes themselves. Sowing of seeds should be done 60-65 days before the planned time of planting in the ground.
Important! Sowing seeds for seedlings does not need to be done too early. If you plant “overgrown” Batyanya tomato bushes in the ground, then such plants often lose the first fruit cluster, which is the largest-fruited.
Soil preparation
It is recommended to prepare the soil for seedlings in advance - it is advisable to do this in the fall. Features of soil preparation:
- the mixture should be made up of soil, humus, compost;
- You can add wood ash, potash, and phosphorus fertilizers.
Germination, picking, hardening
The first shoots appear within a week. After this, they need to be kept in a lighted place at + 24-26 ° C.
Seedlings should be picked after the appearance of the second pair of true leaves.
Plants can be transferred to a greenhouse or garden beds after 55-60 days. 2 weeks before this, it is necessary to harden the seedlings: every day for 10-15 minutes you need to bring boxes with plants from a warm room into fresh air or open a window for ventilation.
Landing in the ground
Young tomato bushes are planted in the ground according to a 50 x 40 cm pattern. Planting density is 2-3 bushes per 1 sq.m. To obtain a high yield, the crop is formed into 1–2 stems. The stepson under the lower flowering brush is used as a second growth point. Many gardeners note that it is possible to form 3 stems.
In order for the Batyanya tomato to please you with its harvest, it is necessary to provide the plants with fertile soil. This is especially important to do in small plots with a small usable area and where crops are planted in one place every year. The Batyanya variety produces large yields in well-drained areas with light soil. Acidic soils must be limed beforehand.
Advice! The best predecessor plants for Batyanya tomatoes are cucumbers, onions, carrots, and cereals. It is not recommended to plant tomatoes in an area where zucchini, potatoes, and other nightshade crops previously grew.
Further care of seedlings
The first sprouts appear 5-7 days after sowing the seed. The film should be removed and the containers should be moved to a bright place. The room temperature is not reduced during the entire time of growing seedlings.
Water the plants as the top layer of soil dries out.
The water should be filtered and at room temperature. If you water seedlings with cold water, they may develop blackleg.
If the young plants have grown too densely, then after at least a couple of true leaves appear on them, you need to pick. The sprouts are carefully picked up with a thin sliver and transplanted into separate cups.
Photo of tomato seeds Batyanya
A couple of weeks after picking, Batyan tomato seedlings can be fed with any fertilizer containing nitrogen. When fertilizing tomato seedlings, you must strictly adhere to the dosage specified in the instructions.
The second feeding is carried out a couple of weeks after the first, but no later than 10-12 days before transplanting the grown seedlings to a permanent place.
How to form tomatoes Batyanya - video
On a note!
12-14 days before transplanting Batyanya tomato seedlings into open ground or a greenhouse, it must be hardened off. To do this, containers with seedlings are taken outside for a short time at first, but gradually the time spent by young tomatoes on the street is increased so that they get used to future growing conditions in advance.
The distance between adjacent plants in rows should be 0.5 m, and the row spacing should be at least 0.4 m. Experienced vegetable growers recommend planting no more than 3 bushes of this variety per square area.
The soil on the site should be loose and fertile. To do this, in the fall, organic matter is added to it for digging, and in the spring, mineral fertilizers and wood ash are added to the planting holes.
How to grow seedlings
To get high-quality seedlings, you must adhere to the rules of agricultural technology.
Seed preparation
Preparation of planting material is carried out to accelerate the germination of seedlings and increase the resistance of tomatoes to diseases. This helps increase productivity. Preparation consists of several stages.
Sorting
Heavy and large seeds are selected for planting. They contain large amounts of nutrients that are required for the formation of the plant. The seeds are poured into a solution prepared from 200 ml of water and 1 tsp. table salt. Then stir for 2-3 minutes and settle for 10 minutes.
Only those seeds that have sunk to the bottom are suitable for planting. They are washed with clean water and dried in a dark room. Planting material should not be placed near heating appliances. Seeds that float to the surface are thrown away.
Heat treatment
Warming up increases the germination of planting material. The easiest way is to use an incandescent lamp . The seeds are kept under it for 3-5 hours. You can put them in a gauze bag and put them on the battery 2-3 days before planting. Also, the seeds are heated for 2-3 hours in an oven preheated to 50-60˚C.
Disinfection
This stage helps protect tomatoes from diseases. The seeds are soaked for 20 minutes in a 1% solution of potassium manganese. But first they need to be filled with water for a day. After treatment with potassium permanganate, the planting material must be washed. For etching, a 3% solution of hydrogen peroxide heated to 40˚C is also used. The seeds are kept in it for 7-8 minutes. Then they need to be dried.
Dressing is also carried out dry using a fungicide. For example, Fundazol, which is mixed with seeds. For 1 kg of planting material, use 5 g of fungicide. Disinfection with the wet method is carried out five days before planting, and with the dry method - two days.
Nutrient treatment
The day before planting, the seeds are placed in a solution of nutrient preparations:
- Epin (1-2 drops per 100 ml of water);
- Virtan-Micro (10 g per 1 l);
- Immunocytophyte (1 tablet per 150 ml);
- sodium humate (1 g per 2 l);
- potassium humate (50 ml per 10 l).
Water for solutions is heated to 45˚C.
Soak
This procedure is not mandatory. But it allows you to get seedlings 2-3 days earlier and increase the resistance of seeds to cold soil. They are placed in a gauze bag and kept for 12 hours in water at a temperature of 25-30˚C. After this, the planting material is dried. The water is changed every 4-5 hours.
Germination
To speed up germination and get an early harvest, the seeds are germinated. Place a cotton cloth in a plate and fill it with warm water. Seeds are sprinkled on top. Then they are covered with moistened gauze or cloth and placed in a room with a temperature of 20-25˚C.
Hardening
Hardened seeds have high resistance to adverse weather factors. They need to be placed between two layers of cloth or gauze, filled with warm water and placed on the radiator. After 3 days they should swell. Then the planting material is placed in the refrigerator for 20 hours, after which it is kept in a warm room at 20˚C for 6 hours. The procedure is repeated for a week.
Bubbling
For this procedure you will need an aquarium compressor and a jar. The container is filled with water at a temperature of 20˚C, and a hose is attached to the bottom through which air is supplied. Seeds are placed in a jar for 12 hours. This helps saturate them with oxygen. The seeds are then dried until they crumble.
Container and soil
For seedlings, you need to prepare boxes, pots or plastic cups with a height of at least 10 cm. The soil mixture can be purchased at the store. It should be mixed with garden soil in a 1:1 ratio and add chalk or dolomite flour (2 tbsp per 10 l). The basis of store-bought mixtures is peat. It does not allow moisture to pass through well and has a high level of acidity.
Many gardeners prefer to make their own substrate. Several mixtures are suitable for tomato seedlings:
- Mix turf soil, peat and humus in equal quantities, add 1 tsp to a bucket of mixture. urea, 1 tbsp. l. potassium sulfate, 3 tbsp. l. superphosphate and 1.5 tbsp. l. ash;
- Mix 0.5 parts of mullein, 1 part of sawdust and 3 parts of peat or 1 part of turf soil, 4 parts of peat and 0.25 parts of mullein, add 1 g of potassium chloride, 2 g of superphosphate, 10 g of ammonium nitrate and 3 kg to a bucket of soil river sand;
- mix 1 part of soil and compost, 2 parts of peat, add 10 g of potassium and urea, 30 g of superphosphate and 200 g of ash into a bucket of the mixture.
The soil for the substrate cannot be taken from the area where tomatoes, peppers, potatoes or eggplants grew. The soil is first disinfected to destroy pathogenic microorganisms. It is poured with boiling water, then laid out on a baking sheet in a layer of 5 cm and sent to the oven, preheated to 90˚C for 30 minutes. For disinfection, the soil is also placed in the freezer for 5 days, then kept warm for a week and again exposed to cold.
Sowing
First, drainage material is poured into the container in a layer of 1.5 cm. Expanded clay, sand or fine gravel are suitable for this. Then the box or pot is filled with soil and grooves 1 cm deep are made in it at a distance of 3-4 cm. The seeds are placed every 1-2 cm. The grooves are sprinkled with earth. You don't have to make any indentations. Planting material is laid out on the surface and covered with a 1 cm thick layer of earth.
Seeds require a humidity of 80-90%. To ensure the necessary microclimate, they are covered with glass or film, which is removed after 2 weeks. The containers are placed in a room with a temperature of 20-30˚C. At 20-25˚C, the sprouts will sprout in 5-6 days. If the room is 25-30˚C, this process will take 3-4 days. Shoots will appear even at 10˚C, but this will take 2 weeks.
Growing and care
When sprouts appear, the container is transferred for 7 days to a place with a temperature of 10˚C at night and 12-15˚C during the day. Then the seedlings are again moved to a warm room. This is necessary to prevent the plants from being pulled too hard.
Water the seedlings with warm water at a temperature of 22-25˚C, which is pre-settled for 12 hours. To do this, use a spray bottle. Cold water should not be used, as this will lead to the development of root rot and blackleg.
The regularity of watering is determined by the condition of the soil. It shouldn't dry out. But the substrate should also not be allowed to become overly moist. Plants are watered under the stem. This can be done using a syringe without a needle.
To ensure that the sprouts receive enough light, the container is placed on the windowsill on the southwest or south side. If this is not possible, you need to illuminate the plants with lamps for 16 hours a day. After 10-18 days, when the sprouts have 2 leaves, you need to dive. Each plant is transferred to a 200 ml container. The soil is first watered abundantly, after which the sprouts are dug out with a picking peg or a teaspoon and replanted together with a lump of earth.
Some gardeners trim 1/3 of the central root. But other vegetable growers consider this an unnecessary procedure. Restoring damaged plants will take a week. After 15-20 days, repeat picking is performed. The seedlings are moved into 1 liter pots.
After the first picking, the plants are fed. To prepare the mixture you will need:
- 10 liters of water;
- 10 g potassium salt;
- 40 g superphosphate;
- 8-10 g of ammonium nitrate.
After 8-10 days, the tomatoes are fertilized a second time with a solution of the following components:
- 10 liters of water;
- 20 g of potassium chloride;
- 15 g ammonium nitrate;
- 70 g superphosphate.
You can use chicken manure. It is diluted with water in a ratio of 1:10. Add 60 g of superphosphate to 10 liters of composition. 2-3 days before moving the seedlings into open ground, carry out the third feeding. For this use:
- 60 g of potassium chloride;
- 40 g superphosphate;
- 10 g ammonium nitrate;
- 10 liters of water.
4-5 days before planting, they begin to harden the seedlings. The containers are taken outside or onto the balcony for 2-3 hours. Then hardening is extended. Tomatoes are kept in the open air for 6-8 hours. Lower temperatures, exposure to wind and sun help seedlings adapt to growing in open ground conditions.
SUPER FEEDING TOMATO DURING FLOWERING TO INCREASE YIELD
Further care for tomatoes Batyanya
Although the Batyanya tomato variety does not require special care, some agrotechnical measures must be carried out in order to obtain a high yield as a result.
INTERESTING!
Why do the leaves of tomatoes in a greenhouse dry out and turn yellow?
Irrigation regime
Batyanya tomato should be watered regularly, but not too much.
After watering, the soil should be saturated with moisture to a depth of about 0.3 m. Typically, moderate watering should be carried out once every 3-4 days.
Features of care
Water the Batyanya tomato moderately, but make sure that the soil under the bush does not dry out, but is moderately moistened. Due to excess moisture, ripening fruits will burst. If the summer is very hot and dry, you will have to water more often, sometimes every 4-5 days. Try to moisturize only with warm water so that the roots do not suffer from sudden temperature changes.
Recent Entries
Lilac perennials that are beautiful, compact and do not crowd out other plants Why when buying seedlings you should not take the sellers’ word for it and how to determine the age of the plant using 3 signs Tomato seedlings have turned purple or whitish: why the color has changed and how to save the plants
The best method of watering is drip. It protects the leaves and stem from water droplets. To prevent moisture from evaporating too quickly, loosen the soil after watering and use mulch.
Drip irrigation is considered the most acceptable when watering tomatoes
Feeding is carried out 2 times a month. The most successful combination of minerals that affect the quality and quantity of the crop is nitrogen, phosphorus and potassium in combination with other microelements. The most suitable fertilizers are:
- Agricola;
- Fertika;
- Vermicompost.
These fertilizers are applied in the form of a solution to pre-moistened soil to avoid burning the root system.
In addition, Batyanya is not averse to eating organic food. Green fertilizer, which is easy to prepare yourself, will be especially useful. For this, weeds collected from the area, such as nettle, will be useful. It is recommended to add wood ash to the prepared infusion.
Many gardeners needlessly ignore foliar feeding. The minerals absorbed by the leaves allow the plant to be nourished much faster than conventional root feeding. Such fertilizing can be done with Kemira solution. But remember that the foliar method is carried out with a very weak solution, preferably in the evening.
Foliar feeding of tomatoes helps improve the quality of the crop
Photo gallery: fertilizers for feeding tomatoes
You can feed tomatoes with Agricola fertilizer
Vermicompost is ideal for processing tomatoes
Fertika fertilizer contains substances necessary for tomatoes
Diseases and pests
Batyanya has powerful Siberian health, especially, as the originators emphasize, the variety is resistant to late blight. If you adhere to the correct agricultural technology, then the plant is not afraid of diseases and pests. But preventive treatment once every 2 weeks must be carried out.
Particular attention is paid to preventive measures when growing tomatoes in a greenhouse.
To combat these problems, well-known chemicals are used:
- Bordeaux mixture;
- copper sulfate;
- Ridomil Gold;
- Fitosporin.
Photo gallery: drugs to combat tomato diseases
The drug Fitosporin allows you to cope with diseases of tomatoes Copper sulfate is used to treat tomatoes if there are problems
The drug Ridomil Gold helps with many diseases of tomatoes
Bordeaux mixture is used for various diseases of tomatoes
Reviews from those who planted Batyanya tomato in their garden
Tatyana, 44 years old, Ryazan: I have been growing this variety for the fourth season. I immediately liked the Batyanya tomato for its unpretentiousness and duration of fruiting, as well as the possibility of collecting seed material for further planting. I grow this tomato with 2 stems, and I get fairly large fruits in the lower part of the bushes and medium-sized fruits in the upper part.
Natalya, 55 years old, Chelyabinsk region: In my garden, I grow the Batyanya tomato in a greenhouse and get large yields, growing bushes even with 3 stems. But this variety still has one drawback - it is poorly stored, the fruits should be processed almost immediately after picking, otherwise they begin to quickly deteriorate.
The Batyanya variety is one of the early ripening and high-yielding tomatoes, intended for cultivation in most Russian regions.
Despite the fact that this tomato was recently bred, many summer residents are already actively growing it in their garden plots.
Recently searched:
Common nightshade diseases
Tomato, more often than other nightshades: pepper, eggplant, potato, is susceptible to fungal diseases - late blight and alternaria. They are equally dangerous. They can destroy all plantings. Breeding scientists suggest using the drug “Ordan” as a preventative measure every 14-20 days. Prevention will allow plants to grow longer.
The drugs Quadris and Maxim (fungicides) help prevent diseases. There are old proven remedies: copper sulfate, Fitosporin, Profit Gold.
Representatives of natural farming describe their methods.
In 200 gr. add 100 grams of warm water. garlic, leave for 3 days, add 1g. potassium permanganate. Mix everything thoroughly, filter and spray the bushes every week.
