Pepper is a very valuable food product. It is the leader among vegetables in terms of vitamin C content and, according to this indicator, holds third place in the ranking of plants consumed by humans. A large amount of vitamin P, which promotes the absorption of ascorbic acid, makes pepper indispensable in strengthening the heart muscle and the entire cardiovascular system as a whole.
Chili pepper, thanks to its many vitamins (more than 40) and minerals (about 20), is an excellent preventative against cancer, hypertension, type 2 diabetes, and infectious diseases.
Biological features
This herbaceous plant is essentially a perennial, but is grown as an annual. In total, there are four types of peppers in nature. And only one of them, Mexican, is a cultivated crop. The flowers are white, bisexual, the fruits of sweet peppers are from 5 to 22 cm, and those of hot peppers are smaller - from 1.5-2 to 5-7 cm. A sweet variety, when crossed with a hot one, can produce bitter fruits.
To maintain the purity of the variety, two different types of pepper are grown at a distance of at least 2 meters from each other.
Peppers are a heat-loving crop, predominantly neutral or short-day; seed germination occurs at a temperature of +8-13 C. The most favorable environmental factors for plant development are temperature conditions in the range of 18-25 C, air humidity not lower than 60 percent.
Lack of moisture in the soil leads to slower growth and, ultimately, to the death of the plant. For high yields, intensive feeding with humus and moderate illumination are required. It is better not to plant pepper on heavy soils, as well as on soils with high acidity and rich in salts.
It is recommended to grow peppers in areas that require improvement.
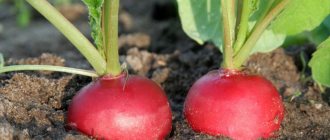
Harvest and storage
Peppers must be harvested as the fruits ripen. There are two phases of pepper ripeness - biological and technical.
The period between them is about 20-25 days. In the technical ripeness phase, the fruits have already grown to the size that is characteristic of a particular variety, but have not yet acquired the necessary color.
Not everyone knows that fully ripened fruits are stored very poorly - they must be immediately processed or eaten. If it is not possible to process ripe fruits, it is better to collect peppers that are not quite ripe, in the so-called technical ripeness phase.
It is better to collect fruits once a week. You should not delay harvesting, as it may lead to a slowdown in the growth of other fruits. The entire harvest is harvested only if there is a threat of frost, which the pepper cannot withstand at all.
It is necessary to collect peppers very carefully so as not to touch the flowers and those fruits that are in the growth phase. During the season it is possible to collect approximately 3-5 harvests from one bush.
- If you did not have time to harvest the peppers in a timely manner, and they are already biologically ripe, they should be used immediately as soon as they are removed from the branch, since they will be stored very poorly.
- But if you harvest at the stage of technical maturity, then the peppers can be stored in a cool place for up to 2-2.5 months. The fruits will gradually ripen without losing their marketable and nutritional qualities.
It is enough to take the pepper out of the cellar or refrigerator, put it in a sunny place, and after a while the fruit will change its color.
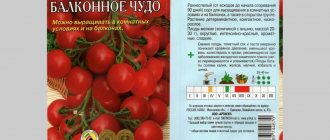
Recommendations for choosing a variety
Depending on the timing of ripening, pepper varieties are divided into three groups: early-ripening, mid-ripening and late-ripening.
Early ripening varieties of sweet peppers:
- Lumina;
- Ivanhoe;
- Marinkin Tongue.
Mid-season varieties
- Atlant;
- Ultraviolet F1;
- Atlas large-fruited.
Late varieties of pepper
- Night F1;.
- Paris F1;
- Albatross F1.
Hot peppers
- The Dragon's Tongue fully lives up to its name. The fruits weigh about 60 g, 12 cm long, bright red.
- Pepper For Mother-in-Law is very similar to Dragon's Tongue, only the weight of one pepper is a little more - up to 65 g.
- The smaller (only 25 g) early-ripening hybrid Gorgon is rich, with fleshy pulp.
- Spicy varieties also include Chinese Fire, Dagger, Adjika, Indian Summer and others.
Semi-hot pepper
Red Lightning F1. The plants of this hybrid are tall and spreading, long dark red fruits ripen on them in the shape of a narrow cone, weighing 100 g, with a wall thickness of up to 4 mm.
There are varieties of this vegetable intended for cultivation only in greenhouse conditions. However, below we will talk exclusively about those varieties that are capable of producing a harvest without requiring isolation from the external environment.
Pepper varieties for open ground
Varieties that feel great in open beds can be either early, mid, or late. With different yield indicators, fruit sizes, trunk heights, they have different taste qualities, wall thickness and color. Of the most popular, three varieties can be distinguished:
- Chardash is very early, characterized by high yield (13-17 fruits on one trunk, 200-220 g each);
- Funtik is a low-growing plant, red peppers, cone-shaped, walls up to 7 mm thick, weight of one - about 180 g;
- early ripening Yunga is a very tasty variety with red fruits, weighing up to 180 g, yielding a harvest of 8–15 pieces. from a plant.
Gift of Moldova, Silver, Cockatoo, Orange, Leader of the Redskins, Prince, Swallow, Red Elephant, Corvette, Siberian Prince are also suitable for growing in open ground.
Non-standard methods
In addition to the traditional method, you can cultivate bell peppers as follows:
- In barrels , the bottom of the container is removed, drainage holes are formed and filled with soil, alternating raw materials for compost with ordinary turf. The lower leaves of the planted bush are torn off and covered with soil (10 cm layer), then covered with film. As the pepper grows, the procedure is repeated. As a result, the barrel is gradually filled with soil to the brim. From this point on, the film is removed, and the crop is cared for in the same way as with traditional cultivation.
- The Chinese method - the seeds are sown in cassettes and covered with a layer of soil up to 6 cm thick. After the formation of the seventh full-fledged leaf, the tops are pinched, which is why the growth of the bushes slows down, and all the plant’s forces are spent on the formation of the root system.
Important! Despite the later ripening of fruits, the yield when grown using Chinese technology is much higher.
Cultivating ornamental peppers at home
Caring for decorative peppers follows almost the same principle as caring for indoor flowers. A suitable place for the plant is window sills facing west or east: additional lighting will be needed here only in autumn or spring.
The room is periodically ventilated, avoiding the slightest drafts. Optimal temperature: during the day +23+25°С , at night – several degrees lower. The level of air and soil humidity should vary in the range of 60-70% ; at lower levels, the crop is sprayed with water.
Important! In the warm season, containers with pepper are moved to the balcony or placed outside (if possible); when the temperature drops, they are returned to their original place.
Watering is done moderately so that the soil is constantly slightly moist. Every 14 days, peppers are fed with compounds containing nitrogen.
To increase productivity and give the bush a decorative appearance, the main shoot of the plant is pinched immediately after the first flower appears on it, thereby stimulating branching. As they grow, shoots that interfere with their decorative properties are removed, and branches of perennials that will no longer bear fruit are cut off.
During long-term cultivation in winter, the plant is provided with additional lighting, the soil is moderately moistened, loosened, and fertilized from time to time. Fungicides are used to control pests, and preparations containing copper are used to combat diseases.
Features of growing black peppercorns
Due to its excessive heat-loving nature, cultivation of this plant in open ground is impossible even in the southern territories of the country. If the temperature drops below +10°C , the crop dies.
To grow at home, you can use regular spice from the store with a suitable shelf life: up to 1 year from the date of collection. The optimal time for planting is May or June. Black pepper is usually planted in orchid soil.
During the growth process, as the soil dries out, watering is carried out, and during the growing season, mineral fertilizers are applied twice. The plant is replanted 2 times a year, and its length is adjusted by pruning. The first fruits appear only in the 2nd or 3rd year .
Important! Small whitish drops that appear on the inside of a plant leaf are normal and do not indicate the occurrence of any disease.
Basic criteria for choosing seedlings
One of the main indicators of high-quality seedlings is a powerful root system. Despite the fact that the pepper has a taproot, the lateral roots should be fresh, branched, preferably with the remnants of the soil in which it grew. It’s even better when the plant is taken with a clod of earth. The ideal option would be pickled seedlings (plants transplanted into a separate container, buried in the substrate for the entire length of the stem to the lower leaves).
If the seedlings are not peaked, the stems should not be overly elongated, thin, or brittle. It is necessary to select specimens with the same leaves - by size, color, density.
The presence of spots, damage, and lethargy of leaves are signs of low-quality planting material - it is better not to buy such plants. The number of leaves on one trunk plays an important role - there should be 8-9 of them. A bush with a lot of leaves is considered to be overgrown; it gets sick longer and adapts more slowly.
It is better to buy seedlings just before planting, preferably in cloudy, windless weather.
Botanical description
Pepper (Capsicum annuum L.) is an annual plant belonging to the nightshade family. The shape, color, and size of the fruit are varietal characteristics. Pepper is native to Central and South America, where it was grown long before Columbus's expeditions.
| Characteristic | Photo |
| Root system. The root is a taproot (after picking the seedlings it becomes fibrous), grows to a depth of up to 90 cm. Like a tomato, numerous lateral roots are formed, growing up to 40 cm in diameter. On the main root, at the root collar covered with soil, adventitious roots may appear. Pepper is sensitive to damage to the root system and does not regenerate underground parts well. | |
| Stem. The main stem is straight, rigid, grows up to 60-80 cm - depending on the variety. Branches at the top. In some cases, branching may occur at the base of the shoot. At a later stage, the main shoot becomes woody. | |
| Flowers. Peppers are self-pollinating. Small, white flowers form on the shoots, in the corners of the leaves. |
Soil preparation
For a bed for peppers, it is better to select an area with light soil that can absorb moisture, where pumpkin and legumes, as well as carrots or onions were grown last season, but in no case eggplants or potatoes. Particularly unfavorable predecessors are nightshades. Fertilizers are applied to the dug up area in the fall: superphosphate (30-50 g x 1 m2), wood ash (50-80 g) and 5-10 kg of necessarily rotted (in no case fresh) manure. In early spring, soil fertilization is repeated (30-40 g of potassium and 20-30 g of nitrogen fertilizers per 1 m2). Before planting, the soil is loosened and leveled.
Choosing the right landing site
Careful care of bell peppers will be in vain if the wrong place for planting it is initially chosen. The place for gardening must meet the following requirements:
- The soil is fertile, drained, with the ability to retain moisture.
- Sufficient sunlight, but diffused.
- Protection from strong winds and drafts. If such a place cannot be found, you can build a protective curtain for the vegetable, which is used on windy days.
You also need to pay attention to your garden “neighbors”. It is recommended to plant peppers next to garlic and onions; they will protect the plant from harmful insects. Tansy, thyme, basil will attract pollinators to the pepper.
Attention! It is not recommended to plant eggplants, tomatoes and potatoes next to peppers. These vegetables need the same nutrients as peppers, and they suffer from the same diseases.
How to properly disembark
Pepper seedlings can be planted in completely open ground only at the end of May. For planting work, it is better to choose a cloudy day, the second half of it. If the weather is rainy, you can plant in the morning. Seedlings grown in a greenhouse in the same garden where they are transplanted must be watered abundantly the day before and dug up immediately before transplanting. Planting material purchased in advance should be stored with a lump of earth, also moistened with plenty of water.
After planting, you need to water with warm, settled water.
Planting pattern: 60-70 cm between rows and 20-30 cm between plants. 1-2 liters of water are poured into each hole. If the seedlings were purchased in one lump of earth, you must first very carefully separate the roots of each plant. Picked seedlings are removed from the cups along with the soil.
Each individual plant is placed vertically on the bottom of the hole and covered with earth so that 2-5 mm remains from the surface to the lower leaves.
When and how to transplant pepper seedlings into open ground
Plant seedlings in the late afternoon, when the sun begins to set. But if the weather is cloudy, it is possible during the day. If you plant when the sun is hot, the seedlings will quickly wither and it will be difficult to restore them. Ideally, if the weather is rainy, then the soil will be moist and the seedlings will be easy to adapt.
Before planting, the seedlings must be well watered, then they will be easy to remove from the pots.
Plants must be removed very carefully. Peppers are planted together with a lump of soil in which they grew. This way the plants will take root faster.
Disembarkation dates
Pepper is a fairly heat-loving crop that does not tolerate low temperatures well, so the time for planting seedlings in open ground is determined by climatic and weather conditions.
It is recommended to plant seedlings in the garden bed only after the air temperature rises to at least +15°C and the soil warms up to +10-12°C.
Pepper seedlings cannot be planted in unheated soil, as they will stop growing and developing.
- The most suitable time for planting seedlings in open ground in central Russia is considered to be mid-May - early June.
- In the southern regions, the planting period can be shifted a week or two earlier.
Planting scheme
The arrangement of seedlings in the garden bed will depend on the method of watering and the height of the variety.
- For low-growing pepper varieties, the distance between rows should be about 50-60 cm.
- For tall and voluminous bushes, it is necessary to leave at least 70 cm between rows.
Distance between bushes:
- 20-25 cm for low varieties;
- 30-35 for medium varieties;
- 40-45 for high grades.
Peppers can also be planted in a square-cluster method, placing them at the same distance (60x60 cm) and planting 2 stems in one hole at a time.
If drip irrigation of plants is provided, then pepper seedlings are planted in a strip pattern according to the pattern 90+50x35-45 cm.
If the seedlings are planted too densely, they will not receive the required amount of sunlight. In addition, it will be difficult to loosen and fertilize the soil.
IMPORTANT! The size and number of its fruits depends on the planting pattern of peppers. If the plants are planted according to the 90+50x35-45 cm pattern, not many fruits will be produced, but they will all be quite large. If the plants are planted more densely, this will allow you to get more fruits, but they will be medium or small in size.
Additional frost protection
It is impossible to delay planting seedlings in open ground until the onset of stable warm weather.
There are two reasons for this:
- In hot weather, the planted seedlings will not take root well and may even burn.
- Overgrown seedlings that have already produced buds will drop them and part of the harvest will be lost.
Therefore, peppers must be planted when the night temperature is not yet ideal for the plants. And there is a threat of spring frosts almost until the end of May.
Temporary shelter for planted seedlings will help solve the problem with fluctuations in air temperature.
- To make such a shelter, you need to place arcs over the bed and cover them with film or agrofibre. This method of shelter, in addition to warmth, also makes it possible to protect the seedlings from the hot sun in the first few days after planting.
- The material thrown over the arcs must be secured below with bricks or sprinkled with earth. During the daytime, such a shelter can be opened slightly from one end.
About a week after planting the seedlings in the ground, when the plants have taken root, the cover can be removed for the day.
The shelter should be left at night until mid-June, since the night temperature is not yet comfortable enough for peppers.
Watering and fertilizing
On the second day after planting, the seedlings are again watered abundantly. Over the next two weeks, 1-2 liters of water are poured under each root every 2-3 days. When the sun is scorching and there is no rain, watering is done daily, preferably closer to sunset. At the end of the first week, new plants are planted in place of the dead ones. After two weeks, the amount of water is reduced to 0.5-1 liter (depending on the weather). If the entire plant from the top to the soil begins to darken, reduce watering even more. Experienced vegetable growers advise during this period to switch to so-called “thin” watering, the essence of which is to water less, but more often.
It is very important not to overdo it with watering during flowering and ovary formation - excess moisture causes mass falling of flowers and fruits.
You can determine the need for watering by the wilted leaves - if the leaves withered on a hot day did not rise after the night and remained limp, then in the evening it is time to water the seedlings.
When the first small peppers appear on the bushes, the frequency of watering should be gradually increased to 2 times a week.
Approximately on the tenth day after planting, a fertilizer solution is applied to each plant. To prepare it, take 1 kg of slurry per 4-5 liters of water or 1 kg of bird droppings per 10-15 liters of water. Wood ash (150-200 g) or potassium chloride (15-20 g), as well as superphosphate (40-60 g) are added to every 10 liters of solution. This composition does not include ammonium nitrate.
If the solution is not made from bird droppings or slurry, 15-20 g of saltpeter must be added. In total, from the moment the seedlings are planted until the last harvest is harvested, 3-4 feedings are necessary. Dilute the resulting solution again, 1 liter of fertilizer per 10 liters of water. For each plant it is necessary to apply 0.8-1 liters.
It is better to do the second and third feeding at the beginning of the formation of the ovary and ripening of the fruit. During this period, the need for nutrition increases several times. In water feeding (without the use of organic matter), the content of ammonium nitrate is increased.
The last fertilization of the soil under pepper must be timed to coincide with the ripening of the remaining part of the crop, when the fruits begin to shrink, curl, and acquire a natural color until they reach their normal size.
Preparatory work before planting seedlings in the ground
The process of planting pepper seedlings in unprotected soil is considered a very important point, so it must be approached with maximum responsibility. The further development and productivity of peppers will depend on how the seedlings are planted in the garden.
Choosing a landing site
To plant peppers, it is better to choose a sunny and draft-free area, as they need good lighting and do not like strong winds. It is best to provide the plants with natural protection from the wind in the form of other crops, or make a small wicker fence.
- The soil must be nutritious, sufficiently loose and at the same time retain moisture well.
- It is very important that there are no weeds or remnants of other crops at the intended planting site.
When choosing a place to plant pepper seedlings, you need to pay attention to the fact that it is not recommended to plant pepper in the places where it grew the previous year.
Undesirable precursors for pepper are:
- potato;
- tomatoes;
- eggplant;
- physalis;
- tobacco.
To plant peppers, you should choose an area where they grew last year:
- cucumbers;
- cabbage;
- legumes;
- pumpkin;
- beet;
- carrot;
- greenery.
Preparing the beds
The area for planting seedlings must be prepared in the fall. Immediately after the entire crop has been harvested, the bed needs to be dug up using a shovel. All plant debris must be removed.
The clods should not be broken - this will allow the soil to freeze better in winter, and most of the bacteria and pest larvae in it will die.
In spring, the soil must be disinfected with a solution of copper sulfate.
You need to take 1 tbsp. a spoonful of vitriol per 10 liters of hot (70-80°C) water. For 1 sq. meter will need 1-1.5 liters of solution. Next, the entire surface of the soil must be sprinkled with organic fertilizers.
The following can be used as fertilizers:
- rotted manure or peat (3-4 kg per 1 square meter);
- wood ash (1 cup per 1 square meter).
Then the soil must be dug well and leveled with a rake. Next, mark the location of the future bed and measure the required distance between the rows. 7 days before the expected date of planting the seedlings, the bed is well watered.
On a note! About 30 days pass from the moment of spring tillage to planting seedlings. To prevent the plot from being empty and overgrown with weeds all this time, you can sow early ripening greens on it: dill, salad mustard, lettuce, spinach, radishes, watercress, and coriander. 10 days before planting seedlings, these crops must be removed.
Read more in the article: How to grow pepper seedlings at home: step-by-step instructions
Loosening and mulching
The role of loosening the soil in the development of any plant cannot be overestimated. Pepper is no exception in this regard. Loose soil is better saturated with moisture and retains it not only on the surface, but also at depth. The absence of a crust on the soil allows air to penetrate to the roots of the plant, which accelerates biological processes, stimulates the growth of all its parts, and prevents moisture from stagnating and “souring.”
During loosening, weeding and removal of weeds, which weaken the seedlings and impoverish the soil, also occur.
Provided that the soil has been properly dug up in the fall and deeply loosened in the spring, pepper seedlings should not be disturbed in the next 10-15 days after planting. During this period, seedlings take root, adapt to open ground conditions, and strengthen the trunk.
The first loosening can be combined with “thin” watering, or even better, done after it. The root system of pepper is located very shallow, so shallow loosening is required - only 5-10 centimeters deep. If it was not possible to plant pepper seedlings on light soil, heavy soil must be loosened a little earlier and deeper - so that a thick soil crust does not have time to form and the roots are better warmed.
Each subsequent loosening is necessary approximately 2-3 days after the next watering or rain. Not earlier - so that the wet soil does not form into lumps, and not later - so that too thick a hard layer does not form on the surface. Early varieties of pepper are weeded 3-4 times, mid-season and late varieties - 2-3 times per season.
At the very beginning of flowering, each plant is covered with moist and loose soil.
Growing seedlings
Pepper seeds take a long time to germinate, young plants grow slowly, so in Russia the crop can only be grown using seedlings. For planting in open ground, sowing work begins in early March, in the southern regions - in late January-early February. There is no need to sow seeds very early: the seedlings will be elongated, the bushes will be weak, and the harvest will be insignificant. The optimal sowing time is 60-70 days before planting in open ground.
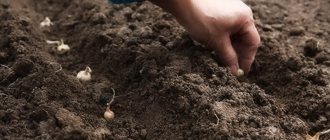
Sowing seeds
Pepper seeds do not require special preparation, but they respond to soaking with faster germination. This can be done between several layers of gauze, in clean cotton cloth or using cotton pads.
Sequence of soaking in cotton pads:
- Take two cotton pads and sprinkle seeds between them.
- Pour hot water for 5 minutes (not boiling water!).
- Squeeze carefully without removing from the discs and place in a fabric bag.
- Tie so that the seeds do not spill out.
- Place in a warm place for 2-4 days.
As soon as the seeds hatch, you can start sowing.
Pepper does not tolerate transplantation well, it begins to hurt, and is stunted in growth. Therefore, it is better to sow in peat tablets. They are pre-soaked in warm water, and the liquid nutrient composition HB-101 is added to it to stimulate growth at the rate of 1 drop of the drug per 500 ml of water. As soon as the tablet swells, place it in a container, place one seed in the middle, and cover the container with a lid. With the appearance of a loop-shaped sprout, the container is transferred under a seedling lamp.
Growing peppers before transplanting into a glass
For pepper in peat tablets, the lighting mode is important. For the first few days, the lamp should work even during the day, otherwise the shoot will grow, which is not necessary now. Starting from the fifth day, the lamp turns on at 9-10 am and turns off at 20-21 o'clock, thereby achieving the optimal duration of additional illumination of 10-12 hours. This regime is maintained until two true leaves are formed.
With watering, everything is simple: water is supplied to the pan, and the peat tablet takes as much moisture as needed. It is impossible to over-water the seedlings using this method.
When two true leaves have formed, the peppers can be transplanted into cups. A layer of expanded clay or pebbles is placed on the bottom for drainage, then the previously prepared soil is filled in. Pepper is planted together with a peat tablet; if it has a tissue shell, then it is removed.
When planting peppers, you need to make sure that the cotyledon leaves are not covered with soil.
It’s good if you can buy containers with a retractable bottom: then you can put them in trays, where you can add water for humidification. Immediately after planting, the pepper is watered generously with warm water with the addition of a stimulant. Good results are achieved by Ecogel, which accelerates the formation of the root system and prevents the development of bacterial infections. Peppers watered with Ecogel solution (2 tbsp/1 l) get sick less, are well accepted, and subsequently produce higher yields.
The transplanted peppers in cups are placed back under the lamps. Now care consists of observing the light regime and timely supply of water to the trays. It is necessary to ensure that the liquid does not stagnate, otherwise the roots will be constantly in the water, and root rot may develop. However, dry soil is unacceptable: pepper is a moisture-loving crop.
Growing before planting in the ground
In the period before planting in open ground, the light regime is important. If in the south everything is in order, then in the farms of the Middle Zone and especially in the northern regions, there is not enough sun rays even in spring. Gardeners who know a lot about growing peppers buy special metal racks for seedlings. They are convenient because as the plant grows, the phytolamps can be raised higher, maintaining the optimal distance to the crown. Ideally, there should be at least 10 cm to the light source, and the duration of additional illumination, as before, is at least 10-12 hours.
Watering should be regular, but without excess moisture. Young plants react painfully to stagnant moisture and may grow weak or die.
If soil prepared in advance was used for the peppers, there is no need for fertilizing. However, if the soil was taken from the garden and not even compost was added, a month before planting, you need to water the bushes with solutions of organic fertilizers. According to reviews, Gumistar, 2-3 tbsp, gives a good effect. which is diluted in 5 liters of water and watered over the plants.
1-2 weeks before planting peppers in open ground, hardening is carried out, and the further north the farm is located, the more attention should be paid to this point. After waiting for the first sunny day, the containers are taken outside in the morning. At first, it is advisable that the leaves should not be exposed to direct sunlight. In the evening, the pepper is brought back so that it does not freeze.
As soon as the night temperature does not fall below 15 °C, the plants do not need to be brought into the house or greenhouse, so hardening will occur faster.
Features of growing chili peppers
Growing chili peppers requires the same basic conditions as sweet peppers. But there are several features. It is necessary that there are two types of bitter pepper - tall and short.
Seedlings of the first type are planted at a distance of 30 cm, and low-growing ones - 15-20 cm from each other. To get more ovaries, you should get rid of the first buds - this stimulates vigorous flowering.
Bush formation
Low-growing varieties of pepper do not need to be shaped; this will not affect the yield in any way. Tall plants are another matter: here, if you don’t take care of the crown, good results may not be achieved. Such plants are formed in several steps, which depend on the stage of development.
Plucking the crown bud
The crown bud is the flower bud located where the shoots first branch. As soon as the pepper seedlings reach a height of 20 cm, side shoots begin to grow, between which there will be a crown bud.
If you pinch it, the bush will respond with stronger branching. As a result, more fruit-bearing shoots will be formed, and the overall yield will increase.
Sometimes the crown bud is formed in very young seedlings, in this case there is no need to wait, remove it immediately.
Pruning shoots
You can use different schemes for forming a bush, the simplest is 2-3 shoots. To do this, the bush is inspected, 2-3 shoots are selected, which grow from the place where the crown bud was. The tops of the remaining branches are pinched.
Sometimes you can leave 4 shoots, but the more branches left, the smaller the fruits will eventually be. Therefore, it is important to correctly assess the strength of the bush.
Soon branching will begin on the left shoots, and a new crown bud will form in the middle. The bush is formed again: 2-3 strong shoots are left, the rest are pinched above the bud, leaving a leaf (it will serve as a food source for the pepper located below). In a similar way, the bush is formed almost before the start of the ripening phase.
Trimming barren shoots
The pepper is shaped so that it has useless, sterile shoots. They grow below the branching point and take away the plant’s strength in vain. They must be removed.
They also tear off all the leaves that shade the bush and do not participate in fruiting. You can remove no more than two sheets at a time. Those located above the fruit are left. In addition to excess foliage, yellowed, damaged leaves are torn off: they are also of no use.
Leaves can be cut off before the first ten days of August; after that there is no point in doing so.
Pinching pepper
This final stage of bush formation is carried out in August. Pinch or trim the tops of the skeletal branches, thereby stopping the growth of the pepper. Now all the energy will be directed to the formation of ovaries and the growth of peppers.
The fruits begin to grow rapidly, the walls become denser, and ripening occurs faster. Without this stage, the bush can grow in height until cold weather, but fewer ovaries will form.
Diseases and pests
- The most dangerous pest for peppers is aphids. It settles on the leaves of the plant and feeds on its juices. It looks like very small (up to 3 mm) light green or black droplet grains stuck to the surface of the leaf, and especially on the buds. Treatment of plants affected by aphids with karbofos or keltan (1 tbsp per 10 liters of water) is very effective. It is important to remember that you cannot spray plants with them during flowering, as well as during the period of fruit ripening. In such cases, a folk remedy is suitable: a glass of tobacco dust or wood ash is steamed in a bucket of hot water. After 24 hours, filter the solution, pour in 1 tbsp. liquid soap and spray the plants (it is advisable to do this in the morning).
- If lightened spots appear on the leaves, they dry out, turn yellow, there are barely noticeable pests on their undersides, and in some places, and in advanced cases around the entire plant, a network of cobwebs is spread out - this indicates that the plantation has been attacked by a spider mite. The following mixture will help against it: onion or garlic (1 tbsp), dandelion (1 tbsp), liquid soap (1 tbsp). Vegetables and herbs are minced through a meat grinder and mixed with liquid soap in 10 liters of water. You can spray at any stage of plant development.
- Naked slugs eat not only the leaves, but also the pulp of the pepper. The resulting damage may cause the plant to die and the fruits to rot. Slugs have difficulty moving on loose soil, almost never cross deep obstacles, and are afraid of bitterness. If prevention in the form of deep furrows around the bed, frequent loosening to a depth of 3-5 cm does not help, then a teaspoon of dry mustard or ground red pepper, sprayed on each square meter of pepper plantation, will repel the slug.
- Blackleg - damage to the trunk of seedlings by bacteria under unfavorable weather conditions (lower temperatures and increased air humidity), which promote their reproduction. Sometimes it is enough to loosen the soil and sprinkle it with wood ash.
- More dangerous than blackleg are fungal diseases such as sclerocinia and fusarium. No remedies will help here - as soon as the pepper leaves begin to fall, all infected bushes should be burned immediately. The following year, this area cannot be replanted with pepper.
How to get your own pepper seeds
In order to get high-quality seeds, you need to pick only large, ripe and undamaged peppers. Then, they need to be left to ripen for a while. This will take a week, two, or a month, everything will depend on the size of the pepper and weather conditions.
When the pepper wrinkles and becomes soft, the seeds can be removed. In order for all the seeds to come out well, you need to make a cut around the stalk with a knife, and then remove all the seeds from the pepper. The seeds taken from each pepper must be poured onto a separate saucer or newspaper, and be sure to sign immediately.
The seeds must be placed in a dry, warm place until completely dry. In this form they should stand for at least two more weeks. Subsequently, the seeds are wrapped in paper envelopes and stored.
Protecting peppers from frost
It happens that frosts continue until the end of May, and even at the beginning of June. In any case, you need to be prepared to effectively protect pepper plantings from temporary cold spells, especially at night. Any of three methods will do: tent shelters, smoke screens and sprinkling.
- You can prepare in advance frames from thin bars, trellises, onto which you need to stretch any light but warm material - plastic film, cardboard, burlap.
- Smoke is provided by smoldering fires located along the edges of the beds.
- Sprinkling is the very fine dispersal of water over plants.
All these activities should begin in the evening and stop only after sunrise.
Pepper is a very capricious crop. Without certain knowledge it is very difficult to get a good result. However, with great desire and maximum effort, you can provide your family with this tasty and very healthy vegetable not only in the summer, but for the whole year.
Nutritional value
New varieties of pepper are quite resistant to the climatic conditions of the Moscow region and Moscow region; some of them allow peppers to be grown in open ground in the Urals and Siberia.
Pepper was previously often used as a medicinal and spicy plant. It is a valuable vegetable with a wide range of uses, as it has great nutritional value in addition to cooking.
Useful qualities of pepper fruits:
- They contain a lot of vitamin C - more than most vegetables. The largest amount of ascorbic acid is found in mature red paprika. The fruits of field crops contain more vitamin C than those grown in greenhouses.
- Paprika is rich in vitamin E, which is an antioxidant.
- Contains vitamins B1, B2.
- Rich in provitamin A, magnesium, iron, calcium.
- Contains a lot of fiber useful for digestion.
- Capsaicin is responsible for the taste and pungency of hot peppers - an antiseptic and antioxidant.
Sprouting pepper seeds
In a heated room, the seeds germinate in 7-10 days. Before sowing, they should be treated and germinated: this will reduce the risk of developing diseases, and the seedlings will be friendly and appear faster.
Soaking the seeds in a solution of aloe juice and water (1:1) will help prevent root rot (blackleg) on seedlings.
- Calendar for treating peppers against diseases and pests
If you want to grow healthy and beautiful peppers, do not forget to treat them against diseases and pests. And we will tell you when and how to do it.
To germinate, simply place the seed between two moistened cotton pads and place in a warm place. Every day the seeds should be checked and, if necessary, sprayed with water from a spray bottle.
After swelling, it is recommended to harden the seeds: place them in the refrigerator for 10-12 hours and repeat the procedure after half a day. Thanks to this, the cold resistance and stress resistance of future plants will increase.
When the swollen seeds hatch, start sowing them.
Agrotechnical conditions
Bell pepper has established itself as a rather fastidious plant to grow. To create favorable conditions for its growth and development, you will have to try a lot. But knowing the agricultural technology of growing sweet peppers, you can reduce the labor intensity of this process.
Climatic conditions
This heat-loving representative of the Solanaceae family was bred by Bulgarian breeders; its homeland is South America. The semi-shrub plant has a long ripening period; 160-180 days pass from sowing the seeds to harvesting the fruits. Unlike natural growing conditions, peppers in Siberia are grown taking into account the characteristics of the cold climate. Varieties are selected with a high degree of resistance to adverse environmental factors and early ripening (Kolobok, Sibiryak, Topolin, Novosibirsky).
Soil requirements
To grow a good pepper crop on your plot, you need to take into account the requirements of the vegetable crop regarding the composition and structure of the soil. Best of all, the semi-shrub plant grows on light, water-breathable, fertile soil.
If the garden has sandy loam soil, then it is more effective to plant varieties with early ripening, and on loamy soil and chernozems that can retain moisture for a long time - mid-season and late varieties of bell pepper.
You should not count on a rich harvest when growing on clay and sandy soil; these types of soil are not suitable for this crop. But they can be cultivated by adding sand, brick chips, mature compost, chopped straw for heavy loam to improve digging. But for sandy soil they use clay, bone meal, composted peat, vegetable compost, and manure humus.
Crop rotation norms
To grow healthy peppers in the garden, you should not neglect the rules of fruit rotation. Every gardener should know which crops are planted after sweet peppers, and which plants are his best companions. So, if you plant bush beans nearby, this will be a natural protection against parasitic individuals that attack bell peppers. Pests cannot tolerate its specific smell, and such plantings act as an insurmountable obstacle for them. In addition, the proximity to representatives of legumes provides the southern crop with nitrogen, which it greatly needs.
To protect against through northern winds, corn is sown near the pepper plantings. Thanks to such a hedge, gardeners save young seedlings sensitive to cold. Among the predecessors, it is better to choose pumpkin, carrots, zucchini, cucumbers, and squash. These agricultural crops perfectly saturate the soil with useful components and make its structure quite loose.
A positive result is also observed when growing sweet peppers after onions and garlic. But planting it in beds where eggplants, physalis, potatoes, tobacco and tomatoes previously grew is not recommended due to common diseases and pests.
Nuances of caring for seedlings
Pepper seedlings are quite demanding on cultivation conditions. Therefore, she requires careful care:
- Provide protection from drafts and sudden temperature changes.
- For watering, use only warm, settled water. It is better to carry out the procedure early in the morning. Peppers need relatively rare (once every 4-5 days), but abundant watering. Do not allow drops of water to get on the leaves.
- After each watering, loosening is necessary. The roots of seedlings are the weakest point. If oxygen does not reach them, growth is sharply inhibited.
- Apply fertilizer twice: in the phase of appearance of the second and fourth pair of true leaves. Use either specialized seedling products (Rostock, Master, Effecton) or a weak solution of mineral nitrogen fertilizers (2–3 g/l). Natural organics will not work.
Seedlings are never fed with organic fertilizers - there is a high probability of infection
Picking, if carried out, is done in the phase of the second pair of true leaves, 2–3 weeks after seed germination. Do not pinch the roots or otherwise injure them.
Picking pepper seedlings is a rather risky procedure; if possible, it is better to do without it
Start hardening 10–12 days before transplanting into the garden bed. Take the seedlings outside first for 2-3 hours, gradually increase the time spent in the fresh air. In the last few days, you can even leave the seedlings to “sleep” outside.
Hardening will help pepper seedlings quickly adapt to new living conditions.
Video: growing pepper seedlings
What problems can you encounter when growing pepper seedlings:
- Stunted development, slow growth. Associated with damage to the roots during the process of picking or loosening, or with the use of an inappropriate (too heavy) substrate.
- Pale green leaves that roll up into tubes. Indicates nutrient deficiency.
- "Blackleg". Softening of the base of the stem, its darkening due to infection. The source can be undisinfected soil; abundant watering and increased acidity of the soil contribute to the development of the fungus.
“Black leg” is one of the most dangerous diseases for seedlings, capable of destroying the future harvest already at this stage
Yellowing and falling leaves. The problem is caused by a lack of light and/or heat. Excessively elongated seedlings. The seeds were planted too early and the room temperature was too high.
Cultivation of black peppercorns
In nature, black peppercorns are a long climbing (up to 15 m) vine. The plant is very thermophilic, temperatures below 10°C are destructive for it, so in Russia its cultivation is impossible even in the southern regions. The vines have large, hard leaves and the fruits grow in clusters. Unripe peas are green, they gradually turn red.
The Russian climate is definitely destructive for the vine on which peppercorns grow.
You can try to grow this pepper at home. For planting, ordinary spice, which is sold in the store, is suitable. Pay attention to the expiration date; a year or less must have passed from the date of collection. The procedure is carried out in May-June. Suitable soil for orchids.
The plant requires the same conditions as decorative homemade peppers. The plants are watered as the soil dries, and mineral fertilizers are applied twice a month during the active growing season. Transplantation is carried out every two years, the length of the vine is regulated by pruning. The first harvest is harvested after 2–3 years.
Few people know, but the well-known spice looks exactly like this before being collected and packaged in bags; black, white, green, and pink peppers are obtained from peas
Small whitish “grains” on the underside of the leaves are normal for the plant, and not some kind of exotic disease.
Video: how peppercorns grow in natural conditions
Brief characteristics of sweet pepper
Sweet pepper is an annual plant with an erect stem no more than a meter high. Branching depends on the variety; the stems can be either bare or pubescent. The leaves have different shades of green and are ovate or lanceolate in shape. The flowers are formed in forks, the peduncles can be either drooping or erect, usually arranged in pairs or 3 pieces.
Pepper flowers appear close to the forks
The seeds are similar to tomato seeds, light yellow, up to 4 mm in size. The fruits are empty inside and can have a variety of shapes and colors. Conical and elongated conical fruits are more common, but there are also varieties with rounded fruits. Size - from miniature (1–2 cm) to very large (20–25 cm). The crop is self-pollinating, blooms in early summer, bears fruit from July until frost.
South America is considered the birthplace of pepper; it is now widespread everywhere. In Russia, most pepper is grown in the North Caucasus and the Lower Volga region. The use in cooking is varied: from fresh consumption, including in salads, to salting, pickling, preparing hot second courses, including stuffing. Pepper is used as an additive in cooking soups, preparing various meat dishes, and vegetable stews.
Choosing a suitable place for pepper
When choosing a place to plant, take into account the characteristics of the culture. Pepper loves warmth, good lighting and fertile soil with a neutral reaction. It is best suited to small hills where the soil warms up faster.
In addition, you should avoid planting in beds where other nightshades (potatoes, tomatoes or eggplants) previously grew, because The causative agents of their common diseases may remain in the soil. And when choosing a place for a plant, you need to remember that it does not tolerate drafts.
Attracting insects for pollination
In order for the pepper to be pollinated by insects, and therefore give better fruiting results, insects can be attracted. For this process, during the flowering period it is necessary to spray the plant with a sweet composition:
- 100 g granulated sugar;
- 2 g boric acid;
- 1 liter of hot water.
In addition to artificial pollination, to attract honey insects, it is recommended to place containers with honey solution near the plantings: 1 tsp. honey dissolves in 1 tbsp. hot water.
Obtaining seeds
When harvesting, you need to take care of the gene pool for the next season, because the germination rate of seeds from plants grown with your own hands, in compliance with all the rules, reaches almost 100%. The core is removed from the selected, most beautiful and largest pepper, and the seeds are separated from it. The seeds are dried naturally and stored in cotton bags for three to four years.
And a little more about selection.
Important! Although pepper is a self-pollinating plant, cross-pollination is not excluded. Therefore, when growing different varieties of sweet peppers, it is necessary to isolate the plants left for seed.
How to harden peppers?
The hardening procedure is very simple. You need to prepare the pepper for the fact that its new growth conditions will be very different from those at home: temperature fluctuations, sun, wind, irregular precipitation, pests.
If you transplant immediately, many seedlings will get sick.
Hardening helps seedlings to wean themselves from the comforts of home.
As soon as the weather outside is suitable for planting, begin taking the containers with seedlings out into the open air. First for 1 hour, the next day for 3 hours, etc. So gradually increase the time the seedlings spend outside the house. Your task is to make sure that the seedlings spend the night in the open air.
But there is no need to stretch the procedure. At first it will be difficult to determine the optimal time for hardening, but with experience you will have a full understanding of how much seedlings need to be taken outside.