Rather than worry about the quality of the substrate in which the seedlings will grow, it is better to immediately disinfect the soil before planting the seeds.
Dear readers!
For you, we have created communities on social networks in which useful articles and interesting ideas are published several times a day! Subscribe and receive useful content in a convenient format! This will eliminate many problems associated with the subsequent fight against diseases of seedlings and insect pests.
In this article we will talk about different methods of soil disinfection and find out which one is the most effective.
Why disinfect soil?
Many will ask: “Is it really necessary to disinfect the soil before planting seeds and planting seedlings?”
The short answer is yes.
The fact is that spores of pathogenic fungi, viruses and bacteria that attack plants can live in the soil. If they are not destroyed, then there will be problems during cultivation.
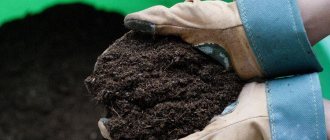
This is especially true when using garden soil as a component of the substrate for seedlings.
Garden soil is simply a breeding ground for a wide variety of pathogens. They overwinter in the soil. In addition, there may be larvae and egg clutches of pests here.
This is also why it is not recommended to use garden soil for planting seedlings.
Now about store-bought substrate.
In general, a conscientious manufacturer must take care to properly prepare the soil before selling. That is, ideally, purchased land does not need to be disinfected.
But often even such land is contaminated.
So it’s better to treat it too. Moreover, the procedure will not take too much time.
Why is this necessary and when is it done?
Disinfection of the soil is necessary, because if this is not done, the plant may die due to the development and reproduction of pathogenic microflora, for which the earth is home. Most organisms live in the top layer, and when soil is collected for seedlings, it is the top that is affected. It may also contain plant residues, which are considered good carriers of infectious diseases.
As for purchased land, it must also be processed. Although the packaging indicates information that the soil has been processed, it is still better to be on the safe side.
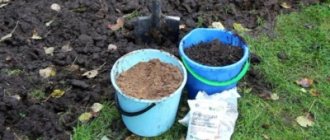
Preparing the soil for seedlings begins in autumn. It is collected in containers and left outside for the entire winter so that it can freeze. In the spring, before planting, the soil is warmed up and processed. Both folk remedies and special preparations are suitable for processing.
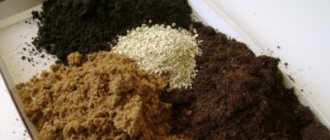
The sequence that is recommended to be followed when processing and disinfecting soil mixtures of your own production:
- Sifting the soil and removing insects, larvae, and debris from it.
- A disinfection process is carried out, which helps get rid of pathogenic microorganisms. For this, drugs or folk remedies are used. This process is labor-intensive and takes a lot of time.
- Soil fertilization. You can add finely crushed egg shells to the soil mixture.
Below we will consider in more detail the issue of land disinfection, which can be carried out in several ways. Each of the presented methods is considered effective.
What methods of soil treatment are there?
There are many ways to disinfect the soil. Let's look at each of them in more detail.
Thermal treatment of the soil before planting
Probably the simplest way to disinfect the soil before sowing seeds for seedlings is heat treatment.
We’ll talk about cold disinfection below, but now let’s talk about high-temperature treatment, namely calcination and steaming.
Calcination
During this procedure, the soil for the seedlings is heated on a baking sheet. Calcination is carried out as follows: pour the soil onto a baking sheet in a layer of 4-5 cm and place in the oven. Keep for half an hour at a temperature of 90 degrees.
Among the disadvantages of this method, it is worth mentioning the chance to destroy not only pathogenic, but also beneficial microflora. Eventually the land will become infertile and nothing can be grown in it.
Steaming
This method involves scalding the ground with hot steam or boiling water. To steam the soil, place it in a canvas bag and place it over boiling water.
IMPORTANT!
After heat treatment, the soil must be allowed to cool and become saturated with oxygen. To do this, sprinkle it evenly on the surface in a layer of 5 cm and let cool.
How to disinfect with cold
In addition to heat treatment, soil can be disinfected using cold. Or rather, using freezing.
To disinfect the soil for growing vegetables with cold, it is taken out to frost below -15 degrees. The substrate must be kept at this temperature for 7 days. Then the soil is warmed up and frozen again.
The disadvantage of this method is that it does not destroy the spores of the most common fungus - late blight.
How to treat with drugs or chemicals
The substrate can be disinfected by treating it with chemicals. This is a highly effective method, but it is used only when all other safer methods have failed.
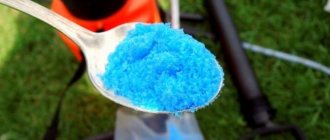
Bleaching powder
An effective substance that burns out almost all pathogenic microflora. It is necessary to cultivate the land six months before planting the seedlings.
If you use garden soil, then in fact the treatment with bleach should be carried out immediately after the end of the summer season. Treatment rates are 200 grams of bleach per square meter of land.
The downside is that not all cultures take root.
Formalin
Apply 15 days before sowing. To make the substance work better, place the soil under cover for 3-4 days.
Formalin is very effective against blackleg.
TMTD
The advantage of this substance is that it is harmless to seedlings. The treatment is carried out before planting. Both suspension and powder can be used.
Biological soil disinfection
The optimal solution for soil treatment is the use of biological preparations. They not only destroy pathogenic microflora, but also saturate the soil with nutrients, making it more suitable for planting.
Trichodermin
An antibiotic that destroys pathogenic microflora. Effective in disinfecting contaminated garden soil. For every kilogram of soil you need only 1 gram of trichodermin dissolved in water.
Baikal EM-1
The working solution is prepared from 150 ml of the drug and 10 liters of water. For every square meter of land, 2.5 liters of working solution are consumed. Can be used before planting seeds and at the end of the summer season.
Alirin-B
A means for destroying fungi that cause root rot. For 2.5 liters of water you only need half a tablet of water. You can water the soil even after planting.
Fitosporin-M
One of the most effective and safe drugs. It is equally useful for disinfecting the soil when planting seeds and for disinfecting the soil before planting seedlings in the garden.
Fitosporin not only destroys pathogens, but also increases plant resistance to disease.
How to use folk remedies
Folk remedies, by and large, are not as effective as store-bought drugs. But they are beneficial because they are cheap, and also because they are environmentally friendly and do not harm plants.
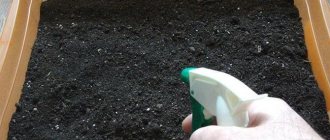
Potassium permanganate solution
Just 5 grams of potassium permanganate is enough for a bucket of water, which can be used to treat the entire garden. For seedlings, you can prepare a solution from just 1 crystal.
Garlic solution
This remedy is effective mainly against insect larvae, but at the same time suppresses the development of pathogenic microflora. To prepare the concentrate, crush 1 head of garlic and pour a liter of boiling water. Insist for a week.
For the working solution, only 50 ml of concentrate is used.
You can disinfect the soil before planting seedlings, or you can treat the garden if you suspect the presence of pests.
Ash infusion
Pour 150 grams of ash into a liter of water, boil and let it brew. Remove the top layer, dissolve it in water in a ratio of 1 to 2 and water the soil under the seedlings.
Steam treatment
You can choose another method of heat treatment, for example, such as a water bath. It is considered more gentle, as it will not damage the soil. Additionally, the soil is saturated with moisture. Steaming is conveniently carried out in a colander, which is placed over a pan of boiling water.
During the cultivation process, the soil is mixed. Steam exposure time is 10 minutes. Then, just as after calcination, the soil must stand for some time so that beneficial soil microorganisms can multiply in it. After this, you can start sowing the seeds.
How to disinfect the soil before planting seedlings
Compared to gardening, very little soil is required for planting seedlings, so it is better to use the thermal method, a solution of potassium permanganate and Fitosporin-M.
Before planting seedlings, the soil can be calcined in the oven, and then watered with Fitosporin or Baikal. This will not only help you destroy harmful microorganisms, but will also saturate the soil with useful microelements and make it more nutritious.
ON A NOTE.
Purchased soil from a trusted manufacturer can simply be watered with Fitosporin solution.
Land treatment after disinfection
Immediately after calcination, steaming and freezing, the soil is sterile, so you need to populate the soil with beneficial microflora. For these purposes, watering with a solution of a biofungicide preparation, for example, Fitosporin-M, Alirin, Trichodermin, is ideal. Such drugs also eliminate fungal spores and harmful microorganisms. They need to water the soil mixture a few weeks before use.
Thus, by performing one of the simple disinfection methods, you can minimize the risk of seedling infection. After all, the healthier the soil, the stronger and healthier the seedlings. And don’t forget about pre-sowing seed treatment, which is also important.
Tillage in open ground
Growing seedlings ends with planting them in open ground. To protect seedlings from pathogenic microorganisms, the soil can also be treated.
Since garden soil is difficult to thermally disinfect, it is disinfected using chemical or biological agents. The following drugs are suitable:
- Bleaching powder;
- Formalin (200 ml per bucket of water per square meter 2 weeks before planting);
- TMTD (disinfection should be carried out immediately before disembarkation);
- Copper sulfate (disinfection is carried out before winter after the end of the summer season);
- Baikal EM-1;
- Alirin-B;
- Fitosporin-M;
- Infusion of ash.
Steaming in a water bath in a large container
It is believed that steam treatment is a more gentle method than calcination over fire. But at the same time, quite reliable.
Tip: after any heat treatment, the cooled soil should be scattered on paper or polyethylene in a layer of up to 10 cm and leveled. This will fill it with air and become looser.
- it is necessary to prepare a large container, for example a tank;
- lay bricks or an iron grate on the bottom;
- pour water below the level of the bricks;
- place soil in a canvas bag or fabric bag on the lattice or bricks;
- cover the tank with a lid, put on fire and steam the soil in a water bath for about two hours.
Calcination of soil in the oven
How to process and with what after different crops
Various vegetable and berry crops leave behind pathogenic microflora. Therefore, the soil is treated before new planting.
- After tomatoes, peppers and eggplants - copper sulfate, Trichodermin, Fitosporin.
- After potatoes – Fitosporin.
- After cucumbers, pumpkins and zucchini - Fitosporin, boric acid.
ON A NOTE.
You can also plant green manure; they not only suppress the development of pathogenic microflora, but also have a beneficial effect on the soil.
Steaming in a water bath in a colander.
- line a colander with a cloth;
- fill a large saucepan with water and wait until it boils;
- Reduce heat and hang a colander with soil over the pan. Or install it on top so that the water does not touch the ground;
- warm up for half an hour. Steam penetrating the soil sterilizes it.
Using the same principle, gardeners advise frying the soil in a frying pan, calcining it in the microwave, or stewing it in foil or in a sleeve. When treated with the last two methods, the water contained in the ground heats up and further cleans the soil. You can also pour boiling water over the soil in a shallow container and cover with film.
Steaming the soil can also be done in a double boiler, in a special container.
There is one caveat: heat treatment kills both pests and beneficial microflora. This means that the above procedures must be done in advance in order to have time to restore the soil before planting.
Some plant growers recommend combining both temperature methods. First, steam it, then take it out into the cold.
How to till the soil at different times of the year
In general, the soil requires regular maintenance throughout the year. Let's look at how to care for the soil throughout the season.
- Spring.
The first treatment is carried out immediately after the snow melts. At this time, you can use either folk substances or “chemistry”. Biological preparations are not suitable, since the bacteria in them are activated only at high temperatures. Optimal substances: solution of potassium permanganate, copper sulfate, bleach. - Summer.
Summer disinfection is carried out as needed. At this time of year it is better to use biologically active drugs. For example, Fitosporin-M, Baikal EM-1. They will not only fight pathogens, but will also have a beneficial effect on plants. - Autumn.
After harvesting, if the weather permits, it can be disinfected with biological preparations. If not, use copper-containing products and ash solution.
Preparing the soil for replanting indoor plants
Plants in their natural conditions and open ground do not always need fertilizers and fertilizing. They have a large amount of land at their disposal, which is restored naturally.
At home, they only have a pot of soil at their disposal. Such a small volume must be supplied with all the necessary substances. The soil must be moisture- and breathable, heat-conducting.
Before preparing the soil for planting or replanting a plant, be sure to read about what kind of soil is suitable for it.
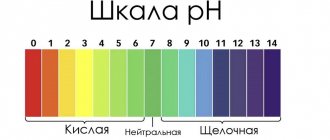
The plant can love acidic or slightly acidic soil (for example, azalea, hydrangea, cyclamen). Orchids love soil with a high degree of breathability; the soil must contain leaf litter, or pieces of bark and moss.
For each plant you can now buy special soil in stores.
Universal soil
There are unpretentious plants that can be suitable for ordinary universal soil bought in a store. Such soil, as a rule, consists of peat with the addition of useful macro and microelements.
You can prepare the soil yourself. Usually this is peat, turf, leaf, coniferous soil or humus. The prepared soil is mixed with sand, pine needles and other components. The harvesting process is quite long, for example, leaf soil turns into compost within two years. If you have your own plot of land, preparing the soil on your own will not be difficult.
Common mistakes
- High temperature during heat treatment.
You cannot exceed the value of 90 degrees and the time of 20-30 minutes if you do not want to destroy the substrate for the seedlings. - After calcination and freezing, the soil is not renewed with nutrients.
If you choose a thermal method to disinfect the soil, then be sure to treat it with biological agents to restore its fertility. - Using large amounts of copper sulfate.
Copper in large quantities harms plants, so precautions must be taken when preparing the working solution. - Mixing chemicals and biologically active substances.
“Chemistry” will kill not only pathogens, but also beneficial bacteria. As a result, the land will be infertile. - Use of land that has already been used.
Along with errors in the use of disinfection methods, a summer resident often tries to save money and uses soil for seedlings that has already been used under plants. This cannot be done not only because the land may be contaminated, but also because it will no longer be so fertile.
Freezing
Negative temperatures will destroy pest larvae, fungi and disease viruses in the soil. But it is not enough to keep the soil in the cold in winter. He needs temperature contrast. Disinfection of soil for seedlings by freezing should begin about a month before sowing:
- Keep the soil in bags in the cold for several days. It should freeze well.
- Place in a warm room for 5-7 days. In the warmth, pest larvae and weed seeds will begin to awaken. Therefore, as soon as the soil thaws, it needs to be exposed to frost again.
- Such a temperature contrast on the ground needs to be arranged at least two to three times.
You will be interested to know: What vegetables and herbs to plant in the garden in July in the vacant beds
Freezing has its drawbacks. The fact is that at negative temperatures, beneficial microflora also die. Therefore, if the soil mixture contains vermicompost, this disinfection method will not work.
Also, carriers of Late blight do not die in the cold. They need to be destroyed by heat treatment or Fitosporin.
As you can see, there are several ways to disinfect soil for seedlings. Since pre-sowing cultivation of the land is the key to the future harvest, there is no need to be lazy. Be sure to choose a method convenient for you and treat the seedling soil.
Answers to frequently asked questions
Is it necessary to disinfect purchased substrate?
Preferably. In general, the manufacturer guarantees that the soil has been completely disinfected at the factory. But sometimes it’s better to be safe than sorry.
What is the most effective way to disinfect soil?
Some types of fungi are able to survive in the cold. But the probability of infection of purchased land with such disputes is very low.
If you decide to disinfect a purchased substrate, you can use any method.
It is better to calcinate garden soil in the oven and water it with antifungal compounds.
Do I need to use several methods or will just one be enough?
In general, one cultivation of the land for seedlings will be enough.
Watering with a strong solution of potassium permanganate
Spilling a pink solution of potassium permanganate is one of the easiest ways to disinfect the soil. Dissolve it in a proportion of three grams per ten liters of water. Spray the soil with this solution. Pots and seedling boxes are also treated with potassium permanganate.
Potassium permanganate solution
A quick and simple method, manganese after processing becomes a fertilizer, but this method is ineffective and is not able to completely sterilize the soil.
Tips for steaming soil
Before steaming, the soil must be cleared of plant debris and dug up; the loose structure of the soil will facilitate steam access to the desired depth. Tips on how to carry out the procedure correctly:
- It is convenient to fix the heat-resistant film around the perimeter of the bed with iron chains; it is advisable to stretch a nylon mesh on top so that the film covering does not rise;
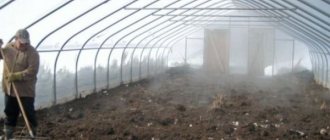
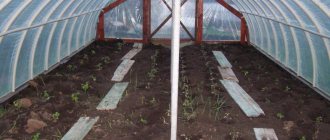
- before cultivating the soil in the greenhouse, the internal surfaces of the building are washed and disinfected; after steaming the soil, the path is also treated with steam;
- soil infected with root-knot nematode is steamed for 16–18 hours, after treatment the film is left in place for another 2 hours;
- more thorough steaming will be ensured by the use of perforated hoses laid in the soil to a depth of 30 cm.
Autumn soil disinfection for spring plantings
If you use zeolite for the procedure, the time it takes to perform it will be reduced by 10 times. The granules are placed on the soil surface before steaming in a layer 10–12 cm thick. Zeolite accumulates heat and then transfers it to the soil.
Some people may find the method of preparing land by steaming to be troublesome, but this technology is supported by its reliability and safety. The soil will be completely cleared of weeds, pest larvae, and pathogenic microflora. The soil is steamed in advance so that the biological balance can be restored in the remaining time before planting.
Steaming purchased soil
Attention! Immediately after treatment, the soil is sterile. But in a couple of weeks the microflora in it will be restored. Where is the guarantee that it’s only useful? Experts recommend that after disinfection, pack the soil in thick, sterile bags. Open just before planting and add Biohumus (one-liter jar per bucket of soil) or Supercompost (1-2 cups per bucket). This way you will completely protect the plants.
Some practitioners advise treating not only garden soil, but also purchased soil. To do this, place a closed bag with the prepared soil mixture in a bucket. Pour boiling water down the side of the bucket and close the lid tightly. Remove the bag only after it has cooled completely.
Chemical methods
The downside of biological drugs is their rather mild effect, so in advanced cases it is necessary to resort to chemical methods of protection and treatment against fungal infections. The most effective are those drugs of chemical origin that have a third or fourth hazard class. But before using these drugs, you need to clearly understand that they are a rather harmful substance, the remains of which can even get into the plants that will grow in these beds.
Tillage is carried out twice a year - in autumn and spring. In the autumn, this is done after digging up the soil for the winter. A drug that can be used at this time and which shows good results is Bordeaux mixture. You need to prepare a three percent solution from it and treat the affected soil with it. In spring, you can use a much wider range of drugs, for example:
- copper oxychloride (4 percent solution);
- Oxychom (2 percent solution);
- HOM;
- Fitolavin;
- Healthy Earth.
The first two medications are intended for complex treatment of soil against fungal infections. They process the top layer, about five or ten centimeters. The following two preparations work best when they are applied to each hole when planting. Be sure to read the instructions before use, because the dosage plays a very important role. It is necessary not only to cure the soil from unwanted infections, but also not to harm the environment and living creatures. The latter drug has a more targeted effect; it destroys fungi in the root zone, which is where it is most effective.
It is very important to understand the extent of soil fungal contamination and apply appropriate treatment methods. As with ordinary diseases, it is much easier to prevent fungal infections using agrotechnical tricks than to cure such an unpleasant disease later. And when using any medications, you must remember the correct dosage and frequency of use. Then the soil in your beds will always be of high quality and in good condition.
All living things are killed and repopulated, but useful
Sometimes in the comments they write: “Every living thing dies in the microwave!” That's why we warm it up. We don't need living things on the windowsills, except for plants, of course.
Perhaps this refers to bacteria that process organic matter in the soil (dead roots, leaves) into compounds accessible to plants. If we are talking about such bacteria, then they can be colonized by watering them after heat treatment with Fitosporin or Trichoderma.
I don't water anything. Bacillus hay lives in the air, on dust particles. She will settle into the pots perfectly and will do her useful things there.
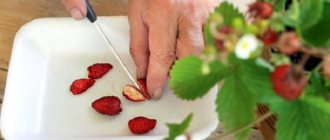
I sow everything in my soil, even the smallest seeds, all the soil is from the microwave, strawberries sprouted in the photo
They also write that it is necessary to sterilize the soil a week or two before sowing so that it has time to become colonized with these bacteria. Sometimes I sow on the day of warming up. The seeds will germinate for several days, plus until the cotyledon phase they live off the reserves in the seed. Until the plant begins to fully feed from the root, these 1-2 weeks will pass.