Phalaenopsis is a wonderful and beloved type of orchid, which nowadays can be easily purchased in specialized stores. If you already have this exotic plant at home, you can propagate it yourself.
One of the simple and affordable ways to grow phalaenopsis is vegetative propagation by children. This article is devoted to how to separate a baby from an orchid.
Formation of a mature child
The baby phalaenopsis is a natural clone of the mother plant and after transplantation it will have the same characteristics as an adult orchid (color of flowers, their size, etc.).
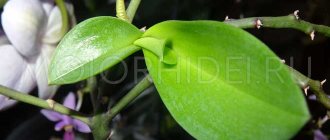
It is a miniature, fully formed orchid: it has leaves, a stem and roots, and sometimes, while on the mother plant, it even produces a small flowering shoot.
The baby can bloom while on the mother plant.
Conditions
Sometimes babies are formed from dormant buds that are located on the flower stalk, leaf axils or at the roots of the orchid. They are quite easy to use for vegetative propagation of phalaenopsis.
If such a baby appears in the form of a lateral shoot on the stem of an orchid, it is called basal .
Very often, vegetative shoots are formed on the flower stalk . This method is most convenient for propagating orchids; it consists of several stages:
- activation of dormant buds located on the flower stalk;
- phase of germination and development of layering (babies);
- separation and transplantation of the formed layer.
The most favorable period for the formation of children comes after a long period of flowering of the orchid.
But for them to appear, the plant also needs certain cultivation conditions:
- the orchid must be mature, with a well-developed root system, and have at least 4 large leaves;
- the orchid bloom should be in its final phase;
- the optimal time of year is spring or early summer;
- relatively high air temperature;
- air humidity at 50-60%;
- sufficient light intensity in the room.
At low humidity, as well as in winter, when light levels drop significantly, phalaenopsis does not produce babies.
In order for children to form on the flowering shoot, after the end of the flowering phase it is not cut off, but shortened 1.5-2 cm above the upper dormant bud. This stimulates the awakening of the remaining dormant buds that are located on the peduncle.
Stimulating baby orchids.
Sometimes shoots form on their own, but in some cases, even if the plant is in optimal conditions, stimulation of their forcing is necessary. This is facilitated by:
- daily temperature fluctuations. At night it should be cool - up to +17-18℃, during the day - up to +27-30℃. These conditions in the spring-summer period are most favorable on a glazed balcony;
- Poor watering of phalaenopsis should be combined with high relative humidity. In an apartment, this requires regular spraying and placing the mother plant on a stand with damp moss or pebbles;
- a large amount of intense diffuse light.
Having provided the necessary cultivation parameters, it is enough to simply cause the appearance of vegetative layering at home.
Advice! When buying an orchid in a store, be sure to find out what type it is. This will allow you not only to properly care for the plant, but also to learn the secrets of its flowering and reproduction.
Period
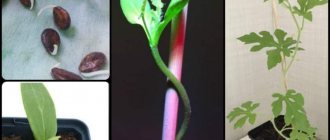
From one to several small plants can develop on the peduncle or stem of phalaenopsis . First, they form leaves, and after a certain period, roots.
If roots do not form for a long time, their development can be stimulated. To do this, you should prepare sphagnum moss, cling film and strong thread:
- the moss is soaked in water for half an hour until completely swollen;
- form a lump of moss and wrap it with thread so that it does not fall apart;
- the formed lump is carefully attached to the base of the peduncle using a thread so as not to injure the plant;
- When the humidity in the room is low, the moss is additionally wrapped in cling film to create a greenhouse effect inside. The film must be opened daily to ventilate the baby;
- since a plant with moss can tip over, it is better to attach it to a support;
- The moss should be sprayed daily with water, to which you can add the root growth stimulator “Kornevin”.
After the baby has grown roots, it can be planted in a separate pot. On the mother plant, layering usually develops within six months.
Several babies on flower stalks.
Determining readiness for transplantation from the mother plant
After 6 months, the little baby will develop 2 pairs of leaves and roots will form.
Attention! If the baby's roots are too small, after transplantation the plant will take a long time to take root and become sick. In this case, it is better to postpone its separation and wait for the roots to grow.
After the formed baby has 3-4 roots about 5 cm long, it can be separated from the mother phalaenopsis and transplanted into a separate pot.
Preliminary preparation
In order not to seriously injure an adult plant when separating a formed baby, it is necessary to prepare the tool and related materials for work:
- garden pruners, scissors or knife;
- any disinfectant (for example, alcohol);
- several tablets of crushed activated carbon or cinnamon;
- a small transparent glass or pot for transplanting cuttings;
- soil mixture for planting a small orchid.
As a pot, you can use a transparent or frosted plastic glass , in which you have previously made drainage holes . The glass should be small enough to accommodate the roots.
The soil mixture can be prepared with your own hands from the following components, taken in equal proportions:
- pine bark, pre-boiled and cut into pieces of about 1 cm;
- sphagnum moss;
- charcoal.
also purchase a ready-made high-quality soil mixture at a specialty store . The main thing is that the pieces of bark in it should also be no more than 1 cm.
Composition of the substrate for phalaenopsis.
After the orchid grows, the pot should be replaced with a larger flowerpot.
When is the best time to plant a shoot?
Separation of a shoot from an adult flower is a long and painstaking process, since only after 6 months the formed baby is ready for separation and rooting in the ground. This happens when the baby has:
- several roots;
- root length more than 5 cm;
- at least two pairs of leaves.
Only in this case is the shoot capable of independently absorbing moisture and nutrients from the soil.
How to plant a baby phalaenopsis orchid?
In order to injure the orchid as little as possible when separating the baby, you need to know how to properly cut it off from the mother plant.
On the peduncle
When separating the baby from the flower stalk, 1-2 cm of the flower stalk should be left at the edges. The cut area is sprinkled with crushed activated carbon and allowed to dry for half an hour.
Basal
Such a child should be checked for the presence of a root system . If the roots have formed, they are separated with pruning shears at the junction of the baby with the mother phalaenopsis. The cut is sprinkled with cinnamon or activated carbon.
Basal baby orchid.
From the leaf axil
To properly separate the cuttings that have grown in the leaf axil, another 1-1.5 cm of tissue from the mother plant is grabbed with pruning shears, and the cut site is treated.
When propagating phalaenopsis by layering, sometimes non-standard situations arise that require resolution.
Without roots
Sometimes orchid cuttings do not form roots. In this case , it is better to wait until the roots form.
You can also immediately separate and plant in a prepared substrate, creating the conditions necessary for the formation of roots.
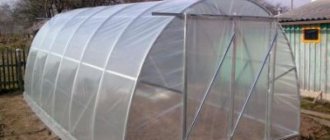
To the greenhouse
Four-month-old cuttings without roots are separated and planted in a substrate of fine pine bark.
The plant must be placed in a greenhouse and sprayed with water daily. This procedure can be alternated with spraying with a fertilizer solution.
It is carried out only in the daytime, and water should not get into the middle of the outlet. Care should be taken to ensure that the substrate does not become waterlogged. It should dry out within a few hours.
To root the baby, you can also use live moss, on which the separated orchid baby is placed on top.
Rooting a baby in a greenhouse.
In polystyrene foam
To root the baby using this method, cut off a small piece of foam and make a hole in it into which the base of the baby can fit. The plant is fixed and placed in a container filled with water.
The base of a small phalaenopsis should be above water , which will create optimal humidity for the formation of the root system.
To further increase the air humidity in the volume, the container with water can be covered with polyethylene or plexiglass.
After the roots have formed, the small orchid is planted in a pine bark substrate.
Basal
The basal baby does not have its own roots. Its nutrition occurs through the common stem at the expense of the maternal roots.
If such a baby has formed on your plant, then under no circumstances should you separate it . It’s just that two orchids will now grow in the pot instead of one.
Often the basal baby is formed at the site of the growth point of the phalaenopsis. As a rule, this happens when it dies. Such a baby will give rise to a new plant.
Phalaenopsis with basal baby.
Reproduction by lateral layering
Orchid babies are young shoots of the plant that periodically appear on the stem and roots, but more often on the peduncle. They have their own miniature stem, nascent roots and leaves.
Reference! With proper care, babies can appear on their own, but you can wake up the “sleeping bud” on the peduncle - remove the protective scale and carefully treat it with cytokinin paste.
The role of children in the life of an orchid is difficult to overestimate, since it is their continuation. Propagating the plant by lateral layering is quite simple - this is the fastest way.
Transplantation into substrate
After separating the cutting from the mother plant, it can be immediately planted in the substrate, but it is still better to prepare it for planting:
- To do this, the cuttings are soaked for 15 minutes. in water in which growth hormone is dissolved. This will ensure faster root growth;
- When planting, moistened roots are less damaged and fit into the pot more easily.
Before planting the children, lay a layer of drainage (expanded clay, vermiculite or ceramic shards) on the bottom of the pot, after which the plant is lowered into it:
- the baby is placed in the container so that the lower leaves are above the surface of the soil;
- the substrate is poured in small portions while shaking and tapping the pot so that the soil is evenly distributed between the roots. There is no need to further compact the substrate;
- The plant should not be watered for the first few days to allow the cuttings to dry out.
partial shade for a while , then you can move it to diffused light.
Attention! The root collar of the phalaenopsis should be at the level of the edge of the pot.
In the future, the small phalaenopsis needs regular watering and lighting.
Possible difficulties
The following problems may arise during transplantation:
- Infection .
This can not only lead to disease, but also to the death of the plant, so the pruner or knife must be sterile. - Decay .
Before planting the baby, you need to let it lie in the air for 30 minutes, then treat the cuts with ground cinnamon or wood ash. - If you cut off the shoot too early, it will die .
If there are several children on an orchid, then cutting everything off at once is strictly prohibited; the mother plant will simply die from the resulting injuries. Attention! Separate one baby first, the second can be planted as soon as the cut from the first is completely closed.
We have materials on orchid transplantation:
- when to replant;
- Is it possible in the fall?
- pruning roots during transplantation;
- transplantation during flowering;
- when releasing the arrow;
- after the purchase.
Where is the best place to transplant?
The separated orchid branch needs to be transplanted into new soil. Beginning gardeners should remember well how to plant an orchid shoot at home.
The orchid shoot can be transplanted into a greenhouse or polystyrene foam. If the baby has its own root system, it is planted in new soil. If it does not have roots, then it is suspended above a pre-prepared substrate and wait for the baby to take root. In both cases, the orchid needs to be grown in a greenhouse, which can be made from a large plastic bottle. A greenhouse will keep the orchid warm and moist.
There is another way to root an orchid shoot: the baby is planted in polystyrene foam. A hole is made in a piece of polystyrene foam and the base of the process is inserted there. The entire structure is placed in a glass of water and secured. You can cover it with a greenhouse or plastic wrap.
Important! The root of the baby should be under water until roots begin to appear. After this, the plant is transplanted into the ground.
The cut shoot is germinated in polystyrene foam
Preparing items for the procedure
It is recommended to transplant the baby orchid into a thin pot with holes in the bottom and a diameter of 8-10 cm. The soil is prepared by mixing:
- sphagnum moss;
- ground tree bark (pine);
- charcoal.
Materials you will need:
- activated carbon – 1 tablet (or crushed cinnamon);
- expanded clay;
- alcohol.
To perform transplantation operations at home, prepare the following tools:
- pruner;
- sharp knife or scissors.
Tools are disinfected.
Possible problems
Some difficulties may arise during the transplant.
- To avoid infecting the plant, use only sterile scissors for work.
- You cannot use a baby if its roots have not yet formed. She will simply die.
- It is forbidden to cut all the keiki at once: the mother plant will not cope with such a load.
- Fertilizing can be done when the flowering period ends.
Caring for a transplanted plant
In order for a small plant to take root, it must not only be planted, but also properly cared for.
Rooting baby
fully formed baby is separated and transplanted into a suitable substrate:
- from pre-boiled pine bark and cut into 1 cm pieces;
- sphagnum moss;
- charcoal.
All components are taken in equal proportions.
A layer of expanded clay is placed at the bottom of the cup. The roots of the plant are placed in a container and covered with substrate, shaking occasionally so that there are no empty spaces left.
Attention! Do not compact the soil mixture, as this can lead to breakage of the roots.
The grown orchid is transplanted into a larger container.
Features of watering
The transplanted children are watered on the second or third day , when the cutting has already been completed.
In the future, watering is carried out as the soil dries, but at least once every five days.
After planting the cuttings in moss, the plant is watered much less frequently, since this substrate has a high moisture capacity.
Top dressing
Feeding is an important point in how to care for a baby after transplantation. After the baby has started to grow, you can begin to feed it with a half dose of standard orchid fertilizer. A grown plant requires the same care as an adult orchid.
What it is?
Children are called shoots that appear on an adult plant during the growing season. Reproduction begins from the appearance of a compaction, in place of which a bud is formed. A baby grows from it, which has its own roots, stem, miniature leaves and peduncle.
Sometimes the sprout blooms directly on the parent orchid. The plant's vegetation begins to grow in late spring, summer or early autumn. In winter, the birth of children from an adult orchid is unlikely.