Pepper is very popular in our country and is grown in all regions. However, not everywhere they can be grown in open ground due to cold conditions. Therefore, it is recommended to use polycarbonate greenhouses for their cultivation. In addition to creating good conditions for your plant, you can also speed up the harvest. However, in order to get a good harvest of tasty and juicy peppers, it is important to devote time to them and properly care for them. Which pepper planting suits you best - read more in this article.
Preparatory work before planting seedlings in the greenhouse
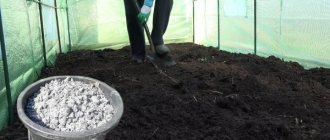
After winter, everything in the garden looks a little dull and gray. There is no greenery yet, and it is impossible to step on the beds. This is the most convenient time to start cleaning and disinfecting a polycarbonate greenhouse. It is important not to miss the moment and carry out work at least 2-3 weeks before planting.
Greenhouse treatment
If in the fall the gardener did not have time to remove the plant remains of the previous season, then spring work begins with this event.
We pull out, dig up and carry plant debris outside the greenhouse. We remove supports, twine and all working equipment. We carefully inspect the structure for damage.
If corrosion is found on the metal frame, the defect will need to be repaired. The easiest way is to wipe the damage with a cut of a raw potato. Then prime and apply paint.
While the room is being ventilated, let’s prepare for wet cleaning of the greenhouse. Place a bar of laundry soap in a bucket of hot water and leave it to dissolve for a while. In the meantime, wash off the main dirt either with a hose or using a soft rag.
You will need a mop with a telescopic handle to reach the high parts of the greenhouse and a paint brush to get into hard-to-reach places.
A solution of soapy water is suitable if the vegetable crops of the previous season were not affected by pathogens. Otherwise, more effective means should be used.
A solution of bleach is prepared from 400 g of the drug and 10 liters of water. The suspension is infused for 2-3 hours, filtered and used for internal disinfection. Thick sediment is suitable for processing wooden greenhouse structures.
Copper sulfate solution has a wide spectrum of disinfection. It effectively fights diseases, pests and their larvae, which probably remained overwintering in the greenhouse. The working solution is prepared from 10 liters of water and 100 g of the drug. A sprayer is used for this work.
Potassium permanganate is the most affordable and budget-friendly (but no less effective) option for spring treatment of a greenhouse. All surfaces of the greenhouse are sprayed with a rich pink solution.
Tillage
Often the same vegetable crops are grown in a greenhouse for several years in a row. And this inevitably leads to the accumulation of harmful fungi, bacteria and parasitic insect larvae in the soil. To protect yourself from the hassle of pest control and protect the harvest, you need to take timely care of mother earth.
After processing the inner surface of the greenhouse, we move on to cultivating the soil.
Irrigation with hot water is a very effective and inexpensive method. The water is brought to a boil and the soil in the greenhouse is immediately watered. The watered area is covered with plastic film to retain heat and achieve greater efficiency.
If diseases were observed in the greenhouse in the previous season, solutions of the following drugs are used:
- potassium permanganate;
- Bordeaux mixture (10%);
- iron sulfate (2.5%);
- "Fitosporin".
The following is used against overwintering larvae:
- "Trichodermin";
- "Gapsin";
- "Fitoverm".
It should be taken into account that the action of the biological fungicide “Fitosporin” becomes effective when the soil is warmed up to 10⁰C.
After tilling the soil, it is necessary to restore the beneficial microflora and it is recommended not to start sowing and planting for 2 weeks.
Temperature
A polycarbonate greenhouse installed in the yard provides the conditions for this due to good light transmission and heat retention inside.
To get a good harvest, you need to maintain the following temperature conditions:
- The temperature for pepper seedlings is not lower than +22°C inside the greenhouse and +14°C on the ground.
- For rapid growth, a temperature of 27-28°C is required.
- Reducing the temperature to the minimum (14-16°C) will not cause the death of seedlings, but will lead to wilting and cessation of growth.
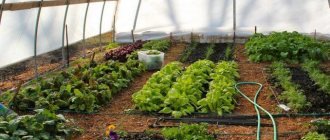
Planting pepper seedlings in a greenhouse
Over the winter, gardeners have missed working on the land and their desire to start sowing and planting as soon as possible is quite understandable. But you should still be guided by common sense and the climatic conditions of your region.
Read more in the article: How to grow pepper seedlings at home: step-by-step instructions
Landing dates
The approximate timing of planting pepper seedlings for central Russia is at the beginning of May. Gardeners in Siberia and the Urals can start working starting in mid-May. This is provided that the temperature in the greenhouse does not drop below 15-18⁰C at night.
Seedlings are ready to change the growing location if:
- her age is at least 2 months;
- has 10-15 leaves;
- The formation of buds has begun.
It is important to anticipate the possibility of return frosts and prepare everything necessary for additional protection of plants in the greenhouse.
By the time plants are planted in the greenhouse, the soil must be treated and disinfected. The demands of peppers on its fertility and structure should be taken into account. Poor soils are enriched with humus or ready-made compost with the addition of mineral fertilizers. Acidity is reduced by adding wood ash, dolomite flour or fluff lime.
Scheme of planting peppers in a greenhouse
When determining the distance between plants, the gardener should be guided by the varietal characteristics of the pepper. He knows this for sure if the seedlings were grown independently. When purchasing, be sure to find out the variety and look for information about it.
- Low-growing peppers are planted closer to the wall of the greenhouse to provide sufficient sunlight. The distance is maintained at 30-35 cm between plants. Row spacing should be about 50 cm.
- For tall specimens, the arrangement of peppers increases to 40-45 cm and 50-60 cm, respectively.
A hole is dug in the ground, slightly larger than the volume of the cup in which the seedlings grew. Carefully remove the root system and plant without deepening the stem. The soil around the plant is compacted and watered, spending 2-3 liters of water per root.
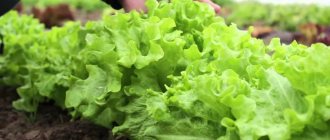
What crops can pepper be combined with?
I want to make the most of the small area of the greenhouse.
Therefore, you can plant onions and basil in the spaces between the rows as a compactor. Tomatoes or cucumbers will feel great in the next bed next to the peppers.
By and large, you can turn a greenhouse into a communal space for plants by properly distributing tall and short growing crops. Such rational use of space depletes the soil less and reduces the likelihood of damage by insects and parasites.
At what distance to plant peppers?
So that during the growth process the plants do not shade each other and receive the required amount of nutrients from the soil, it is necessary to plant as follows:
- Low-growing varieties are planted at a distance of 40 cm, leaving a gap between rows of 50-60 cm.
- Bushes of tall varieties are planted at intervals of 50 cm with a row spacing of 70 cm.
Distance between beds
The most practical is to plant seedlings in beds. The longer the bed, the easier it is to care for the plants. At what distance should peppers be planted in the garden? The most convenient planting is considered to be 70x70 cm. This planting pattern provides a number of advantages:
- It is convenient to carry out root feeding without injuring neighboring seedlings.
- Simplifies monitoring of plants for fungal diseases.
- It is easier to garter tall bushes.
- Simplifies watering and irrigating plants.
- Provides free access for loosening the soil and removing weeds.
- Makes harvesting easier.
Watering regime for pepper seedlings in a greenhouse
Sweet bell pepper is a heat- and moisture-loving crop. However, there must be an optimal balance between the temperature in the greenhouse, air humidity and soil condition.
The first and most abundant one was done while planting seedlings in the greenhouse. It is necessary to give the plants time to adapt and not disturb the root system by watering for 5-7 days. Of course, if the weather is extremely hot and the water evaporates very quickly, the interval is reduced.
Special large containers are filled with water for irrigation in advance so that it can settle and warm up. In the evening hours, when the sun is setting, they begin to water the peppers. However, it is worth noting that watering at night significantly increases air humidity and the greenhouse must be well ventilated.
Watering in the morning is more rational in terms of maintaining optimal humidity indoors.
You can irrigate using the sprinkling method, but only in the absence of hot sunlight. Otherwise, droplets of moisture on the leaves will act as a magnifying glass, which will certainly lead to burns.
The method is stopped during the period of flower buds opening, so as not to wash away the pollen and not be left without a harvest.
- During the formation of ovaries, plants are watered every 3-4 days.
- During the period of fruit ripening and until the end of harvest - once a week.
Often, a crust forms on the soil surface after watering, which must be systematically loosened to provide air access to the root system.
Growing seedlings
The most important stage is the proper cultivation of pepper seedlings. Both the yield and the quality of the grown fruits directly depend on how well the sprouts are accepted and how the plant develops. After all, no one wants to receive small, inconspicuous peppers that have been “beaten” by any diseases or suffered from soil starvation.
Selection of soil and container
Without good soil there will be no good harvest. Therefore, you need to choose and prepare the soil with full responsibility, and then the planted seedlings will fully grow and develop.
What you need to know about the soil for sweet pepper seedlings:
- The soil substrate must be loose and fertile. Poor soils, as well as clayey, dense, poorly breathable and impermeable soils, are not suitable for pepper. The seedlings will quickly wither and the roots will rot.
- It is necessary to pay attention not only to the consistency of the soil, but also to possible inclusions. The soil should not contain visible plant debris in the form of parts of roots and seeds of other plants, or larvae of insect pests. Another thing is that the soil should not contain other harmful inclusions that are indistinguishable to the naked eye - fungi, bacteria, etc.
- Peppers are southern plants and love warmth. But they cannot live without moisture. Therefore, the soil should be moderately moist.
The easiest way is to purchase the required substrate at a specialized retail outlet. But if you wish, you can “make” it yourself. To do this you need to acquire:
- humus (peat);
- river sand;
- garden (turf) soil.
Vegetable growers recommend supplementing this mixture with wood ash (1 cup), superphosphates (30-40 g), potassium sulfate and urea (15 g each) per bucket (10 l). If the mixture was purchased ready-made, just add a little wood ash. Everything else is already there.
Of course, all components must be disinfected; to do this, the soil is heated in a water bath, and then slightly dried. When making your own soil for seedlings, you need to mix the ingredients, then sift them on a fine sieve so that the soil is enriched with oxygen. When the prepared soil dries out and is moderately moist, you can sow the seeds.
The containers used are:
- peat pots and tablets;
- organic cups;
- small plastic dishes (from yogurt, etc.);
- special cassettes and boxes with cells.
The inorganic container must be disinfected before filling with soil using a disinfectant solution, after which it is washed.
The main determining factor in choosing dishes for seedlings is the need for picking. For peppers, this procedure is not mandatory; moreover, experienced vegetable growers strongly do not recommend disturbing the root system of seedlings and devoting a whole liter of soil (or at least 0.5 liters) to each plant. At the same time, 3 seeds are planted in each container at a distance of 2 cm. In any case, it will be better if the seedlings grow in individual containers so that the roots are not damaged during transplantation.
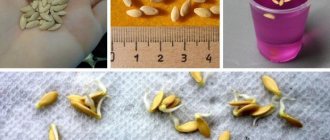
Seed preparation
If homemade sweet pepper seeds are used for planting, it is better to disinfect them using a solution of potassium permanganate (2%). In order for the seeds to be healthy and germinate faster, they are treated with special solutions. Zircon and Energen have proven themselves to be the best.
Pepper seeds purchased in bags do not need to be disinfected. And if they are gelled or panned, i.e. already placed in a nutritious and protective shell ahead of time, no processing is needed for them.
By the way, the seeds of this nightshade crop lose their viability quite quickly. Therefore, there is no need to buy them in excess. And if you have already bought it, it is better to check it for germination in advance.
The hardening process takes a little more than a day. First, the seeds are soaked in moderately hot (about 50°C) water for 15 minutes, after which the gauze in which the seeds are located is wrung out and placed together with the planting material in the freezer of the refrigerator for a day.
Another option for hardening is to keep the seeds on gauze in a plate with warm water during the day for a week, and place them in the refrigerator at night.
Sowing
The soil or peat container for sweet pepper seedlings should be slightly moistened and compacted. The best way to moisturize is to spray the soil. You need to make a hole in the middle, the depth of which will allow you to place the sprout with the root system there.
It is important to remember that shortening the central root and any damage to it is unacceptable for sweet peppers. When a pepper sprout sinks into a hole in the soil substrate, it is necessary to ensure that the central root is not deformed, and the height of the cotyledon leaves above the ground should be 1-2 cm. After planting, the soil around the sprout is carefully squeezed and watered with settled water at room temperature. You can add biostimulants (for example, HB-101) to water for irrigation.
Seedling care
Drying out the soil is unacceptable, even for a short period. It is necessary to water the seedlings in the morning, abundantly, but make sure that there is no waterlogging. If you accidentally pour too much water into a container with seedlings, you need to immediately drain the excess moisture and dry the soil. An over-moistened substrate will cause the roots to rot.
At first, the sprouts are watered once every 2-3 days, and when real leaves appear (2-3), the seedlings need daily watering. At the same time (or 14 days after germination) make the first fertilizing with the following solution (based on a 10-liter bucket of water):
- ammonium nitrate (10 g);
- potassium sulfate (15 g);
- superphosphate (25 g).
The same solution is used for the second feeding 2 weeks before planting in the greenhouse. It should be remembered that after fertilizing is done, the seedlings must be watered, and if the nutrient solution gets on the leaves, they must be washed.
Sowing pepper seeds for seedlings: video
Feeding pepper seedlings in a greenhouse
2 weeks after planting pepper seedlings in the greenhouse, the first root feeding is carried out. During this period, organic fertilizers are of particular value.
- 1 part of mullein infusion or bird droppings is added to 9 parts of warm, settled water and used for irrigation.
The next application of fertilizer is carried out after another 2 weeks, and it should consist of the following complex:
- nitrogen, potassium and phosphorus.
A lack of nutrients can be judged by the appearance of plants.
- Healthy peppers have resilient foliage that is bright, rich green.
- Pale and withered leaves indicate a lack of microelements in the diet, in particular nitrogen. “First aid” is provided by applying fertilizers along the leaf.
To eliminate the deficiency, solutions are used:
- ammonium nitrate;
- urea;
- ammonium sulfate.
Mullein infusion is not used for spraying.
Iron deficiency is manifested by yellowing of the leaf blades, while the veins remain green. The problem is solved by spraying with solutions of iron-containing preparations. It can be "Micro-Fe" or "Ferovit".
How to feed peppers during flowering and fruiting
During the appearance of buds and during the flowering period of pepper, the ratio of microelements in the composition of complex fertilizers changes. Nitrogen content is kept to a minimum, while phosphorus and potassium content should be maximized.
The same parameters apply to the fruiting period.
If peppers lack phosphorus, then:
- there is a sharp decrease in the number of inflorescences and ovaries. The leaves acquire a purple tint, followed by wilting and dying.
The cause can be eliminated by spraying the leaves with a solution of superphosphate or potassium phosphate.
Potassium deficiency during flowering and fruiting is expressed by:
- falling of inflorescences and ovaries, drying of leaf plates along the edges.
In such a situation, it is recommended to use potassium magnesium or potassium sulfate.
Pepper responds well to the addition of wood ash and herbal infusion.
It’s quite simple to prepare it in the garden:
A large container is filled 2/3 with chopped herbs: dandelion, coltsfoot, nettle. Top up with water and leave for a week to ferment. Used for watering at the root at the rate of 1 liter of infusion per bucket of water.
Varieties
The following types of overseas vegetables are prepared for greenhouse growing conditions:
| Variety | Characteristic |
| Claudio | Ripens 73-76 days after planting, is not susceptible to fungi, tolerates heat and light frosts well. |
| ox ear | Elongated fruit, weight - 120 -140 g. Seedlings are transported without loss of properties. |
| Atlant | A highly fruitful hybrid, the shape of the fruit is conical. Stores well and freezes. |
| Cockatoo | The fruits are large, weighing up to 500 g, and red in color. The height of the bush is about 60 cm. |
| Winnie the Pooh | Not capricious, has good immunity. The fruits are well stored, transported, have excellent taste, and contain vitamin C. |
| Health | Growing and caring for this pepper in a greenhouse is not difficult. It is unpretentious to light and watering. Gives a high yield. |
| California miracle | The fruits ripen within 100 days from the moment the pepper seedlings are transplanted. Vegetable weight up to 140 g. |
| Orange miracle | The color of the fruit is orange and is frost resistant. Used for the seedless method. |
| Hercules | Early ripening, ripening takes 3 months from sowing, the shape of the fruit is cubic, the shade is green, red. |
Formation and pinching of a pepper bush in a greenhouse
Is it necessary to form pepper bushes in a greenhouse? The answer will depend on what varieties are grown. If they are low-growing, then formation will not be needed, but this is provided that the correct intervals between plants and in row spacing have been observed.
Specially bred hybrids with weak branching do not require formation. These are Mercury F1, Goodwin F1, Claudio F1, Pinocchio F1, Othello F1.
Low-branching varieties of peppers are Lastochka, Gift of Moldova, Dobrynya Nikitich, Barguzin, Lumina (aka Belozerka), Ilya Muromets, Alyosha Popovich, etc.
Medium and tall peppers in a limited greenhouse space are subject to mandatory formation. Removing excess shoots improves plant ventilation, which in turn prevents the occurrence of diseases.
So let's get started. After planting the seedlings in the greenhouse, it is necessary to monitor the development of the plants and not miss the moment of laying the so-called crown bud. It must be removed. This is where the stem begins to bifurcate into two branches. These are skeletal branches of the first order. All shoots and leaves below the branching point are removed, but not in one go, but 2-3 leaves per day.
If you plan to collect your own pepper seeds, leave the crown flower on the varietal bushes. The resulting fruit has the healthiest seeds.
On branches of the first order, new shoots appear from the axils of the leaves - stepchildren - these will also be removed by pinching.
As they grow, the first-order stems also begin to bifurcate; these are second-order shoots. Of the two shoots, the stronger one is left, and the other is cut off, leaving 1 fruit and 1 leaf.
A second-order shoot will also develop and split in two over time, and this is already the 3rd order. They deal with it in the same way as the previous one.
A month to a month and a half before the end of the harvest, all growth points are pinched so that the plants devote all their energy to enlarging and ripening the fruits.
Secrets for shaping peppers - video
Planting scheme
The harvest largely depends not only on the time of planting, but also on the correct formation of the ridge.
Distance when planting seedlings
Even at the stage of choosing a pepper variety, it is worth taking into account the area and height of the greenhouse, and the method of cultivation. It is worth growing low-growing varieties in a low greenhouse, and frost-resistant varieties in open ground.
Rules for forming a ridge:
- tall varieties are placed at a distance of 30-40 cm from each other;
- low-growing varieties - 25-30 cm;
- the distance between the rows is 70-80 cm so that there is room for crown formation.
Bush formation
It is worth forming a bush in tall varieties. In short-growing plants, excess, rotting or diseased shoots are simply removed.
Follow these guidelines:
- They begin to form a bush from a height of 25-30 cm, a lower plant may die or stop developing;
- the very first bud is removed, then the plant will begin to actively grow new shoots;
- the stem is formed into several shoots, choosing strong and disease-free shoots, the rest are pinched or the tops are cut off;
- if the remaining shoots again form forks, then the same actions are repeated: stronger shoots are selected, the tops of the rest are pinched, the first buds are removed;
- everything that grows inside the bush is pruned, because they thicken the bush, not allowing it to bear fruit well;
- no more than 20 fruits are left on the bush;
- carefully monitor the appearance of rotten, light shoots, which are immediately removed so that diseases do not arise;
- when the peppers are fully grown, the buds are blooming, the fruits are forming, it is recommended to remove the main top, then the fruits will be larger and richer in taste;
- when the stem reaches a height of half a meter, the plant is tied to wooden mini-trellises;
- if the plant is tall and the height of the greenhouse allows, the stem is tied with a rope to the ceiling of the greenhouse.
Important ! At the beginning of planting, the plant will wither, drop branches and leaves, but with proper care, after a couple of days it will perk up, raise its leaves to the sun and begin to turn green with a vengeance.
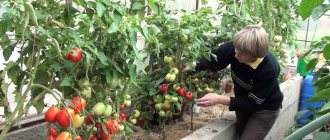
Harvest and storage
What joy the period of fruit ripening brings to gardeners. All the gardener’s efforts in growing peppers in a greenhouse brought a well-deserved reward in the form of large, shiny, thick-walled and sweet fruits.
Now it is important to collect them correctly and on time in order to use them for food, or to prepare food for the winter, or to put them in storage.
Peppers are usually harvested in greenhouses 2 times a week, as they acquire varietal characteristics.
Timely harvesting relieves the plants and promotes the formation of new fruits. Sweet pepper has two degrees of maturity: technical and biological, and each of them has its own characteristics.
Technical ripeness of peppers
The time of technical ripeness of pepper is determined by the following criteria:
- the size and weight of the fetus correspond to the characteristics stated in the instructions;
- the walls of the fetus have become elastic;
- but it did not acquire the color characteristic of the variety;
- the seeds have not ripened.
The harvest harvested at this time can be stored for up to 2 months, subject to temperature (8-10⁰С) and air humidity (95-97%).
Biological ripeness of peppers
When the fruits on the bush have acquired a characteristic red, purple, orange or yellow color, this means that the time has come for biological maturity. During this period, the fruits contain the maximum amount of vitamin C and vitamins from group P. As well as carotenoids, substances that are very important for the body.
It will take an additional 20-25 days for the fruits on the plant to move from technical ripeness to biological ripeness.
Fruit ripening
It is very easy to bring peppers collected at the stage of technical ripeness at home. To do this, several ripe ones are placed among the green fruits. And it doesn’t have to be pepper. Red tomatoes or even apples will do. The released ethylene will quickly bring the peppers to biological ripeness.
Diseases and pests
Pepper stolbur
Sweet pepper can get sick if the temperature regime is not observed and sudden changes in daily temperatures occur. Then the leaves become covered with plaque and purple spots.
The most dangerous pest of pepper bushes is aphids. The plant is also damaged by spider mites.
Among the diseases, we note stolbur - a type of mycoplasmosis that affects not only peppers, but also other nightshade crops (tomato, potato, and others). With this disease, the bush stops growing, sheds its leaves, and its unripe fruits turn yellow. Another disease that often affects peppers is blossom end rot. Its occurrence is provoked by high humidity. You can prevent such a nuisance by using a handful of wood ash under each bush. This alkalizes the soil.
With Alternaria, or black mold, the entire plant, all its parts, become covered with brown spots.
Getting your own seeds
Among the peppers grown in a greenhouse, there will always be 1-2 varieties that you will want to see in your garden next season. And you need to prepare your favorite specimens in advance.
First of all, mark them by tying a bright ribbon to the stem, otherwise one of the household members will definitely snap at the beauty without leaving the bed.
Pure varietal peppers are suitable for collecting seeds. Fruits grown from seeds marked F1 are not suitable for collecting seeds: they do not retain maternal qualities.
The seeds are left with the fruit grown from the crown bud or 1-2 fruits from the first order branches. The seeds of these peppers will be the healthiest and most germinating. It is desirable that the fruits reach biological maturity directly on the root.
It is then picked and left to ripen indoors. The seeds can be removed when the fruit loses its elasticity and the skin becomes wrinkled.
Using a sharp knife, carefully cut the walls of the pepper along the fruit and take the seeds that are located closer to the stalk.
You can immediately check for occupancy:
- The grains are placed in a glass of water and those that are on the surface are removed.
- Those that have precipitated are laid out to dry.
- After 3-5 days, they are packaged in a paper bag and labeled with the variety and date of collection.
Pepper seeds remain viable for 3-4 years.
This shelf life will allow you to grow your favorite variety, even if it is not on the shelves of specialized stores at the right time.
General recommendations
To grow a plant in an indoor garden you need:
- Prepare the soil, fertilize, apply phosphorus fertilizer. Then humus in proportions of 10 liters. solution per 1 sq.m.
Manure cannot be used! In pepper it causes a decrease in yield.
- Before planting small seedlings, warm up the greenhouse and the ground using natural heat and heaters.
- Seedlings survive better if the seeds are grown in glasses with peat.
- Peppers in a greenhouse require care. It is important to follow the recommendations for watering, feeding, and seating chart.
Planting peppers in a greenhouse has advantages: the thick walls of an artificial greenhouse protect the seedlings from wind, frost, and excess moisture. Double material scatters light, in this case the sun does not burn the leaves, but evenly illuminates the room.
How to form a bush
Pepper in a greenhouse requires care and proper formation of the bush. This will allow you to achieve a rich harvest. Competent stepsoning occurs according to the following rules:
- Agricultural work is carried out only on bushes that have grown to 25 cm.
- The crown flower (the first one) must be ruthlessly removed. This will help the vegetable develop other shoots.
- Create the skeletal base of the bush.
- To do this, powerful shoots are collected, the rest are pinched and trimmed.
- Skeletal shoots develop and a primrose appears on them. Repeat the pinching procedure again.
- Process the remaining branches using the same method.
- Remove flowers inside the bush. They interfere and reduce productivity.
This method of formation is suitable for tall plants. On low-growing plants, only sluggish, weak shoots and diseased parts need to be removed.
Look at the tips on how to properly plant peppers from Nikolai Petrovich Fursov, candidate of agricultural sciences. Please note that he advises leaving no more than 12-15 fruits on each pepper bush.
Preparing soil for pepper
The soil also requires preparation before planting seeds. It should be loose, fertile, with a neutral pH.
Soil composition: humus, sand, earth in a ratio of 2:1:1, it is also recommended to add ash (1 tbsp of ash per 1 kg of mixture). For looseness, add perlite or vermiculite.
The soil must be disinfected, steamed at a temperature of 60°C, or spilled with a hot, dark pink solution of potassium permanganate.
You can buy ready-made soil in the store specifically for peppers, but soil for nightshades (tomatoes, eggplant) is also suitable for them.
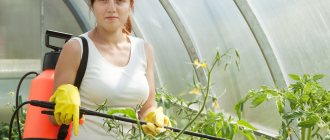
Proper care of greenhouse peppers
Regular watering and avoidance of temperature fluctuations are very important for peppers. If plants do not receive the amount of water they need, their fruits suffer from gray rot. A sharp change in temperature greatly reduces yield.
Pepper garter pattern
Formation of growing peppers:
- In varieties with average growth, it is necessary to pinch off the forming shoot, the leaves grown on the trunk and the extra sprout in the middle of the plant.
- High-grade peppers are formed from the two strongest stems, which must be tied to a trellis.
- Hybrids of the latter do not require any formation at all, but only need timely garter.
In order for the pepper plant to enjoy an excellent harvest, it is recommended to pinch off one lower bud. It also requires constant removal of shoots and leaves growing from the lower part of the main stem on the sides.
Advice. You should not plant sweet and hot peppers in the same area. For several reasons, peppers can cross-pollinate and the fruits of the sweet variety become spicy.
With the correct planting scheme and following simple care rules, a wonderful pepper harvest will delight the gardener and more than justify the time spent.
Advantages of growing according to the scheme
Plants that people decide to plant directly in the ground must be planted according to a special scheme. This type of cultivation has several advantages that every gardener should become familiar with:
- Saving free space. Sometimes people have to plant peppers in small areas. In such cases, it is necessary to plant the seeds according to the pattern, maintaining the optimal distance between the rows and holes. This will help save space in the garden and compactly place the pepper in the selected area.
- Acceleration of root growth. If you plant peppers too close together, their root systems will develop slowly. This will lead to slower bush growth and poorer yields. Therefore, to avoid such problems, it is better to plant vegetables according to a proven scheme.
- Improved yield. Using the diagram when determining the distance between bushes allows you to increase the amount of harvest obtained several times.
Forcing seedlings
Since when planted in protected soil, seedlings should have 6-10 true leaves and be 20-25 cm high, sowing of seeds begins in February. For forcing seedlings, peat pots are used, since in them the plants receive less stress during transplantation: pepper has a sensitive root system that does not tolerate picking well. The soil used is light and fertile. It can be purchased at a garden store or pre-prepared yourself by taking peat, sand and humus in equal parts.
The substrate is disinfected, the seeds are also disinfected by soaking them in a manganese solution for 20-30 minutes. To make them germinate faster, a growth stimulator is added to the water. The seeding depth is 0.5-1.5 cm, depending on the density of the soil mixture. The containers are covered with glass or film and kept in a warm room. After the emergence of seedlings, the protection is removed, and the seedlings are given additional illumination using a phytolamp in the morning and evening hours.
Compatibility with other crops
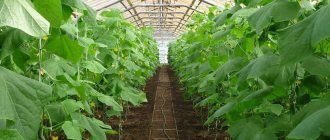
Gardeners often ask the question: “Is it possible to plant several crops in one greenhouse? For example, tomatoes and peppers, cucumbers and bell peppers?” These crops are heat-loving, but their compatibility also depends on other growing conditions.
- Do not plant bell peppers in the greenhouse with hot chilies at the same time. The seedlings are pollinated.
- Planting cucumbers and peppers in the same greenhouse is not the best option for experienced gardeners. Cucumbers do not require ventilation, but peppers love fresh air. Cucumbers require heat, while peppers require moderate, constant temperatures.
- Tomatoes and peppers don't get along well together. They need different conditions in the greenhouse. Sweet vegetables need moisture, and tomatoes die from water.
Thus, it is better to plant crops in different parts of a large greenhouse or arrange an individual greenhouse for each.