Importance of fogger for plants
A natural example of a natural air conditioner is a waterfall. The same principle is inherent in fogging systems. High-pressure water is turned into jets of mist that remove heat from the air.
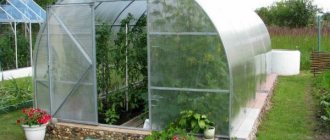
Industrial fogger for greenhouse
Foggers have been used in industrial greenhouses and winter gardens with exotic plants for a long time. The systems are also popular in the field of landscape design and site development. Clouds of fog look gorgeous around artificial ponds or alpine slides. And equipping the veranda with such a system will allow you to calmly enjoy your holiday in any heat.
Fog generator in landscape design
Many summer residents believe that foggers are an unnecessary luxury for small farm greenhouses, because cucumbers and tomatoes can be grown without them. However, there are a number of advantages to using it that are quite difficult to refuse.
The disadvantage of the system is that it can be used mainly in the summer. In winter - only in well-heated rooms.
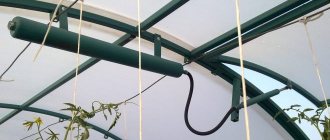
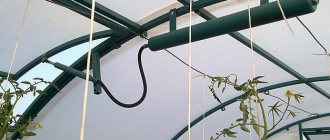
The pipe with fittings is mounted at a height of at least 2 meters
Scope and tasks to be solved:
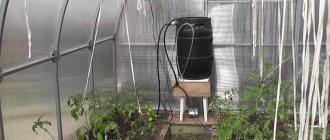
In the greenhouse
- Using a fog generator, the humidity level is maintained. The gardener, turning on the system, regulates the decrease in air temperature. This is what creates the optimal microclimate for plants. The higher the humidity, the lower the temperature.
- Through the humidification system, you can supply a solution of micro and macro fertilizers for foliar feeding of plants. Therefore, it will be beneficial for growth and development.
- If necessary, solutions of fungicides and insecticides are supplied to the system. This will protect the plantings from diseases and pests. At the same time, uniform distribution of drugs is guaranteed.
In the garden and on the terrace
- To clean the air from dust particles.
- Cooling the air in hot weather.
- In addition, it is difficult for insects to move in humid air: their wings get wet. Therefore, you will be able to relax on the open terrace, but mosquitoes and mosquitoes will not be able to bother you.
- When cultivating mushrooms, in particular oyster mushrooms. There will be no need to spray the mycelium to humidify the air.
- Creating a foggy cloud on alpine hills and near artificial reservoirs. It has been observed that flowers grown using artificial fog have brighter colors.
Attention! The greatest effect is achieved at a temperature of 30-40˚С. Namely, exceeding +30˚С has a detrimental effect on the viability of pollen of vegetable crops. Therefore, fog will increase fruit production.
How does a fogger work?
An industrial fogger works using special devices, sprinklers. Thanks to them, water is sprayed into droplets measuring 5-10 micrometers. This is thinner than a human hair, whose thickness is 80 microns. These tiny droplets instantly evaporate, cooling the air and increasing humidity.
Attention! The water spray device is most effective at a temperature of 30-40 °C.
Greenhouse fogger
Standard fog systems are made from:
All kinds of foggers and their components can be found in online stores. The choice is huge; for example, it is known that there are about 20 thousand varieties of nozzles.
Fogger with four nozzles
The average price of a fogger (part of a system) with four nozzles is 110 rubles. And the automatic spraying system itself can cost from 30 to 100 thousand rubles. depending on power and configuration.
The innovation has not yet become widespread among summer residents. Judging by the reviews, only a few people use it. All the more valuable is the step-by-step instructions for making a fogger with your own hands.
Reviews of fog generators
Domestic manufacturers produce one-piece fogger installations only for industrial greenhouses. The private market is covered by plastic units from Israel and China. They belong to the budget category. On forums, gardeners share their personal experiences of using foggers for greenhouses.
Vladimir from Samara notes a useful property of the installations: in a number of situations, water should not get on the foliage and flower petals. A properly configured fogger ensures this, but only in greenhouses with a height of at least 3.5-4 m. Andrey (Rostov) advises taking foggers with a water flow rate of at least 12 l/h. Otherwise, instead of fog, large drops are obtained. Even a powerful pump will not save you.
Probably, experienced summer residents will question the need to purchase a fogger. You can get a harvest without it. However, practice shows that generating fog in a greenhouse will increase the number of fruits, speed up their ripening, and save plants from stressful heat.
Source of the article: https://mirfruktoeda.ru/teplica/sistema-tumanoobrazovaniya-svoimi-rukami.html
How to assemble a fogger for a greenhouse
There are no particular difficulties in assembling your own fogging system. It works on the same principle as industrial devices, it is simply constructed from more affordable components.
Diagram of the fogger filtration system
DIY fogger
You can purchase a ready-made fogger for the greenhouse
A purchased or home-made fogger consumes a minimum of water and electricity. At the same time, it is able to provide greenhouse plants with the humidity they need and lower the air temperature to the optimum.
Temperature maintenance
In summer, due to solar activity, the temperature outside can reach high values, and in enclosed spaces even higher. High temperatures can harm crop yields both during the flowering period and during the growing season and fruiting.
It is possible and even necessary to lower the temperature in the greenhouse by installing shading and ventilation systems, but in addition to them, a fogging system . The temperature reduction effect is achieved through the evaporation of atomized fine water.
DIY fogging system
Of course, you can purchase a fogger in online stores or at specialized retail outlets. But the price of the product makes you think. The minimum amount starts from 55 thousand rubles. “Advanced” greenhouse growers recommend making a fogging system with your own hands. To do this, you need to have basic knowledge and skills in plumbing work and, of course, your desire.
High Pressure Fogging System
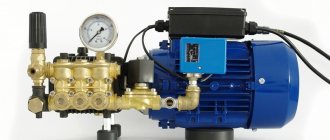
At a system pressure of 20 bar, it is possible to obtain a full-fledged fog cloud with water microparticles of 3-5 microns.
Consumables
So, to build a structure using high pressure you need:
System installation
After purchasing the above materials, proceed directly to assembly. Now it all depends on your imagination, but you can adhere to the following algorithm:
Important! No matter how clean the water is in the water supply, well or Artesian, a filter must be installed. Otherwise, the injectors will clog and quickly fail.
Systems using high pressure produce the finest fog cloud. It looks impressive in garden design. Used in industrial greenhouse complexes. But even home-made equipment will cost quite a hefty sum due to the high cost of components.
Maybe you are interested in a drip irrigation system? You can get more detailed information about such a system from my colleague’s article by clicking on this link .
Low pressure fogging system
A do-it-yourself fogging system using low pressure is several times cheaper. Water microparticles, of course, will be larger, 7-10 microns. Therefore, it is more of a water mist, but is quite suitable for use in small greenhouses.
Required materials and components:
Low pressure spray nozzles made of stainless steel. Spray diameter 0.2-0.6 mm. The diameter of connection to the hardware connector is 6 mm. Pressure from 5 to 20 bar. There is an anti-drip valve. Thus, when the pump is turned off, water from the supply pipe does not drip through the nozzle.
The operating procedure is similar to assembling a high pressure system.
This is not to say that organizing fogging is an easy task. But, if you have a little technical knowledge and skills, it is quite doable.
Source
Ultrasonic evaporator
This is, in fact, the only expensive part that you will have to buy. But you shouldn’t rush to purchase components for existing models of air humidifiers; they are at least twice as expensive.
A regular piezoelectric element costs from 300 to 500 rubles. You can buy one at online auctions, or directly from China. Make no mistake in your choice: a “bare” piezoelectric element will not work; you need a device in a waterproof case with a pair of outgoing wires and a plug at the end. The difference is that such a humidifier has all the necessary piping to generate the required frequency and can be placed in literally any container of water without additional waterproofing.
The evaporator must be fixed at the bottom of the container in an arbitrary place, but not close to the walls, leaving free space for installing a container with water. If the evaporator body is not waterproof, or the plate does not sink deep enough during installation, the device can be secured to the bottom of the container from the outside. It is necessary to make a neat hole under the side of the plate and seal the junction with sanitary silicone. For stability, the container will need to be equipped with legs or a stand.
Body parts
We recommend using an airtight food container to house the humidifier. Its height must be at least 150 mm and its width about 300 mm.
The water container is a regular three-liter jar. It will completely evaporate in 6–8 hours; if you need more, use five-liter bottles or drinking water cylinders.
There are two types of connection between the container and the body. In our case, we will place the can with its feet on a round wooden washer. Of course, the service life of such a part is not very long, but nothing prevents you from making a new one. In addition, you can take a “moisture-resistant” tree, for example, larch or linden, as a basis. First, use a 100 mm wood crown to drill out a washer from a 50 mm thick board. Then, using a 75 or 80 mm crown, we make an annular groove about 15 mm deep using the existing hole in the center, and then select the central part with a 60 or 50 mm crown.
Using a penknife, we expand the sample from the crown to 9–10 mm, then we go inside with a thin chisel, giving the correct profile. As a result, the washer should fit tightly enough onto the jar, like a lid. Along the upper edge of the washer, use a hacksaw to cut crosswise to a depth of about 15 mm to create small holes for air intake and water outflow. As a result, the structure should work as a drinking bowl for young birds.
As a second option, you can use an external container: a small tank or canister connected to the evaporator by two thin silicone tubes. It is important, however, that the supply tube comes out at the very bottom of the container. The insertion level of the second hose exactly determines the height of the water layer.
Dry running protection
The emitter must always be submerged; this is critically important. Without water, it resonates, heats up and fails in a matter of seconds.
Protection against dry running can be done with a simple washer fluid level sensor for domestic cars. It is advisable to purchase short float sensors with a reed switch in a small tube, otherwise there is a high risk that the humidifier will turn off before the water in the jar runs out.
Place the sensor at the bottom of the container so that once the jar is installed, it will be inside. If the container is separate, the sensor is installed in it. The normal mode of operation of the sensor is an open contact, but there can be several switching schemes. To invert the signal, use an intermediate relay or semiconductor switch. If the contact sensor has a standard operating circuit, then it can be connected directly to the power supply circuit of a low-power emitter.
