Greenhouse / Types of greenhouses
Greenhouse for strawberries
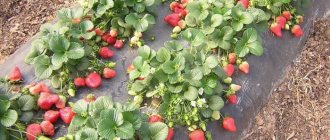
Strawberries are a rather finicky and demanding plant. Strawberries are grown both in greenhouses and hotbeds, as well as in front gardens, and they constantly dream of a harvest that can provide at least their own needs. In order for this harvest to be quite feasible, you must not only have a great desire to grow the crop, but also follow absolutely all the rules about strawberry agricultural technology; there must also be a greenhouse for growing strawberries.
- 1 Stages of work to create the structure 1.1 Selecting a location
- 1.2 Dimensions of greenhouse for strawberries
- 2.1 Foundation
- 3.1 Greenhouse rafters
Strawberries in a greenhouse
Strawberries, like any garden plant, grow and bear fruit well in a greenhouse. The advantages of this method of growing berries are obvious:
- the ability to create a favorable microclimate for high yields;
- the ability to grow on racks, which saves space;
- reducing the risk of infection with various diseases and, as a result, increasing yield;
- obtaining strawberries all year round, or starting in early spring, depending on the purpose of cultivation (for personal consumption, for sale).
It is easier to care for plants in a greenhouse because plantings can be placed on shelves in pots or containers. There is no need to constantly weed the soil, which makes maintenance easier. An automatic watering system can be installed in the greenhouse.
Also, on the site you can learn: how to grow strawberries in greenhouses, the secrets of growing strawberries in a greenhouse using Dutch technology and the subtleties of growing raspberries in a greenhouse all year round.
Benefits of vertical planting
The vertical arrangement of beds in a greenhouse is an excellent space saver, allowing you to harvest a much larger harvest from one square meter than with the traditional horizontal method. Only the greenhouse itself can limit the height of such a structure, and a stepladder is often used to care for plants located at the very top.
When planted in this way, the berries do not touch the ground, which means they remain clean. They are less susceptible to various diseases, in particular, various types of rot.
Pests also rarely attack such plantings, which means that pesticide treatments to control insects are not required.
An undeniable advantage is the absence of weeds and the need to weed them. The whiskers that appear from time to time in most varieties do not take root and are easy to remove. There are also beardless varieties, but they will have to be propagated by seeds, and this will take an order of magnitude longer than rooting a strong shoot.
Strawberries grown using this method receive more light, bear fruit more actively and last longer. Caring for a vertical bed is simple and convenient: you don’t need to bend over to pick berries or pinch off excess shoots.
Kinds
It all depends on the purpose for which the berry is grown. If exclusively for personal use, then the area and equipment of such a greenhouse will be the same. If a business is made on this, then the quality and size of the greenhouses will be much greater.
Frame
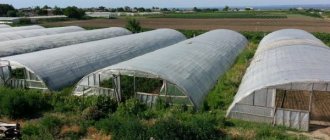
Suitable for those who want to get an early harvest. Typically, frame greenhouses are covered with film. Their advantages are that they are not expensive and are easy to disassemble and install. Disadvantage: poor frost protection. Such greenhouses are not suitable for year-round cultivation of strawberries.
Glass
This is an option that is perfect for organizing strawberry plantations on an industrial scale . Large fruit nurseries use this type of greenhouse.
They can install internal heating systems, create the necessary lighting and use various auxiliary technical means to facilitate planting care (automated watering and fertilizing systems).
The disadvantage for personal use is the labor intensity of construction - the need to lay a foundation, its impressive size. This also includes the fragility of glass. The advantage of this design can be considered its durability.
Polycarbonate
Polycarbonate is a modern material that has made the life of gardeners much easier and has become the most popular in the construction of greenhouses on personal plots. It is perfect for building a greenhouse for strawberry beds.
The disadvantage is its rather high cost , but it will also be used for more than one year.
The advantage of such a greenhouse is the ability to create the necessary conditions for obtaining a harvest (just like in a glass greenhouse).
A polycarbonate greenhouse is considered the most convenient and reliable Beginning manufacturers are increasingly abandoning glass, preferring flexible, strong and durable polycarbonate.
Home greenhouse
It is quite possible to grow a small crop of strawberries for your family, even in an apartment. Especially if you use Dutch technology. For home growing, a room in an apartment, an insulated loggia, or even a garage are quite suitable.
The room itself will already be a greenhouse, in which special lighting must first be installed. The same applies to the garage, where in addition to additional light there should also be heating . Creating a greenhouse for growing strawberries at home is not difficult and does not require large financial investments .
Pyramid made from old tires
In addition to the previous option, you can create a pyramid of tires for strawberries. When wondering how to build such a pyramid, you need to find several tires of different sizes in advance. Anything will do, from multi-ton trucks to small car models. Typically, the bottom tier is a tire from heavy-duty vehicles. Next come smaller diameters, which are selected based on the base.
The place where strawberries will be planted in a pyramid must be thoroughly cleaned and a hole dug. It must match the tire diameter. The top part of the tire with the largest diameter will have to be cut using an electric jigsaw. The remaining part is placed in the prepared hole. It is necessary to pour a 2 cm drainage layer at the bottom of the structure. It usually consists of a soil mixture mixed with expanded clay. The tiers are then made using similar methods.
Drawings and parameters of a pyramid for strawberries
There is no point in making a complex drawing for a slide, since it is a fairly simple design. The pyramid is made up of several boxes stacked on top of each other. If tires are used, then a drawing is not needed at all.
You don’t need a plan if you are building a two- or three-tier pyramid for strawberries.
It’s more difficult to deal with a structure that has 5-7 tiers, because it needs to be watered somehow. To ensure that water is evenly distributed over the soil, the slide is equipped in the center with a perforated pipe into which water is poured.
The above scheme provides for the protection of the bottom of the pyramid with a galvanized mesh. She will not allow rodents to get out of the garden. When a pyramidal bed is installed on asphalt or in the yard on paving slabs, there is no need for reinforced mesh.
Equipment that makes it easier to care for
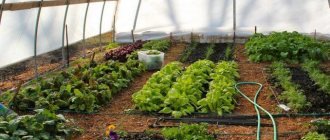
A greenhouse is a home for plants. In it they are protected from weather troubles - wind, rain, frost. In order to create such conditions, as well as make it easier for yourself to care for the rather capricious berries, the greenhouse can be equipped with all kinds of devices, as well as the workspace in it can be properly organized.
beds
The beds can be made traditionally - on the soil. Or you can install racks in several tiers so that access to them is easy and convenient. On shelves, strawberries are grown in individual pots or containers .
is considered convenient - in hanging beds or horizontal boxes.
Heating
If you plan to grow strawberries all year round , the greenhouse must be heated . In the south, biofuels can be used.
In the middle and northern regions it is not enough, so it is better to install a permanent heating system.
This could be heating the bed from below, a kind of “warm floor” for plants. To do this, during the construction of a permanent greenhouse, pipes are laid under the beds through which hot water is supplied during the cold season.
To heat the air, a water heating circuit is installed.
Lighting
Glass and polycarbonate greenhouses are good because it is easier to install electric lighting in them than in film ones. When growing strawberries in the autumn-winter period, they always require additional lighting, so to obtain a harvest, the presence of phytolamps is mandatory.
Irrigation systems
You can, of course, waste time on manual watering. Or you can automate it. The simplest drip systems and technologically advanced automatic systems are a matter of scale of cultivation.
Drip irrigation allows you to significantly save water and supply it to the plants in the required quantities. There are many types of systems on sale; you can do it yourself.
For drip irrigation, a stable centralized water supply to the site is important. If the greenhouse is installed on the site of a private house with permanent residence, then this problem can be easily solved.
automatic watering systems in greenhouses for industrial cultivation of berries. It will pay off along with other investments in the business.
Ventilation
Ventilation hatches, or, simply put, vents, are a must. During construction, they must be provided on the roof and in the end walls.
Vent ventilation is justified only in small greenhouses. Sometimes it is not enough, especially in calm weather.
If we are talking about large areas, installing automatic ventilation is justified. Modern climate control systems using electronic equipment automatically maintain optimal temperature conditions using exhaust and circulation fans.
Ease of access
This is one of the important conditions. The interior space of the greenhouse should be arranged so that you can easily reach any corner of it, especially if the strawberries are grown in soil in traditional beds. Their width should not exceed 0.7-1 m. The height of the racks is adjusted to the height of the person who will provide the main care for the strawberries.
It is convenient to separate a place in the greenhouse (for example, a small vestibule) where the equipment necessary for care will be stored.
Making a wooden pyramid
When wondering how to make a pyramid for strawberries yourself, many, looking at the drawings, remember children's sandboxes. Indeed, a do-it-yourself strawberry pyramid, the drawings of which you can draw up yourself, will resemble a children's playground, albeit in an unusual design. For manufacturing you will need the following materials:
- wooden boards of durable thickness, their dimensions are determined by the original area of the site. Before work, it is important not to forget to saturate them with drying oil. And then sand it with sandpaper and varnish it. This will help smooth the boards and reduce the risk of injury for both the berry and the gardener;
- material for fastening the tiers of the pyramid, with which the boards will be connected to each other;
- hammer with a building level;
- soil, with which after completion of the work it will be necessary to fill the pyramid.
The pyramid construction scheme begins with leveling the prepared area of soil. After the process, the manufacturing of the largest part of the structure begins. It usually requires boards about 30 cm in size. They need to be connected using fasteners, forming a square or rectangle shape. Then deepen the structure about 15 cm deep into the ground. Then you immediately need to fill the bottom layer with soil.
The strawberry pyramid is first filled with nutritious compost, humus and coarse sand. Then water the structure generously and leave for half an hour for the soil to settle. Next, if necessary, you can add more soil to the bed so that it reaches the edges of the boards, but does not spill out of them.
Then you need to build the second part of the pyramid. Which, according to average estimates, should be 70 cm smaller than the first plot. Such space is optimal for comfortable germination of strawberries. The second part must be placed strictly in the center on the base of the pyramid, then the process is repeated, similar to the first stage. Then you need to install another tier according to the same principle as the first two.
When wondering how to build a pyramid for strawberries with your own hands, you can pay attention to another way to create a structure.
Photo
You can visually familiarize yourself with the main aspects of the technology for growing strawberries in a greenhouse built with your own hands in the photo below:
Selection of seedlings
When choosing planting material in a store or market, you need to carefully consider the seedlings. An ideal rosette would be one with a large heart-shaped bud and 3-5 well-developed leaves. It should have a healthy, fresh appearance, the leaves should not be limp.
If you grow seedlings yourself, the best ones will be rooted tendrils from the largest mother bushes that bloomed earlier than others. They are marked at the beginning of the fruiting period (around the beginning of June). No more than 5 tendrils are rooted from such rosettes and the formation of others is not allowed. In August, young plants can be transplanted to a permanent place; by this time they have become sufficiently strong.
Location
On a personal plot, the place for the greenhouse should be flat, not swampy (a low-lying area will not work) and located close to the house. There should be no buildings or trees nearby that could cast a shadow on the greenhouse.
Building a greenhouse in close proximity to your home has a number of advantages. This makes it easier and cheaper to provide communications to it - water and electricity. Some gardeners even attach it to the house. During the cold season, you can get into the greenhouse without going outside.
Cleaning the soil from weeds and insects
Before planting, the land must be carefully prepared. It is recommended to dig it up, then check for the presence of roots of perennial weeds, as well as wintering reserves of the pest. It is best to thoroughly steam it with boiling water after cleaning the soil. But this method is suitable for small quantities.
On a large area we do this:
- in the spring we remove a layer of earth 10 cm thick;
- We dig a hole 1x1 m and put the removed layers there;
- Place the last layer with the roots facing up;
- pour warm water over everything and cover with film;
- leave air gaps at ground level.
Over the course of several months, the soil will be steamed under the film. Afterwards the soil needs to be sifted. Done, ready to use.
In addition, garden soil may be full of harmful insect larvae and spores of various fungal diseases. They can be eliminated using special preparations for soil treatment. Among them are Fitosporin, Intavir, Aktara and Quadris.
As you can see, preparatory and planting work can be time-consuming. But the right location, well-formed beds, ideal soil and timely fertilizing can be the key to an excellent harvest in the future. And already next season you will be able to pamper yourself with delicious berries grown on your own plot, equipped with your own hands.
Construction of a greenhouse for growing strawberries all year round
Before starting construction, it is necessary to think through its internal structure to the smallest detail and make drawings. Next comes the calculation of the amount of building materials and the funds that will be spent on it.
When planning industrial cultivation, it is necessary to take into account that strawberries are a highly profitable business, the payback is 100%. Accordingly, the more modern and technologically advanced the greenhouse is, the higher the crop that will grow in it for more than one year.
Foundation
A permanent greenhouse requires a good foundation. For this, a foundation is built. It can be ribbon or columnar. Most often, a strip foundation is made.
- the trench must be filled with sand 20 cm below the surface of the earth and thoroughly compacted;
- the formwork in the trench is installed 20 cm above ground level and smoothed around the perimeter with a metal rod or reinforcement;
- the mandrel thus strengthened is filled with concrete;
- , brickwork is laid in one row on top of the poured concrete . It will be convenient to attach frame posts to it;
- is placed on the brick .
Frame
The frame racks can be made of a metal profile with a section of 50 x 40 mm. They are fastened with anchor bolts at equal distances from each other. You will need a rack profile and a guide.
The vertical racks are made from a rack profile, the horizontal parts of the frame are made from a guide. They are connected to each other with self-tapping screws or riveting.
All corners must be reinforced with triangular elements. This will give the structure strength.
Soil requirements and preparatory activities
We have already figured out how to make a bed for plants, and now let’s talk about the soil. In order to grow a really good strawberry crop, you need to choose soils similar in composition to loamy and sandy loam.
Loamy soil perfectly passes and retains moisture, breathes and warms up easily. Sandy loam has a lot of sand in its composition, due to which it also has excellent throughput. When it dries, a dense crust does not form on its surface.
Strawberries just don’t like sandy and clay soils. Sand quickly heats up and cools down, losing its beneficial properties. Clay slows down the growth of the plant, since it does not contain enough oxygen and moisture.
Acidity is considered an important characteristic. Acidic and alkaline soil types are unsuitable for strawberries. Neutral soil compositions or with a normal/slightly acidic reaction, when the pH level is not higher than 5.5, are best suited.
In order to increase soil fertility, it is necessary to regularly feed the plantings with organic matter. This fertilizer is prepared mainly from bird droppings in a ratio of 1:10. It infuses for several weeks. Mullein can also be used.
Compost is prepared in late spring. We take garbage bags with a volume of about 120 liters and prepare chamomile, nettles, weeds and clover. We chop everything thoroughly and then put it in bags in layers, topping each layer with wood ash. Next, we place the bags in the sun. By the end of summer the compost will be ready. It is perfect for digging up the ground in the fall or as mulching around a bush.
In autumn, when preparing the soil, you can add mineral fertilizers to it:
- phosphorus;
- potassium;
- nitrogen.
But when using this type of fertilizer, you must follow the dosage regimen. They can be used both dry and dissolved.
Also, before digging the soil in the fall, ammonium sulfate is used. It looks like small white crystals. For 1 sq.m. it will require no more than 40 g.
Important! Ammonium sulfate will allow strawberries to grow green mass.
Construction mesh
In addition to the mesh method described at the beginning of the article, you can build a large column from it, fastening the ends so that you get a pipe with a diameter of 80-90 cm. The walls of the pipe are tightly lined with straw so that the earth that will be poured inside does not fall out through the mesh cells .
Compost is poured at the bottom of the column, and its amount depends on the height of the bed. Now you can start planting.
Sometimes the straw is replaced with plastic film; small holes are made in it for planting young rosettes. It would be a good idea to make tiny holes throughout the entire area of the film so that the earth can “breathe” better.
Lane layout
The location of the paths in the greenhouse depends on its size. The organization of a greenhouse can occur in several ways :
- on the sides - in long and narrow greenhouses;
- in the center - when two beds are located along the walls;
- between the beds - when divided inside into three beds.
The material for covering the paths depends on the preference of the greenhouse owner.
Today, if you make paths in a greenhouse with your own hands, you can divide them into the following types:
- Stone - made of natural stone, which is laid on a sand cushion close to each other.
- Tile - made of paving stones or paving slabs intended for laying sidewalks and garden paths.
- Concrete - made from concrete mixture using special molds, then laid on sand.
- Gravel - made from fine gravel poured directly onto the ground.
- Wooden - from construction boards.
- Brick - made of paving, light brick.
Paths in the greenhouse - photo from inside the structure:
Equipping the inside of the greenhouse with paving stones, tiles or clinker bricks is the best option . Due to their small size, they can be used to lay out any shape of paths. Moreover, such paths are quite durable and easy to maintain.
Decorating the inside of greenhouses with a concrete coating is also practical and resistant to damage. However, its production cost is slightly higher .
Add colored pebbles when pouring a concrete path, and the coating will become more decorative and give your greenhouse an original, elegant look.
The most impractical of those described is a gravel surface . It is difficult to move around with a cart, and in wet weather stones stick to the soles of shoes. Therefore, it is preferable to use smooth, hard coatings.
The disadvantage of boards is their fragility , since they begin to rot when exposed to moisture. The option of simple trodden paths without any covering is also not acceptable. Unpaved paths contribute to the formation of puddles.
The industry is currently producing a very practical material that can be used as a covering for greenhouse paths. It is made from crumb rubber . It is very practical to use and durable. Its only downside is its relative high cost.
