In winter, the gardener has more free time, and therefore you can try to optimize some operations related to growing plants. For this purpose, someone came up with sowing seeds on toilet paper, someone improved the method.
We'll tell you what seeds can be planted this way, and in what cases the method really makes life easier. We will also give two options for growing plants using toilet paper.
For which seeds is this method suitable?
Sowing on toilet paper, like the once popular method with strips of newspaper, is intended to make labor easier during sowing. Some seeds are so small that it is not convenient to work with them. As a result, you have to sow them in continuous rows and then pull them up.
The method is advisable to use for seeds:
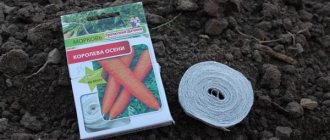
- carrots;
- celery;
- sorrel;
- petunias;
- primrose and other plants.
The toilet paper method is not suitable for large seeds - peas, beans, pumpkin, zucchini, etc. They swell greatly, do not hold up well in strips or roll-ups, and their roots require more space.
You can only germinate seeds on toilet paper and then grow them in the usual way. In this case, you can use any planting material.
Toilet paper as a growth stimulant
Toilet paper has a composition that has a mild biological growth stimulant effect on the seeds.
Due to the inclusion of organic substances in its composition - dissolved cellulose, which is a polysaccharide, it acts like an organic fertilizer.
This material has a rapid decomposition process - this is provided for by its production technology - so that it does not clog in the sewer.
These qualities have a beneficial effect on plants, helping to accelerate their growth.
When choosing toilet paper, preference should be given to plain white paper, without any patterns. Their presence can negatively affect germination.
READ ALSO: Why tomatoes crack during ripening
Sowing seeds on strips of paper
The method is suitable when the seeds are immediately sown in open ground. In the spring, furrows are made in the beds and strips of toilet paper with seeds glued on are spread. This method allows you to save time when planting, and you also don’t have to do thinning.
Preparation of material
Paper ribbons work best from gray, the cheapest toilet paper. It is cut into strips 1-2 cm wide and rolled back into rolls. Then the seeds will be glued onto the strips using paste.
Prepare glue according to the following recipe:
- Pour 2 tablespoons of starch into a cup.
- Gradually pour 100 ml of water to obtain a homogeneous consistency.
- Separately, boil 2 cups of water.
- Pour in the diluted starch in a thin stream, stirring the liquid constantly.
- Keep on low heat until thickened, turn off and cool.
Instead of starch, you can use 4 tablespoons of flour. The recipe remains the same.
Cool the finished paste to room temperature, then apply to paper. It cannot be used hot: the seeds will lose their germination.
Sticking seeds
There are different ways to stick seeds onto toilet paper. The simplest one requires perseverance from the gardener: you will have to manually apply each seed at the distance required for the plant.
Work order.
- Check that the workbench is dry.
- Unfold one strip of paper and, if necessary, press down with available objects.
- Apply a thin layer of paste with a brush.
- Soak a cotton swab in water, apply it to the seeds and apply them to the paste.
- If you need to set a certain distance between the seeds, you can adjust them with a toothpick.
Leave the toilet paper to dry on the table for about a day. As soon as the strips are dry, carefully roll them up and store them until spring.
Sowing in the ground
Success in growing plants depends on how correctly the sowing on toilet paper was done. The smaller the seeds, the less soil there should be above them; some types are generally sprinkled with only a thin layer of sand. These points need to be taken into account.
When sowing, the following rules must be observed:
- The bed is prepared 2 weeks before sowing so that the soil settles without seeds, otherwise they will be too deep and will not be able to sprout.
- Make furrows no more than 2 cm deep; the row spacing depends on the crop.
- One edge of the toilet paper is pressed into the groove with a stone, then the roll is carefully unwound.
- After making sure that the tape is nowhere above the level of the bed, the rows are sprinkled with soil or sand.
- The soil is watered using a watering can with small holes.
Usually sowing ends several times faster than with the traditional method. However, strong wind can interfere; here it is better to work with an assistant or place stones more often. After sowing, they need to be removed.
After planting, the soil needs to be slightly compacted so that it adheres closely to the seeds.
Germination process
Before soaking the seeds, you first need to put them in a glass of water and mix them, check after two minutes to see if they remain on the surface, it is better not to use them.
Before germination, seeds are disinfected, but those purchased in stores are usually already treated for diseases.
There are three main methods for germinating seeds using toilet paper - on a saucer (in a container), in a cup or in a plastic bottle.
The choice of container is determined by the number of seeds - for a large number of them it is more convenient to use the roll method - in a cup.
The desired phase of seedling development must be taken into account - when planted in a glass, the plant can be grown to seedlings.
Sowing snails for seedlings
This method also has other names - “roll-your-own sowing”, “Moscow method”. Its essence lies in the fact that the seeds are germinated without soil, exclusively in moistened toilet paper, and only on the second or third day are the plants planted in the ground.
It is better to take white or gray paper; colored paper is better suited for plants. You will also need cellophane packaging bags. You can use melt water; if you don’t have it, you can let it sit indoors for at least 2-3 days. Tools you will need are scissors, a syringe and a hand sprayer.
The easiest way is to sow seeds in paper snails using the following technology:
- Place the plastic bag on a work table or other flat surface.
- Place the toilet paper so that it protrudes slightly beyond one edge of the bag and overlaps. Moisten each layer with water using a sprayer.
- Place the seeds along the opposite edge of the paper, maintaining an interval of 1-2 cm.
- Roll everything up into a roll, with the seeds on one side and the protruding toilet paper on the other side.
- Rolled rolls are marked - indicate the variety and planting date.
Such rolls, also known as snails or rolled-up rolls, are placed in a plastic glass, a bottle with a cut neck or other suitable container so that the edge with the seeds is at the top. You can place several rolls, the main condition is that they should stand tightly so that they do not unroll spontaneously.
Add some water to the glasses. It will wet the toilet paper from below and, gradually rising, moisten the seeds. The bags will protect the rolled cigarettes from moisture loss. At the final stage, the container is covered with a plastic bag on top to prevent evaporation and create the desired microclimate. Under such conditions, the seeds germinate quickly enough and can be carefully removed and planted in the ground. After the shoots emerge, the snails, along with the glasses, are taken out to a sunny windowsill, where they are kept for another 2-3 days.
Instead of toilet paper, you can use disposable diapers or a backing for laminate flooring - the principle of seed germination will be similar.
Plants obtained by this method must be planted in the ground after 3-4 days, otherwise they will die from nutritional deficiency. You can extend the time a little if you add fertile soil between the layers. It is poured onto toilet paper or a diaper in a layer of up to 1 cm, the seeds are planted at the required interval, then rolled up. To prevent the snails from unwinding, you can tie them with strong twine or an elastic band.
How to sow seeds at home with a snail
To germinate seeds in toilet paper you will need:
- Plastic film or bags - they will need to be cut into strips no more than 10 cm wide (it’s good when the width of a strip of polyethylene is equal to the width of toilet paper) and 40 cm long;
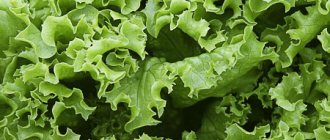
- Delicate toilet paper (ordinary gray paper is a bit rough; it will be difficult for young plant roots to penetrate the paper);
- Spray bottle for spraying;
- A plastic bottle with a volume of 2 - 2.5 liters, which needs to be cut in the middle and made into a mini-greenhouse (so that the upper part of the bottle fits well, make four cuts 5 - 7 cm deep in the second half, now when putting on the top, you need to squeeze the second part is slightly towards the center and it will be easy to put on);
- A little light porous nutritious soil (seedlings can also grow in toilet paper without soil).
Pros and cons of the method
Growing plants by sowing seeds on strips of paper has both supporters and opponents. The method has many advantages: saving time in the spring, when there is especially little of it, making work easier, and the ability to set the required distance between plants right away.
The method is not without its drawbacks, among which gardeners note:
- delay in development and fruiting for about three weeks;
- difficulties when diving into the ground;
- labor intensity at the time of creating snails.
Gardeners often complain about excessively long roots. This problem is possible if the width of the stripes was chosen incorrectly. As an experiment, you can cut the roots halfway with sterile scissors; most plants produce lateral shoots and only benefit from this procedure.
It is better to check any new growing method yourself and compare the results obtained in the conditions of one farm.
When to plant seedlings?
Planting seedlings depends on the growing method. If you have “roots”, then in March 2022 they must be planted on the waning moon - from the 3rd to the 16th.
But if it’s “tops,” then, on the contrary, it’s growing. In this case, seedlings should be planted from March 17 to March 29.
It also matters what exactly you are going to plant. Specific dates are determined by the location of the luminaries in the signs of the Zodiac. For example, in March cabbage should be planted on the 18th and 21st, eggplants and zucchini - from 20 to 24, radishes, beets and legumes - from 20 to 23, sweet peppers - from 20 to 24, cucumbers, tomatoes and carrots - from 19 to 24 and from 27 to 28, flower seeds - from 22 to 24, and bulbous plants - from 22 to 24 and from 26 to 27.
How to distinguish seedlings of cucumbers from zucchini?
A funny question may arise not only for beginners, but also for experienced summer residents. There are several methods to determine whether they are cucumbers or zucchini.
- We tear off the leaf and rub it a little in our hands. A zucchini leaf will have a specific aroma inherent to zucchini;
- The zucchini leaf is more rounded, and the stem is powerful and squat;
- If the seeds are planted at the same time, cucumbers are visually smaller than zucchini.
Cucumbers in eggshells
Planting cucumber seedlings in a polycarbonate greenhouse
A good greenhouse makes it possible to get a good early harvest. In their polycarbonate greenhouses, you can immediately sow cucumbers or plant those that have grown at home. To do this, be sure to warm up the greenhouse and prepare the soil. Plant seedlings that grew at home for 20 days, and then hardened for another 5 days.
Planting cucumber seedlings in a polycarbonate greenhouse
After planting, be sure to water and also warm up the greenhouse if necessary. Remember, cucumbers love warmth and begin to wither during cold weather.
How to grow cucumber seedlings in peat pots, eggshells and plastic cups?
Early cucumbers are an excellent storehouse of spring vitamins and microelements. Even if you have a greenhouse, you want to plant ready-made seedlings in it and get an even earlier harvest! And it’s easier to look after seedlings at home.
How to grow cucumber seedlings in peat pots
Peat tablets or pots are the optimal and simplest way to grow cucumber seedlings in modern realities. To do this, select medium-sized cups, fill them with soil and plant 2-3 seeds in each cup to a depth of 2 cm. For peat tablets the situation is the same simple - put 2-3 seeds on the tablet and pour water on it.
Pay attention to the soil with which the pots will be filled. Choose turf soils with humus and very little wood waste. Do not forget to periodically feed the cucumbers.
Preparing the seeds
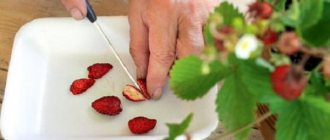
Many seeds germinate perfectly on paper, but there are also those that will not germinate under any circumstances. These are dead grains that need to be disposed of. In order to sort “living” and “non-living” seeds, they need to be kept in a weak salt solution (at the rate of 30 g per 1 liter of water). All bad seeds will float to the surface - they can be collected and thrown away. Then the water is drained and the remaining seed is dried. After this procedure, it can be planted on paper.
Soaking seeds in saline solution
By the way, there are different ways to grow seedlings on paper. Let's look at the two most common of them.
Why is paper good for gardening?
Toilet paper, due to some of its properties, is excellent for use as a substrate for growing seedlings. It is soft, does not allow the emerging roots to get tangled in themselves, and makes picking easy. At the same time, a reasonable question about nutrients can be answered as follows: due to natural characteristics, plant seeds during germination do not need additional nutrients and useful elements obtained from the soil. For the first time, what was laid down during their formation and development will be enough for them.
Toilet paper is great for growing seedlings
Let us remember the structure of seeds, which was studied in biology lessons at school. Seeds, whether dicotyledonous or monocotyledonous, contain special tissues that represent a supply of nutrients - proteins, starch, and oils. This may be endosperm, cotyledons and other tissues. Thus, we can say with confidence that at the beginning of their lives, small plants feed themselves, and therefore the presence of nutrients in the substrate is not at all necessary. On the contrary, some advise using a less nutritious substrate for these purposes.
Longitudinal section of seeds of dicotyledonous and monocotyledonous plants
Operating procedure
- Place several strips of paper together and cut them into small pieces. You can even pick it.
- Cut the bottle into 2 parts, so that the bottom is intact.
- Place chopped paper particles on 1 half of the bottle. Moisten the paper generously.
- Spread the seeds on the surface of damp paper, cover them with other pieces.
- Write the name of the crop on the surface of the bottle.
- Close the bottle with seeds using the cap.
- Place the plastic container in a bag.
- Tie the bag with a rubber band and leave in a warm place until shoots appear.
The temperature favorable for the emergence of seedlings is + 23 - +26 degrees. After the seedlings appear, it is reduced to room level. Water is added regularly to prevent drying out.