A small greenhouse on a summer cottage is an undoubted help for a gardener. And you can grow seedlings in it, and get early vegetables and herbs, and get a harvest of cucumbers and tomatoes, and even harvest remontant strawberries until December. And there are a great variety of ready-made polycarbonate structures on offer – choose to your heart’s content. But the question often arises of how to arrange the beds in a greenhouse for maximum results. Let's try to figure it out.
Gardeners use stationary greenhouses and temporary film shelters - greenhouses - to create a favorable microclimate for heat-loving plants
Compatibility of vegetables in a greenhouse
Photo 1
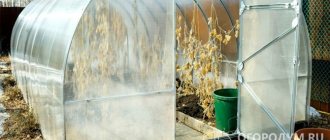
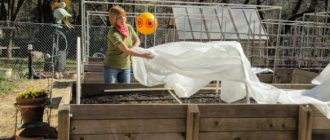
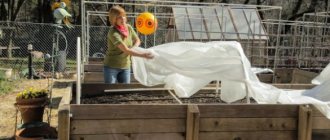
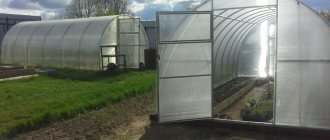
Different vegetable crops require different conditions. And according to the rules, it is not recommended to grow them in the same greenhouse. Some gardeners install two or more greenhouses or one long one and, partitioning it in half, thus create optimal conditions for keeping crops. We have a small family, and the area of the plot does not allow us to “roam around”. Our solar heated greenhouse, homemade, has a frame made of timber 35 mm x 70 mm, covered with cellular polycarbonate 6 mm thick, dimensions 3.6 m x 6.0 m, height at the ridge 3.0 m. The roof is sloping, polygonal in shape ( Photo1). Inside, the greenhouse is equipped with a room fan (for mixing the air), and emergency heating in case of a sudden cold snap - a household fan heater. For ease of use, both devices have remote controls. This season, the greenhouse equipment was supplemented with a wireless sensor, which transmits current information or sound signals (in case the temperature drops or rises beyond acceptable limits) to a small weather station located in the house. And you can take the necessary measures in time. For more information about the construction of a greenhouse, see the article Do-It-Yourself Greenhouse.
I have been growing vegetables for many years. Over the past decade, breeders have developed a huge number of new varieties and hybrids that easily adapt to various growing conditions, the vagaries of local weather, and are highly resistant to the main types of diseases of these crops.
Thanks to the above-described scientific achievements, a good greenhouse and equipment, we successfully grow 5 crops in it at the same time (tomatoes, cucumbers, peppers, eggplants and physalis). We grow all the seedlings ourselves. Our family has fresh produce on the table from spring to late autumn.
Placing various crops in a greenhouse
Photo 2
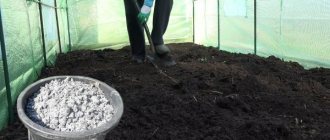
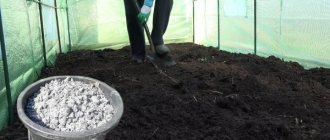
First of all, the greenhouse itself must be correctly oriented to the cardinal points. It should be located from north to south along the length of the ridge. The ridges inside it should also be directed along their length from north to south. If possible, it is better to make three narrow ridges in a greenhouse rather than two wide ones (even in a small one). The ridges should be about 15 cm high and fenced with some available material - flat slate, boards, etc. To raise the soil to the required height, you can dig a trench in the center of the ridge, almost the size of its width, and lay large branches, stumps and any other rough suitable material on the bottom. Place a thin layer on top, for example, branches, brushwood, wood chips, garden waste and cover everything with the removed soil, a layer of 35-40 cm. This will not only raise the soil level, but will also serve as additional drainage in areas that are flooded in the spring. True, such ridges will have to be watered somewhat more often.
It is also very important to properly place different types of crops in the greenhouse. Here it is necessary to take into account the cold resistance, shade tolerance, height and “span” of plants, as well as their tolerance of each other’s proximity on the same ridge.
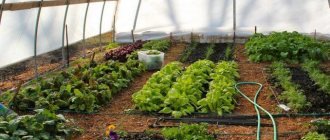
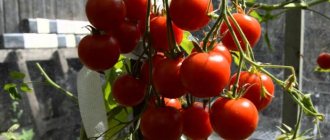
In the northern part of the side ridges, you can plant the most cold-resistant and shade-tolerant crop, for example, vegetable physalis. In front of it, in the central part of the side ridges, are tall and semi-tall tomatoes. And it is better to allocate the central ridge for cucumbers, so it will be easier to care for and shape them, since here the greenhouse is highest at the ridge (Photo 2).
On all three ridges on the south side you need to leave room for peppers and eggplants. But there is, however, one nuance. Peppers and eggplants go very poorly with tomatoes. In this case, I plant a couple of cucumbers between the tomatoes and eggplants with peppers (Photo 3). Or I dig a “separator” made of boards or slate across the entire width of the ridge. The top of the leaf is slightly higher than the soil level, literally 3-4 cm; it goes 30-35 cm deep. Plants must be placed in such a way that the leaves of the fruiting bushes of these “neighbors” do not touch each other in the future (Photo 4).
Photo 3 Photo 4
This is an example of a plant arrangement where there is no preference for one of the crops being grown (Photo 5). If any crop is grown as the main one, then it will be necessary to make adjustments not only in placement, but also in the formation and selection of varieties or hybrids of this crop. Everything will depend on where it will be located.
Read more in the articleVegetable crops for joint cultivation in a greenhouse.
Photo 5
Creating optimal conditions for plants inside the greenhouse
Even the most wonderful greenhouse is only a third of success, and the remaining two thirds are high-quality seedlings and a competent agrotechnical approach.
To obtain an early and high overall harvest, a solar-heated greenhouse must be equipped with at least emergency heating (see the article Do-It-Yourself Greenhouse). It comes in very handy in May - early June, when the weather is unstable and the nights are still quite cold. In the autumn, it is practically not used, since the crops are already finishing their growing season and the use of heating is not justified.
It is good to build a warm bed for cucumbers, peppers and eggplants. This will make it possible to get the first cucumbers (planted with 15-20-day-old seedlings) already in early June. To obtain such early production of peppers and eggplants, it is additionally necessary to construct a shelter made of non-woven material or film. Otherwise, young plants may become very weak and there will not be a good harvest from them. Mature, well-rooted plants tolerate unfavorable conditions more easily.
It is more difficult to do crop rotation in a greenhouse than in open ground. It is not always possible to move crops from one ridge to another. Therefore, you have to either completely replace the entire soil, or remove 1/3 of the layer, where the largest number of pests and diseases accumulate. The remaining contents of the beds are simply swapped with each other (at least partially) and the missing fresh substrate is added. For example, soil from under cucumbers is transferred to a ridge where tomatoes, peppers, and eggplants will grow. And vice versa.
After harvesting the main crops and putting the greenhouse in order, it is good to sow fast-growing sederats, such as mustard, or mixtures thereof. After the green mass grows, the ridges are dug up. In the greenhouse, due to the lack of snow cover, the sprouted sederats do not overwinter, even winter rye.
A little about varieties and hybrids
Competent selection of assortment is an important issue, but this is only half the battle. The most remarkable, unpretentious and productive varieties and hybrids can turn out to be completely useless if they are formed incorrectly (relative to specific conditions) or if the peculiarities of agricultural technology are not taken into account.
The topic is continued in the article Vegetable crops for joint cultivation in a greenhouse.
Photo by the author
greeninfo.ru
Using a greenhouse to grow plants
In regions with the early onset of autumn cold, certain vegetable crops do not have time to ripen in the open ground and, due to unfavorable temperature changes, they die. Growing in a greenhouse allows you to extend the growing season of the crop and get a full harvest. More often, cauliflower, leeks, celery, parsley and other vegetable crops that have not had time to ripen need to be grown.
Plants intended for growing are carefully dug up with a ball of soil and transferred to pre-prepared planting holes. Before planting in a greenhouse, damaged and yellow leaves are removed from plants, and the main root of parsley and celery is shortened. The hole is filled with fertilizers (nitrophoska, kemira), watered and the crop is planted.
Care consists of watering and maintaining the required temperature. Temperature fluctuations, high air humidity, and the appearance of dew on plants should not be allowed. When mold islands appear, you should immediately pollinate the soil with ash and dry the top layer with dry sand.
Thus, if the greenhouse is used from growing seedlings to growing vegetable crops that have not yet had time to ripen, then its load will be maximum, and the family will be provided with fresh, vitamin-rich greens and vegetables for a long time.
Mixed planting of vegetables in a greenhouse
In a small summer cottage, it is not possible to install 2-3 greenhouses to grow each crop separately, as professionals do. In such cases, amateur gardeners often use combined planting. This results in an earlier and higher harvest of a wide variety of greens and vegetables. In this case, the sowing space is used most rationally, and caring for seedlings in a greenhouse is much easier and more effective than in open beds. Plants are planted so that the greenhouse area does not remain empty. To do this, it is necessary to take into account the ripening period for each crop.
Compatibility table for growing vegetables.
Neighboring vegetables: mixed planting
Mixed planting in a greenhouse is used both in spring and summer. The use of this method eliminates unilateral soil depletion. Plants in protected greenhouses suffer less from pests and less often need watering and loosening, which improves their taste. For example, radishes planted among bush beans and lettuce have a particularly delicate flavor. It is grown next to parsley, chard, garlic, peas and types of vegetables such as cabbage and tomatoes. In the spring, you can grow young greens in a greenhouse, and in the summer, use the same area for heat-loving vegetables.
Mixed growing is ideal for those whose garden does not allow for a separate bed for each crop.
The site for the greenhouse should be flat or with a slight slope to the south, located close to a water source and protected from cold winds. When watering in the construction of protected soil, water is used at the same temperature as the soil, so as not to cause temperature shock in the plants. If mineral fertilizers are dissolved in water, you must ensure that it does not fall on the stems and leaves, which can lead to burns. To increase the resistance of vegetables to pathogens of bacterial and fungal diseases, it is recommended to use special biological products that are sprayed on the seeds and roots of plants immediately before planting in the ground. The soil in the greenhouse is filled with organic matter in the fall, and in the spring it is only supplemented with manure and sprinkled with a layer of fertile soil.
Plants are planted so that their proximity does not interfere with the growth of other vegetables. Beds intended for main crops cannot be completely occupied. Therefore, it is better to plant dill, watercress, Chinese cabbage, garlic, and mustard greens in the greenhouse. Greens will produce a harvest even before heat-loving plants begin to develop. Onions tolerate low light and temperature fluctuations well. It is grown as the first crop in January-February. Garlic and onions are soaked for 2-3 days and planted in a greenhouse close to each other.
In mid-April, a thin layer of damp sawdust is poured into the containers. After 3 days, watercress and radishes are sown, and after another 4 days, dill. Radishes should be sown sparsely and not covered with sawdust. Watercress and dill must be covered with a thin layer of sawdust. Containers are placed in slightly opened plastic bags. After the radish seeds have taken root, they are planted in the greenhouse at a distance of 8 cm from each other, as close to the light as possible. Sawdust with sprouted seeds of watercress and dill are evenly scattered on designated beds. Then all the seeds are sprinkled with a thin layer of soil. Spinach, lettuce, Chinese and Chinese cabbage, and chard are sown in mid-March.
Diagram of the neighborhood of vegetables according to the type of mineral fertilizers.
It happens that the proximity of certain types of vegetables adversely affects their development. For example, you cannot plant tomatoes and cucumbers next to each other, since their agricultural practices are different. Heat and high humidity in the greenhouse have a positive effect on the growth of cucumbers, but destroy tomatoes. It is contraindicated to plant sage next to cucumbers, and fennel and peas with tomatoes. It is strictly forbidden to plant potatoes next to tomatoes and cucumbers. Beans have a beneficial effect on cucumbers. It is recommended to grow celery, beets, lettuce, cabbage, garlic and onions next to cucumbers. Before combining certain plants in a greenhouse, you need to make sure that they are compatible.
Cucumber seeds are sown in early February or 25-30 days before planting seedlings in a permanent place. If you plan to plant cucumbers after seedlings of early cabbage, then you need to sow cucumbers on March 5-10. To plant cucumbers after eggplants, peppers, tomatoes or other vegetables, you need to start sowing them on April 5-10. Peppers, tomatoes and eggplants can also be grown as a second crop. To do this, sowing peppers and eggplants is carried out in early March. For tomatoes, the optimal age of seedlings is 50-60 days, so seeds are sown in the first half of February.
The beds on which it is planned to grow vegetables must first be cleared of greenery. Plants that affect the illumination of heat-loving crops are immediately removed. Cucumbers easily tolerate being in the vicinity of peppers and eggplants, but you need to take into account that cucumber vines can shade plants planted nearby. Eggplants have the same properties. You cannot combine sweet and bitter peppers so as not to affect their pollination. Corn can be planted next to cucumbers. Tomato, lettuce and beans have a positive effect on its growth, while celery and beets have a negative effect. Green beans have a high yield when planted in a greenhouse. This plant accumulates nitrogen on its roots, which increases soil fertility. Beans are best planted in beds among tomatoes or other vegetables.
Tomatoes benefit from proximity to radishes, radishes, lettuce, corn, cabbage, carrots, garlic and beets. Parsley and spinach are often planted around tomato beds. To improve the taste of tomatoes, you can plant basil, borage, mint and lemon balm nearby. If the size of the greenhouse allows, then melons and watermelons can share the proximity to tomatoes. But these crops do not grow well after other vegetables, especially pumpkin ones. 30 days before planting, sprouted seeds of watermelons and melons are sown in pots measuring 10x10 cm. For these crops, the soil layer in the greenhouse should be at least 25 cm. Fertilizing is carried out once a week, alternating mineral and organic fertilizers. Unlike tomatoes, watermelons and melons do not tolerate drafts. Therefore, they need to allocate the most protected corner of the greenhouse.
ParnikiTeplicy.ru
Planning the greenhouse area according to Mittleider
Traditionally, the layout of beds in two and three rows is used. Both options are quite feasible in greenhouses with dimensions of 3 by 6 meters. We provided approximate calculations above. However, there is another known method, an innovative one - the method of Jacob Mittleider.
Scheme of a Mittleider greenhouse with three beds
When a greenhouse is planned according to Mitlider, crops are planted in beds 45 cm wide. This resembles the traditional option. However, it is recommended to make the widest possible paths between the beds. For example, a good passage width is 90 cm. This technique will ensure good air flow and sufficient illumination.
Layout of beds according to Mittleider.
The technique involves creating comfortable conditions for the gardener. It is recommended to plant plants in two narrow rows, leaving free soil between them. In this case, there will be a good air exchange, and the person will not have to reach far to the bushes to work.
Scheme for growing vegetables in box-beds according to Mittleider
The most original method is to place the beds on racks that are arranged in a spiral. Can be made from pipes that are used for communications and water supply. This method is ideal for growing low-growing crops, such as greens and strawberries.
What cultures live next door?
You can have many plants in one greenhouse. So you are allowed to plant together:
- eggplants and peppers - these types of vegetables are heat-loving and prefer a similar watering regime;
- tomatoes and small onions, radishes, lettuce;
- it is not advisable to combine cucumbers and tomatoes;
- tomatoes get along well with peppers - both are nightshade crops, their care system is similar;
- greens and peppers – greens get along well with absolutely any crop;
- eggplants and tomatoes - despite the fact that these vegetables require a similar microclimate, you should not place them close to each other.
Compact crops are allowed to be planted not instead of, but in addition to vegetables
Optimal conditions for planting plants in a greenhouse
Proper construction of a greenhouse is very important, but in addition to this, you need to create comfortable conditions for the plants. Proper care must be provided for each species. Crops need to be planted in a prepared greenhouse. It would be nice to equip it with a heating system. It comes in very handy in the spring and early summer, when the nights are cold and the temperature is unstable. There is no point in heating crops in the fall, since they are already ripening.
For eggplants, peppers and cucumbers, you can equip a warm bed to get an early harvest of your favorite vegetables.
To do this, use shelters made of fabric or plastic film. After all, young plants that are weakened at first may not produce a harvest at all. Vegetables that have grown are more resistant to unstable microclimates.
Before planting, it is necessary to clean the soil and fertilize it. The soil should be loose and moist. The main thing is to saturate it well with oxygen. It is also important to disinfect the soil.
Disinfection methods:
- Burnt sulfur;
- A smoldering solution of sulfur and kerosene;
- Biological products.
Vegetables need to be cared for regularly with fertilizing. Fertilizers for each type of plant are selected individually. Tomatoes love phosphate and calcium, eggplants love nitrogen. The soil for cucumbers is well fertilized with manure.
It is also important to regularly pollinate plants. Bees do not fly into the greenhouse, so this procedure must be carried out manually. In addition, it is worth taking care of watering, ventilation, loosening the soil and fertilizing the plants.
What do grapes go with?
Do you want to try growing grapes, but you don’t know how compatible they are with other crops? First of all, it is worth noting that it requires the installation of special equipment in the greenhouse that will monitor the level of humidity and air temperature.
It is recommended to grow plants such as basil, radishes, lettuce and onions between the rows of grapes.
Tulips will also feel great next to grapes, the cultivation of which you can learn about by reading the article greenhouse cultivation of tulips: features of cultivation and care.
If you combine the compatibility of plants with the speed of their maturation, you can launch a real “green conveyor” in the greenhouse.
Growing seedlings in "snails"
One of the original ways to get strong seedlings ready for picking is to grow them in “snails” made of foamed polyethylene. The latter is used as a substrate for laminate or as film thermal insulation. Strips of this material are rolled up along with a thin layer of soil in which the seeds are placed. As a result, a “snail” is formed, inside which excellent conditions are created for the development of seedlings.
Growing seedlings in "snails"
Advantages of the method:
- saving space and soil;
- optimal conditions for seed germination;
- easy picking without damaging the roots.
Flaws:
- long process of sowing seeds;
- If the sprouts are not transplanted in time, they may die.
In this way, you can germinate most garden crops - nightshades, all types of cabbage and lettuce, as well as root vegetables. The “snail” is also suitable for germinating medium-sized flower seeds. The preparation of soil and seeds is carried out using the usual technology described above.
Step 1. Foamed polyethylene is cut into strips about 50 cm long and 10-12 cm wide. Lay out on a tray with one end facing you.
Laminate backing strips
Step 2. Pour a few tablespoons of moderately moistened soil onto one end of the strip and level it.
Laying out the soil on the substrate
Step 3. Place the prepared seeds at a distance of 2-3 cm from one edge. The distance between the seeds is 1-2 cm.
Sowing seeds
Step 4. Carefully begin to roll the tape from the end. Add the next portion of soil and sow the seeds. This continues until the end of the tape.
Formation of the "snail"
Step 5. The rolled up “snail” is secured with a rubber band. Place in a container with a depth of at least half its (“snail”) height. The seeds should be at the top edge of the “snail”.
Securing the snail
Step 6. Well moisten the soil inside the “snail” using a spray bottle. In the future, watering can be carried out in the container - the moistened soil itself will absorb moisture.
Watering
Step 7. Place a regular plastic bag on the container with the “snail” and tie it to create greenhouse conditions inside. Place in a warm, bright place until the seeds germinate. Once a day, open the bag for ventilation.
Creating greenhouse conditions
Step 8. Seed germination in “snails” usually occurs faster than in soil, due to stable temperature and humidity. It is necessary to monitor the appearance of loops in order to immediately place the seedlings in the most illuminated place.
Germination of seeds
Step 9. After germination until two true leaves appear, caring for seedlings does not differ from conventional technology. Due to the small amount of soil, the seedlings may not have enough nutrition, so add a little complex or humic seedling fertilizer to the water for irrigation, approximately 20% of the concentration recommended for feeding.
Sprouts ready for picking
Step 10. When two true leaves appear on the sprouts, the “snail” is rolled out, the strongest seedlings are selected and dropped into cups using the usual technology or into “diapers” - we will discuss them below.
Picking seedlings from “snails”
Video - Growing seedlings in “snails”
Basic rules for intercropping
When combining vegetables, even if they have excellent biological compatibility, competition for nutrition, light and water may occur. You can nullify it if you follow the principle of complementarity.
This means that it is better to plant vegetables in the same bed that have different light and nutritional requirements. So it would be advisable to plant a plant with a low need for the same substances near a crop with a high need for nutrients.
The main crop is usually located in the central part of the greenhouse. Here the conditions for food will be better. Accompanying crops can be placed in other parts of the greenhouse.
We also recommend that you familiarize yourself with the article: methods and rules for arranging plants in a greenhouse.
The compatibility of plants also depends on their attitude to heat.
Classification of indoor structures
All indoor structures can be divided into two groups:
- greenhouse arches;
- greenhouses-houses.
Moreover, each variety has its own pros and cons. The arched building provides better illumination. And since tomatoes are known for their love of light, it will be the best option for growing them.
It should also be mentioned that indoor structures differ in the material they are made of. The advantage of a polycarbonate greenhouse is the ease of creating a microclimate suitable for tomatoes.
If you choose the film option, then it is recommended to lay two layers of film with a gap of 3-5 cm between them. After the threat of frost has passed, one layer is removed.
Plant height, watering and compatibility
- When placing vegetables, try to place tall and low crops side by side. It is important that some plants protect others from overheating. So spinach and lettuce need shade. Corn will be a faithful companion for pumpkins and cucumbers. This vegetable makes the microclimate for crops located in the lower tier much better.
- When it comes to watering vegetables, completely different rules apply. It is recommended to place in the same bed those plants that have the same watering requirements.
Completely undemanding to the presence of moisture:
MoyaTeplica.ru
How to increase the productivity of a greenhouse?
In small greenhouses, where there are usually 2 beds, some beginning greenhouse growers plant tomatoes on one, and cucumbers on the opposite side. In this case, both cultures suffer, since they require different conditions for growth and development. Therefore, it is better to divide the interior space transversely into 2 zones with a dividing curtain, thereby reducing interdependence on the growing conditions of the neighboring crop.
The productivity of a small greenhouse can be increased by compacting the base crops by planting low-growing intercrops with a shallow root system. You can harvest multiple crops. The first rotation is to sow several varieties of radishes into the greenhouse (April). After harvesting, plant tomato or cucumber seedlings in May. After sowing and harvesting early cold-resistant greens (radishes, dill for greens, onions for greens), plant cabbage, salads or tomatoes, and cucumbers.
It is better to grow vegetables of the same type in one zone of the greenhouse at different ripening periods (early, middle). After harvesting the early ones, plant the next early ripening crop with the same environmental requirements (cabbage, salads, greens, radishes, onions). To increase the productivity of a greenhouse on one bed, you can use a mixed, compacted, repeated type of planting.
So, you can plant cucumbers with dill, cabbage and radishes in the garden at the same time. Tomatoes and sweet peppers can be packed with herbs, onions, and radishes. Beds with repeated crops can be developed in different ways. First, sow early varieties of radishes, and after harvesting, plant salads and greens. After cutting the crop, again sow late varieties of radishes or onions and other green crops. You can grow early cold-resistant greens in the garden and, after cutting, plant early white cabbage and beans.
Placing various crops in a greenhouse
Mixed planting of vegetables: in the garden, in the greenhouse, diagrams, video. Compatibility of vegetable crops.
Do you want to grow an unprecedented harvest on your garden plot? Try combining different types of vegetables and aromatic herbs in the garden. Mixed plantings of vegetable crops are gaining more and more popularity and will give results that will surprise you!
Mixed plantings increase yields and eliminate the use of chemicals
All gardeners are trying to get as much harvest as possible from their plot of land. Planting only one vegetable crop on it will not achieve a good result. Therefore, they try to plant the prepared land with different types of vegetables or berries. Mixed plantings help increase yields and eliminate the use of chemicals.
A few tips: how to place plants in a greenhouse
The placement of plants must be considered in advance, even before the construction of the greenhouse. It is the number of crops and their location that decide what size the greenhouse will be. In addition, you need to consider the place for comfortable work. In addition to the shelves, you need a special passage - paths for convenient movement.
Proper planting will reduce the likelihood of low plantings being shaded by taller plants.
There are two options for placing seedlings when growing vegetables in a greenhouse: in a garden bed or in pots. Each method has its own characteristics, but how the seedlings will grow, as well as obtaining good harvests, depends on the correct planting. First, you should consider the cardinal directions. You may need a compass to determine this.
Planting planning depending on cardinal directions:
- Layout of vegetables in long rows from north to south. This planting will allow each plant to receive the right amount of solar energy. At the same time, tall crops should not cast a shadow on low species.
- East-west planting is used for tall plants. Due to the abundance of foliage, not all greenery is fed by the sun. But according to this placement, during sunrise the lower tiers will also warm up.
- The use of a southern slope is important if the ground on the site is uneven. This way the sun's rays fall at an angle and warm up the plants as much as possible.
Often, when planning planting, vertical placement of plants is used. You shouldn’t limit yourself to just one plane; you can install special hangers. If you think through everything correctly, then such placement will be quite profitable.
Vertical landing systems:
- The top floor should be occupied by seedlings in pots. She is the one who needs a lot of light. As the crops grow, the plants will move lower.
- The middle and lower locations should be given to adult seedlings or containers with fertilized soil in which young bushes are planted.
- The space under the shelves should be used as a warehouse, since the sun does not penetrate there at all.
The optimal depth of shelves when placed vertically is 40-50 cm. You can use a terraced planting scheme. This option includes racks with seedlings on one side and a terrace on the other. This way, only one type of crop is usually grown in a greenhouse. The design of the greenhouse itself also directly affects the placement of seedlings.
Options for building greenhouses:
- A gable greenhouse is used for tall plants or even small bushes and trees. To properly utilize the space, the tallest crops should be planted in the middle of the greenhouse.
- A wide greenhouse with arches is used for medium-sized or short vegetables. Then the plants are planted along the walls, and a passage is made in the middle.
- A rectangular greenhouse is used for growing all crops. It is optimal to place several narrow beds with paths for movement between them.
The width of the paths should be at least 40 cm. This guarantees comfortable movement. If you use a special wheelbarrow, the path must be made at least 90 cm wide.
What is mixed planting
Mixed plantings involve placing vegetable crops on a small plot of land that have a beneficial effect on each other, taking into account their characteristics. When planting, be sure to follow the rules for arranging plants with each other, taking into account their height, size and ripening period. They should not suppress each other’s growth, but create a certain microclimate or be protection from sunlight or wind.
Advantages of mixed vegetable plantings
Growing several types of plants in one place reduces soil fatigue and makes it possible to abandon annual crop rotation. Planting in compliance with all compatibility rules will increase the yield several times by the end of the season.
The main advantages of mixed plantings:
- proper placement of vegetable crops allows harvesting from early spring until the first frost;
- The area of land allocated for a vegetable garden is used more rationally, from 1 sq.m. you can get up to 20 kg of vegetables with the right combination;
- vegetable crops feed on different elements contained in the soil, which helps to avoid unilateral depletion of the soil;
- substances secreted by the roots of one plant influence the taste and size of the neighboring vegetable, stimulating or suppressing;
- the mixture of odors emitted by leaves or fruits of different crops plays the role of chemicals that repel pests or prevent them from finding the desired plant.
Conditions for mixed plantings
Mixed plantings are part of biodynamic farming, which means growing vegetables and berries only using natural forces, without resorting to chemicals and artificial fertilizers. To get as much harvest as possible from each piece of land, follow these tips when planting in a mixed way:
- The width of the future bed should be 1 m. This is the optimal size for further convenient processing and sowing.
- The main, long-ripening crop is planted in the central part of the bed. It could be tomatoes or cabbage. By the end of the season, its growth will increase significantly, and it will occupy the area of the entire bed.
- Something that ripens quickly is planted on the sides of the bed. Such friendly crops can be greens - spinach, radishes, green salad. They are compatible with almost all vegetables and stimulate their growth. While the main crop grows, the side crops will already be collected and space will be freed up.
- Plants for lateral planting are chosen to be small and stunted, with a small root system.
- To protect against pests in an organic way, herbs with a strong aroma are planted in the garden bed - sage, basil, coriander, lemon balm or mint. There should be a lot of them so that the spicy fumes can repel pests and attract beneficial insects.
Undesirable neighborhood for vegetables
When different crops or varieties are grown in one area, an exchange of chemical compounds occurs between them and the plant next door has a direct impact on the quality and quantity of the crop. Before making a plan for planting vegetable and berry crops, figure out what placement should be avoided.
Cucumbers and tomatoes are not planted next to each other. Tomatoes require constant ventilation, and cucumbers require heat and high humidity.
Tomatoes are bad neighbors; they inhibit the growth of vegetables growing nearby. Such proximity does not have a negative effect only on garlic, beans, radishes and greens. Beans and vegetables such as carrots should not be placed next to cabbage; they inhibit the growth of each other. Place celery next to it and get a good harvest of both crops.
Sage and legumes should not be planted near the onion bed; they have an adverse effect on its growth and taste. For potatoes, cucumbers, celery and pumpkin are bad neighbors; close placement of tomatoes is also undesirable. You will not be able to get a good beet harvest if dill or potatoes are planted next to it.
Growing seedlings in peat tablets
Plants with a particularly delicate root system, as well as valuable flower seeds in granular form, are more convenient to grow in peat tablets. The tablets consist of sterile peat soil that allows water and air to pass through well.
Peat tablets
When dry, their height is 1-2 cm, the diameter can vary. After swelling in water, the height of the tablets increases 6-8 times, this is quite enough for the root system of most crops in the first phase of growing seedlings.
Peat tablets for growing seedlings
Below is a step-by-step technology for planting granulated petunia seeds in peat tablets. Other crops are grown in the same way.
Step 1. Prepare tablets for seedlings. To do this, place them in a plastic container close to each other. Pour a small amount of water into the container, wait for the tablets to absorb it, and then add a new portion. This is repeated until the tablets stop absorbing water, after which the excess is drained.
Preparation of peat tablets
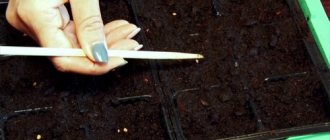
Step 2: The seeds are carefully placed into the well at the top of each tablet. When sowing very small seeds, for example, lobelia, several pieces are placed in each tablet. If the recess is not large enough, it is widened or deepened with a toothpick.
Sowing seeds
Step 3. When sowing granulated seeds, it is necessary to moisten their shell until completely wet, otherwise they will not germinate. The most convenient way to do this is with a spray bottle, pipette or rubber bulb.
Moisturizing the seed coat
Step 4. Cover the seeds on top with a small amount of soil, spreading it with a toothpick. You can simply drown the seeds slightly into the tablet.
Adding soil
Step 5. The grown seedlings are transplanted into pots half filled with fertile soil.
Transplanting into a pot
Step 6. Further care of seedlings does not differ from conventional growing technology and includes watering, fertilizing and other necessary operations.
Watering
Note! Seedlings with a short growing season can be planted in the ground directly in tablets, bypassing the stage of transplanting into a pot.
Prices for peat tablets
peat tablets
Compatibility of vegetable crops in the garden
For each main vegetable crop, you can select a companion plant, interaction with which will stimulate growth, improve taste, providing both a biochemical and physical effect. Let's figure out how to choose the right companion plant and what combinations of vegetable crops attract beneficial insects.
What plants attract beneficial insects
Your garden plot must have conditions that attract beneficial insects. These include pollinating insects and insect predators. The latter fight pests, protecting vegetable crops from damage by them. Mixing the smells of different types of vegetables and plants creates a favorable environment for their habitat.
Especially beneficial insects are attracted to spicy herbs. Predatory flies and wasps are attracted by the smell of various varieties of mint - catnip, peppermint. Hoverflies, which destroy aphids and soft-bodied insects, prefer flat, open flowers of vegetable crops and plants.
Marjoram, lemon balm, thyme, chamomile attract insects that pollinate their inflorescences and other flowering ovaries. Earthworms will be attracted to your beds by onion feathers, valerian and chicory roots.
Overseeding white clover under cabbage attracts predatory insects and spiders that eat caterpillars. In addition, it reduces the number of cabbage aphids and root flies. By planting cabbage next to celery, you can ensure the destruction of flea beetles, and proximity to aromatic herbs will scare away egg-laying cabbage butterflies.
A radish in the same bed with cucumbers will protect against spider mites and leaf beetles. Not only useful plants attract pollinators to the garden. Don’t rush to fight dandelions in your garden beds – thanks to their strong root system, they extract calcium from the depths of the earth, and their bright flowers attract bees and other beneficial insects. The ethylene gas they produce promotes the rapid ripening of fruits and berries.
Good neighbors - vegetables in the garden
Legumes release nitrogen into the soil, which stimulates the growth of potatoes, radishes, and corn planted next to them.
Cucumbers and spinach are good neighbors for onions, thanks to them they grow well. Alternating rows of carrots and onions is a classic combination; they repel pests from each other and grow without overwhelming their neighbors.
Garlic and onions among strawberry tubers, although they will not affect the yield of the berries, will allow rational use of the area.
Parsley is the most common vegetable companion. They plant it on the sides of the bed next to tomatoes, strawberries, radishes, and lettuce.
Eggplants are famous for their compatibility with beans, peas, and basil. Zucchini accelerates its growth in the vicinity of mint, radishes and legumes.
Beets will give a good harvest if grown in the same bed with tomato seedlings and green salad.
grassia.ru
Growing seedlings in “diapers”
Seedlings germinated in “snails” can be planted not only in glasses, but also in “diapers”. This method is also space and soil saving. In this case, ordinary packaging plastic bags are used as wrapping material.
Growing seedlings in “diapers”
Picking plants into “diapers” is performed using the technology given below.
Step 1. The plastic bag is spread on a tray. Prepare the soil - it should be moderately moist so that it does not crumble when squeezed in a fist.
Preparing the diaper bag
Step 2. Pour a tablespoon of soil onto one end of the “diaper”, closer to one edge. They level it out.
Soil on a picking bag
Step 3. A sprout taken from the “snail” is placed on top of the ground. To do this, the “snail” is slightly rolled out to free the root system along with the earthen lump. The sprout is placed so that the cotyledon leaves are above the edge of the film.
Sprout placement
Step 4. Cover the top of the sprout with another tablespoon of soil, trim it (the soil) so that it does not spill out when wrapping. The bottom edge is left free of soil to make it easier to roll up the film.
Backfilling the sprout with soil
Step 5. Wrap the film, carefully compacting the soil around the root system. The bottom is folded so that the soil does not spill out and water does not flow out.
Wrapping the film
Step 6. The soil on the surface is leveled, compacted and topped up if necessary.
Leveling and filling soil
Step 7. Seedlings in a “diaper” are placed in a container, at the bottom of which sawdust is poured to absorb excess moisture. If the film unrolls, you can secure it with an elastic band.
Placing seedlings in a container
Step 8. Water the seedlings at the root using a small watering can or rubber bulb. With this method of growing seedlings, it is better to fertilize with each watering, dissolving a small amount of fertilizer in the settled water.
Watering and care
You can grow not only picked seedlings in “diapers”, but also plants that do not tolerate picking well - cucumbers and zucchini, pumpkins, tribute and watermelons, as well as other vegetables and flowers with large seeds before planting in the ground. They are planted 2-3 seeds in pre-prepared “diapers”, watered and placed in a container, covered with a bag. After germination, the strongest sprout is left in each “diaper”.
Video – Picking peppers in “diapers”
The described general techniques for growing seedlings are suitable for almost all vegetable and flower crops; however, each plant needs a special regime and duration of cultivation, watering and fertilizing. A brief description of the agricultural technology for growing various crops is shown in the figure.
Conditions for growing vegetable seedlings
If you follow the planting dates and follow all care recommendations, you will be able to get strong and healthy seedlings that will quickly take root and produce a good harvest.
How to arrange beds in a polycarbonate greenhouse?
Today, there are two main methods for arranging beds in a greenhouse.
The first is classic, which has been successfully used in Russia for a long time. With the classical method, we try to make full use of the greenhouse area and at the same time strive to make working in the greenhouse as comfortable as possible for people.
The second method has appeared recently and is gradually finding more and more fans. Its essence is as follows: by using new bed layouts, minimize labor costs for caring for plants in the greenhouse and, by improving the microclimate in the greenhouse, achieve maximum yields. We called this method Pikalevsky. (More details about this method.)
Classic layout of beds in a polycarbonate greenhouse.
With the classical method, we strive to occupy as much of the greenhouse area as possible with beds for plants, and for work in the greenhouse and the ability to care for plants, we minimize the width and length of the passages.
We arrange the beds rationally
There are several simple secrets to the proper arrangement of beds.
- For example, it is advisable to plant tall varieties in two rows. They are formed into several stems, and a gap of 80 cm is left between the rows.
- A good solution is to combine different varieties. Tall crops are planted in the center of the greenhouse, and low-growing crops are planted on the sides. It’s great when vegetables ripen at different times. Then you can collect a fresh harvest for a longer period.
- If the greenhouse is not made of polycarbonate, but double bubble, with reinforced film, you can also achieve a high yield. To do this, you will need low-growing varieties, if we talk about, say, tomatoes. The rows are formed into two and three stems, without stepsons. It is most effective to grow early ripening varieties under such conditions. A good solution is to plant the bushes in a checkerboard pattern. In this case, it is necessary to leave free space between the rows (approximately 50 cm).
Scheme of tomato formation in a greenhouse.
- When there are only two beds in the greenhouse, the two-row staggered method and the single-row method work well. All this will depend on the specific type of plant.
- If there are three beds in the greenhouse, but the dimensions are modest 3 by 6, you need to plant the crops in one row on the sides, and make two rows in the central bed. This is the optimal solution, providing maximum compactness and comfort. At the same time, the plants must be comfortable in the greenhouse, they must receive the necessary space and nutrition.
Option with three beds (in the center)
It is important! Remember the key principles for choosing the optimal planting pattern. It is necessary to rationally use the entire area of the greenhouse, and be sure to provide free access to every bush, plant, and branch. In addition, the conditions for the plants themselves must be the best - so that there is enough light and nutrition.
Stationary beds at waist level
