The beds in a greenhouse 3 by 6 meters have their own design nuances. Today we will look at all the features in more detail, we will pay attention to the arrangement of beds in two and three rows, their location in the greenhouse. Then, taking into account all the advice, gardeners will be able to place the plantings in the most successful way. It will be comfortable to work in the greenhouse.
Beds in a greenhouse 3 by 6
Arrangement of beds in greenhouses 3 by 6
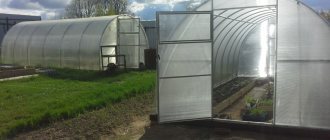
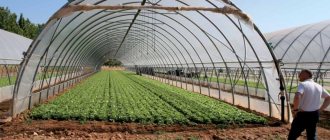
Typically, compact greenhouses 3x6 m are widely in demand in suburban and summer cottage areas. Here are the key features of such greenhouses.
- The greenhouse must be placed in an open place. It is important to organize a convenient approach to it.
- The beds usually run along the long sides, along the walls.
- For better and longer-lasting lighting, the long side should be facing west.
- It is important to create conditions for comfortable care of the beds. The height of the ridges relative to the path is usually a maximum of 40 cm.
- It is advisable to leave paths at least 45 cm wide. Only in such conditions is full-fledged effective work possible.
- It is better to make beds 60 or 90 cm long. Wider beds are used with paths on both sides, and when approaching from one side, beds 60 cm wide are suitable.
Optimal width of beds in a greenhouse
It is important! It is necessary to take care of the proper width of the paths. If they are too narrow, it is inconvenient to walk on them, there is no place to mark the necessary equipment, inventory, watering hoses, and the integrity of the beds will be constantly compromised. It is much more convenient to work with wide paths.
Greenhouse made of polycarbonate 3 by 6
Planting tall tomatoes
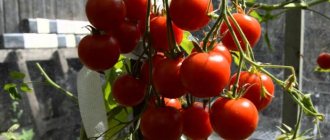
Growing tall tomatoes allows you to save space in a greenhouse or open ground. To get a good harvest, you don’t have to plant a lot of plants, because up to 10 fruit clusters grow on one stem of this tomato. Tall tomatoes will not shade each other and will require less care. In addition, they can become a real decoration of a summer cottage, thanks to their elegant appearance.
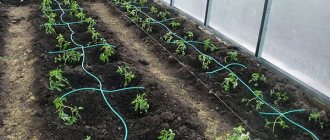
If you grow tall tomatoes, the distance between rows can be up to 1 m, between bushes - 70 cm. In some cases, the interval can be slightly reduced: 70-90 cm between rows and 50-60 cm between bushes, respectively.
Here is an approximate diagram showing the planting of tomatoes, the distance between individual bushes and rows.
Remember that tall varieties of tomatoes require staking to a support.
5 ways to tie tomatoes How to tie tomatoes correctly in order to support tall bushes and not lose the harvest of large fruits?
We arrange the beds rationally
There are several simple secrets to the proper arrangement of beds.
- For example, it is advisable to plant tall varieties in two rows. They are formed into several stems, and a gap of 80 cm is left between the rows.
- A good solution is to combine different varieties. Tall crops are planted in the center of the greenhouse, and low-growing crops are planted on the sides. It’s great when vegetables ripen at different times. Then you can collect a fresh harvest for a longer period.
- If the greenhouse is not made of polycarbonate, but double bubble, with reinforced film, you can also achieve a high yield. To do this, you will need low-growing varieties, if we talk about, say, tomatoes. The rows are formed into two and three stems, without stepsons. It is most effective to grow early ripening varieties under such conditions. A good solution is to plant the bushes in a checkerboard pattern. In this case, it is necessary to leave free space between the rows (approximately 50 cm).
Scheme of tomato formation in a greenhouse.
- When there are only two beds in the greenhouse, the two-row staggered method and the single-row method work well. All this will depend on the specific type of plant.
- If there are three beds in the greenhouse, but the dimensions are modest 3 by 6, you need to plant the crops in one row on the sides, and make two rows in the central bed. This is the optimal solution, providing maximum compactness and comfort. At the same time, the plants must be comfortable in the greenhouse, they must receive the necessary space and nutrition.
Option with three beds (in the center)
It is important! Remember the key principles for choosing the optimal planting pattern. It is necessary to rationally use the entire area of the greenhouse, and be sure to provide free access to every bush, plant, and branch. In addition, the conditions for the plants themselves must be the best - so that there is enough light and nutrition.
Stationary beds at waist level
What influences placement
As a rule, gardeners plant several varieties of tomatoes in a greenhouse. However, some other criteria also influence the scheme:
- The direction of the wind affects temperature regulation and the presence of drafts in the room. Thus, tomatoes with poor resistance to temperature changes are best planted against the walls of the greenhouse.
- Lighting. There are varieties that need a lot of light. They must be placed on the sunny side.
- A combination of different varieties. In a small space, it is more profitable to plant tomatoes with a variety of characteristics. For example, you can combine light-loving varieties with shade-tolerant ones.
- The level of amenities is an important factor in choosing an accommodation option. This includes the location of greenhouse beds, the design of irrigation systems, lighting, heating and ventilation.
We plant tomatoes in a greenhouse measuring 3 by 6 meters
In the summary table we will look at the key features of planting crops. As an example, we take planting tomato bushes in a polycarbonate greenhouse. We will pay attention to the features, key characteristics of planting, as well as the method of planting. We will also indicate approximate calculations for two and three beds in a greenhouse 3 by 6 meters.
Growing tomatoes in a 3x6 meter greenhouse
Table. Features of planting tomatoes in a polycarbonate greenhouse.
| Index | Two beds | Three beds |
| Peculiarities | It is better to place the beds along the long sides. Then the width of the bed will be approximately 100 cm, and the rest of the area will be needed for the path. | A more convenient option with efficient use of space. You can make the paths a little wider by narrowing the beds. |
| Disembarkation method | It is optimal to use the two-line method and square-cluster planting. Sometimes, for greater comfort, bushes are placed in a checkerboard pattern. | A checkerboard arrangement of bushes is optimal. The square-nested method is used a little less frequently. |
| Calculation | In total, you can plant 60 bushes if you leave a gap between the rows of 60 cm, and the distance between the bushes is only 40 cm. Then 15 bushes can occupy 1 row. | It is recommended to seal the gap to 30 cm. Then you can plant 20 bushes in one row at once. |
Tape two-line scheme for planting tomatoes
Now let's look at the important points in a little more detail.
Planting in a greenhouse in two beds
Many gardeners and experts note that it is more convenient and easier to place beds along the entire length of the greenhouse, along the walls. For standard above-ground beds, the traditional height is 30-40 cm. At the same time, it is important to take care of the required width of the path, otherwise it will be inconvenient to use and place tools, walk with a wheelbarrow, and water the plants.
Two beds in a greenhouse
For high quality and speed of work, it is important to have adequate free space. Most often, bushes are planted in nests in the form of squares or rectangles, as well as in two lines.
Three beds in a greenhouse
This method is more popular because it allows for the most competent and efficient use of the entire area. At the same time, you can achieve a sufficient width of the paths, making the beds along the edges more compact.
Three beds in a greenhouse
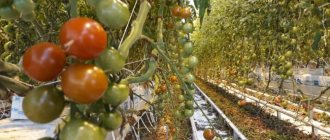
For those who are planning to plant tomato bushes, there is special advice: it is better to plant determinate varieties of tomatoes on the outer rows, since the greenhouse has a low height near the walls compared to the central part. It is advisable to select in advance varieties with medium height and early ripening.
Let's look at planting tomatoes in a 3 by 6 greenhouse with three beds in more detail. It is better to form the outer rows into two stems, while increasing the gap between them. On average, it should be approximately 40 cm, since bushes with large volumes need increased nutrition. It is easy to calculate the number of bushes in a row: simply divide 600 by 40. As a result, it turns out that you can plant 15 tomato bushes in a row. In total, in one greenhouse with such parameters it is quite possible to freely place as many as 90 bushes with tomatoes, while their harvest time will be extended.
Layout of three beds
You can also select beds in a special way based on ripeness. It is advisable to grow mid-season, mid-early varieties in the center. But early ripening early tomatoes are more suitable for side beds.
The optimal solution is to ripen the tomatoes one at a time. It is very important to choose the right varieties in accordance with your budget, taste preferences, and soil characteristics. Then all the tomatoes will ripen one by one, and there will always be fresh, delicious tomatoes on the table.
What should be the distance between tomatoes when planting?
Tomatoes are one of the most favorite crops cultivated by Russians on their plots. One of the important conditions for obtaining a high-quality harvest is the distance between tomatoes when planting them in the ground in a permanent place.
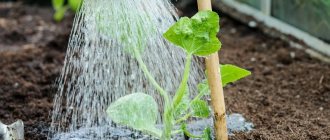
Tomatoes are a crop that likes moderate soil moisture, and if you don't give them the right amount of water, the yield will be much less than what the plant is capable of producing. Therefore, in order to maintain the required soil moisture, agronomists advise planting seedlings in trenches dug to the width and depth of a spade bayonet.
Before planting, the trenches are well moistened with several buckets of water. Strong seedlings are planted in wet trenches, sprinkling the roots with a small amount of soil. Depending on the height of the seedlings, you need to choose the optimal distance between the tomatoes in the trench. For low-growing varieties it can be within 40-50 cm, and the distance between the trenches is 50-70 cm.
There is no need to put soil between the tomato bushes. After planting all the tomatoes, the trenches need to be filled to the top with mowed grass and tamped down a little. As the grass dries and subsides, you need to add a new portion several times.
Watering for tomatoes in trenches is needed much less often than with the usual method of planting seedlings in holes. Moisture in trenches is stored much longer, which means you can expect not only a larger harvest, but also less hassle associated with watering.
This method of planting tomatoes in trenches will help you get relatively large yields of your favorite vegetable, without particularly straining in terms of regular watering.
OgorodSadovod.com
Basic principles for creating beds in a greenhouse
Now it’s time to consider the formation of beds in greenhouses with dimensions of 3 by 6 meters.
We focus on the cardinal directions
First of all, you need to remember the cardinal directions when planting beds with different crops. You can use boxes, racks, or make beds directly on the ground. In any case, the location of plants relative to the cardinal points will be of great importance. Plants should receive maximum heat and light, solar energy.
Optimal location of the greenhouse on the cardinal points
For accurate orientation, you will need a compass. It is best to place the beds in a direction from north to south. This is when the plants will be able to receive more sunlight throughout the day.
It is important to remember: regardless of the culture, type, dependence on heat and light, each plant must be placed in the beds, taking into account its maximum possible growth before harvesting. Under no circumstances should low-growing plants be in the shade of tall ones.
Low-growing plants in the greenhouse should not be in the shadow of tall ones
Plant height arrangement
Experts note: it is tall plants that need a special approach. Large growth and the presence of foliage determine significant shading of the bed. As a result, other plants may suffer from lack of heat and light. The optimal solution is to place tall plants along the “east-west” line. Then the lower tiers of leaves will be perfectly illuminated by the morning sunlight.
Tomatoes are planted in a greenhouse according to this scheme. On the north side there is a row of indeterminate tomatoes with a height of up to 2.5 meters.
Sometimes it happens that greenhouses have to be installed in uneven terrain. In this case, it is advisable to choose a slope with a southern exposure. Such a site should have a slope oriented to the south. Shelves and beds are placed across the slope. This is an ideal option because the maximum number of plants will be exposed to direct sunlight, since they will fall on the greenhouse at an angle.
It is important! You may encounter various interferences and problems when orienting yourself in accordance with the cardinal directions. If you cannot install the greenhouse properly, you have to choose the best possible option.
There are also pitfalls. For example, if the slope is southern, but there is shadow from the tree crowns, the best option would be to locate the greenhouse on a northern slope, but free from plantings.
We take into account the design features of the greenhouse
Design features also influence the order of planting in their own way. Here's what you need to take into account.
- For growing short trees and tall crops, a gable-type greenhouse is optimal. You can use the space as rationally as possible if you make a bed directly in the center, under the ridge, that is, in the place where the ceiling is highest. Then the tallest crops can be planted there.
Gable greenhouse 3 by 6 meters
Advice! Experts and experienced gardeners note that you cannot save on passes. The paths must be comfortable. The optimal minimum is 40 cm. Have you decided to use a wheelbarrow? Then it is better to leave an 80 cm passage in the center, and plant the plants on the sides in two beds.
How does the tomato variety influence the choice of planting scheme?
Breeders produce both short and tall tomatoes. The interval between bushes that have an unlimited growth point cannot be the same as when planting standard or dwarf tomatoes.
Indeterminate
In tomato varieties that have powerful roots, shoots reach 3 meters in height during the growing season. Indeterminate hybrids cannot be placed close to each other, per 1 square meter. Only 2 plants are planted. The bushes need to be tied to a support, the stepsons should be torn off, and the stems should be pinched.
Determinant
Tomatoes 1.5 m high have developed roots, but grow only to a certain point. Varieties that do not require formation are placed on 3 or 4 bushes per square meter.
Low-growing, standard
The height of these compact tomatoes is less than 0.5 m. Tomatoes are distinguished by strong and thick stems, densely leafy branches that are not tied to a support or shoots. For 1 sq. meter can hold up to 7 standard tomatoes.
Smart use of verticals
It is not at all necessary to place the beds exclusively in one plane. You have an excellent opportunity to organize a shelving structure in the greenhouse. It is the vertical layout of the beds that allows you to very efficiently use all the free space. However, there are also difficulties here. It is extremely important to distribute all plants and containers with soil in such a way that the lower tiers are not in the shadow of the upper ones.
Greenhouse shelving
Here are three simple rules for shelving.
- Directly under the shelving, you can make a warehouse-type niche to store the necessary equipment.
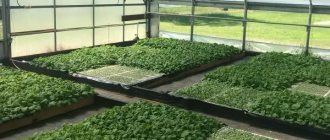
- The lower and middle tiers are ideal for adult plants. You can also place containers with fertile soil in which young bushes are planted. For example, this is a good solution when growing strawberries using the Dutch method.
- Containers with seedlings most need warmth and light. That is why they should be placed on the uppermost tiers when placing beds in racks. In accordance with growth and development, they can be gradually moved lower.
Shelving and pots for plants in the arrangement of a greenhouse
It is important! Hold yourself to a certain standard. The depth of the rack should be no more than 50 cm. Then the shelves will not shade the plants.
The vertical can also be used for terraced arrangement of beds. This is also a good option for those who want to gradually switch to shelving. In the greenhouse, on one side the beds are left traditional. The southeast or south side is more suitable for this. But a terrace can be made on the opposite side of the greenhouse.
An example of creating terraced beds
It is worth noting that such experimental designs are appropriate in cases where the combined cultivation of different crops is carried out within the same greenhouse. If one crop is grown, it is necessary to create uniform conditions throughout the entire area.
How to calculate the required number of bushes
After ensuring a comfortable microclimate in the shelter, they think about the number of bushes planted in the beds. People are always interested in the question of how many pieces should be planted in a greenhouse. It all depends on the type and variety of crops.
Dwarf and short
Tomatoes with short stature are usually planted in a hole with 1 or 2 bushes. The distance between the holes does not exceed 40 cm. In this case, the number of bushes reaches 150-200 pieces. In the future, only strong seedlings are left.
Planning the greenhouse area according to Mittleider
Traditionally, the layout of beds in two and three rows is used. Both options are quite feasible in greenhouses with dimensions of 3 by 6 meters. We provided approximate calculations above. However, there is another known method, an innovative one - the method of Jacob Mittleider.
Scheme of a Mittleider greenhouse with three beds
When a greenhouse is planned according to Mitlider, crops are planted in beds 45 cm wide. This resembles the traditional option. However, it is recommended to make the widest possible paths between the beds. For example, a good passage width is 90 cm. This technique will ensure good air flow and sufficient illumination.
Layout of beds according to Mittleider.
The technique involves creating comfortable conditions for the gardener. It is recommended to plant plants in two narrow rows, leaving free soil between them. In this case, there will be a good air exchange, and the person will not have to reach far to the bushes to work.
Scheme for growing vegetables in box-beds according to Mittleider
The most original method is to place the beds on racks that are arranged in a spiral. Can be made from pipes that are used for communications and water supply. This method is ideal for growing low-growing crops, such as greens and strawberries.
Why do you need to keep the recommended distances?
Unfortunately, gardeners often save space in the garden bed, in the greenhouse or in the seedling box and do not pay attention to the correct distance to plant tomato seedlings. This vegetable does not tolerate crowding, which can lead to the following problems:
- in a very dense neighborhood, tomatoes will cast a shadow on each other and this will slow down their development and reduce fertility;
- A short distance will also have a negative impact on the root system: more powerful plants will begin to suppress weaker ones, taking away moisture and nutrients;
- seedlings will be more susceptible to various diseases, which, due to their close proximity and impaired air circulation, will be able to quickly cover one bush after another.
Planting tomatoes at an unreasonably large distance will not solve the problem, because in this case the vegetable plantations will occupy significant areas of land. Therefore, the distance between the rows and the plants in them is an important point, both when sowing seeds and when planting seedlings.
Making the best beds in a 3 by 6 greenhouse
It's time to look at the step-by-step instructions for arranging beds in a greenhouse. It is important to ensure maximum efficiency and create the best conditions for plants.
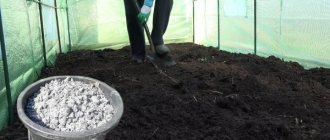
You will need fertile soil. The soil is prepared specially or purchased ready-made. In addition, you need to stock up on boards, sawdust or straw. You will also need manure as the main fertilizing layer. We act according to the algorithm.
Step 1. First, a trench is dug at the site of the bed.
First you need to dig a trench
Step 2. Then you need to install a fence - formwork made of wooden boards.
Options for fastening boards in wooden fences for beds and flower beds
An example of a wooden fence for garden beds
Step 3. Then pour out a layer of straw or sawdust. Its thickness should be 10-15 cm.
Step 4. Then comes the turn of manure. You need to take manure, which is already beginning to rot. The layer is made compacted. Height – 20 cm.
Use manure that has already begun to rot
Step 5. The created pillow is poured with boiling water to soak the manure and the bottom layer. After this, the beds should be left alone for two days.
The beds are filled with manure, now they need to be watered with boiling water
Step 6. Next, you can add a layer of fertile soil and peat. It should have a height of 30 cm.
The beds are covered with a 30-centimeter layer of soil
Peat prices
peat
You can make multi-layer fertilizer using chicken manure and a decomposition stimulator. When decay is intense, maximum thermal energy is released. This is precisely what is necessary for better growth of planted crops. You can leave organic fertilizer under the black film for a week so that it warms up well, and then pour out the soil and plant the plants.
Organic fertilizer can be covered with black film for a week (pictured is a mini-greenhouse)
To protect seedlings from rodents, you can line the bottom layer with a special mesh. Also, sometimes instead of sawdust, rotten boards, bark and stumps are placed down. Manure can be replaced with grass humus. Everything must be compacted well and poured with boiling water; be sure to let these layers “simmer” before filling in the soil.
How to make beds in a polycarbonate greenhouse
To find out how to properly make beds in a polycarbonate greenhouse, as well as which beds are generally suitable, read this article! We also recommend reading about the watering hose.
Even marshy, rocky or sandy soil can provide good conditions for growing various crops. Simply install the boxes and fill them with fertile soil. The boxes are warmer and protect against pests. The height of the box is approximately 40 cm.
Example of an alternative: growing tomatoes in buckets
Plants in buckets are easy to care for
Preliminary subtleties
In order to count on a good harvest, it is important to take into account many factors that influence the seedling planting pattern. When purchasing tomato seeds, you need to know exactly for what purpose the tomatoes will be grown. When purchasing tomato seeds, you need to know exactly for what purpose the tomatoes will be grown
When purchasing tomato seeds, you need to know exactly for what purpose the tomatoes will be grown.
- For transportation (for example, for sale), varieties with high shelf life and dense skin are needed so that they do not crack or deteriorate during transportation.
- For fresh use (in salads, juices), the earliest, juicier large-fruited varieties are suitable.
- Late, fleshy, small-fruited varieties are more suitable for canning and pickling.
In addition, the following characteristics are important for greenhouse conditions:
- growing conditions (varieties must be adapted to closed ground conditions);
- taste, meatiness;
- productivity;
- ripening time;
- fruiting period;
- type of bush formation;
- fruit size;
- resistance to diseases.
The seasonality of the greenhouse itself also matters - whether it is unheated or year-round, with heating.
https://youtube.com/watch?v=JjXe0usuX80
Advice from experienced gardeners
Some tips for growing tomatoes will help you get a bountiful harvest, and will also help you avoid common mistakes of novice gardeners:
The correct use of agrotechnical techniques when growing plants in a greenhouse, as well as the timely application of the necessary fertilizers, are not all the measures necessary to obtain a decent harvest. It is equally important to properly equip the greenhouse: this will help make the most of the entire useful volume of the room and make your work easier.
Source
Proper care
In order for tomatoes to be pleased with their productivity, they need to create suitable conditions:
Air temperature – from 22 to 24 degrees.- Ventilation.
- Air humidity -70%.
- Plants should be fed with monopotassium phosphate and potassium nitrate along with watering once a week.
- Disinfect the soil before planting.
- If pollination is necessary, shake the bushes during flowering or attract bees, wasps and bumblebees with sweet kvass and compotes.
Attention! To prevent tomatoes from getting sick, they are sprayed with copper sulfate.
Next, you can watch a video that describes in detail how to organize the care of tomatoes in a greenhouse:
We take into account the characteristics of materials
When choosing cellular polycarbonate as a covering for a greenhouse, it is usually assumed to build an arched structure, since this material, unlike glass, bends well. But giving such a shape to a metal frame is not so easy, especially if it is made from profile pipes. Therefore, the future owner of a greenhouse faces a dilemma: which design to choose.
The decision often depends on the availability or ability to rent the necessary tools: a welding machine and a pipe bender. If they are, the choice of shape is limited only by personal preference. If they are not available, or you do not have proper experience in using them, it is better to choose a greenhouse-house with straight walls and a pitched roof. Or hire a master, but then you’ll have to say goodbye to the idea of saving money.
However, there is another option: to make something between an arched and rectangular structure. Namely, teardrop-shaped, with a small bend radius and a sharp roof. This will allow you not to think about how to make an arc from a profile pipe with your own hands without a pipe bender.
You can give a professional pipe this shape without special tools. Source postroitbanju.ru
Choosing a profile pipe
The advantage of a profile pipe over a regular round pipe is its greater strength with a smaller wall thickness. And in less weight with the same molding, which makes the frame lighter without making it less reliable.
In addition, the square or rectangular cross-section of the frame elements and its flat edges make it easier to install the coating, just as attaching polycarbonate to a greenhouse frame from a profile pipe is much easier than to round pipes.
The flat mounting surface ensures a better fit of materialsSource teplica-exp.ru
Pipes are selected according to parameters such as material of manufacture and dimensions.
Steel pipes are produced with or without a protective zinc coating. When choosing one type or another, you need to keep in mind the features of working with them.
Galvanized pipes.
Their main advantage is the presence of a protective coating on the walls on both sides, which prevents corrosion processes and the appearance of rust. Such products do not require additional processing either after installation or during the entire service life. But they can only be welded with special devices; household appliances are not suitable for this. And if you try to bend the pipes, you can damage the integrity of the protective coating. Therefore, at home, pitched greenhouses are usually built from them, and bolted connections are used for assembly.
There is a special fastener for sale for non-welded connection of profile pipes. Source pellete.ru
Uncoated pipes.
They are cheaper than galvanized ones, bend without problems and are connected by welding. But when deciding how to make a greenhouse from a profile pipe with your own hands, we must not forget that in order to maintain its strength and decent appearance, the frame must be protected from the destructive effects of heat and moisture, which are so necessary for plants.
Therefore, before covering the finished frame with polycarbonate, it must be mechanically cleaned of weld scale and traces of rust, degreased, primed and painted. Renewal of the paintwork may be required more than once throughout the entire period of use of the structure.
A painted frame will last longerSource yandex.net
The optimal cross-sectional size of a corrugated pipe for a standard greenhouse is 40x20 mm with a wall thickness of 2 mm. It is used to make load-bearing elements and door frames. For transverse ties and the manufacture of vents, a section of 20x20 mm and a smaller thickness is sufficient.
The cross-section of the professional pipe is selected depending on the expected load and dimensions of the structureSource maja-dacha.ru
Choosing polycarbonate
When choosing between monolithic and cellular polycarbonate, you should prefer the latter, since it retains heat better due to the air in the honeycombs.
Transparent sheets have the highest light transmittance.
The thickness of polycarbonate is selected within 4-10 mm and depends on the following factors:
- flexibility - the material must bend to the desired radius;
- shape of the structure - for pitched roofs it is better to use sheets with a thickness of at least 6-8 mm; for arched and teardrop-shaped, as well as for vertical walls, 4-6 mm is sufficient;
- step between the supporting elements of the frame.
In the absence of a protective film, the material will collapse in 1-2 years Source otomatah.ru
Tomato planting dates for the Urals, Siberia and Central Russia
You need to plant tomatoes in a greenhouse when the soil temperature is above 15 degrees . Usually this temperature is set in late April - early May. Otherwise, if the ground is too cold, the seedlings will not develop.
No heating
In the Urals and Siberia, tomatoes ripen late. Seeds are sown in unheated greenhouses from the 20th of April.
With heating
You can begin planting tall tomato seedlings in a heated greenhouse from the end of February to the 10th of March. Early and middle varieties have the same terms. Ultra-early tomatoes, including cherry tomatoes, are planted in early April.