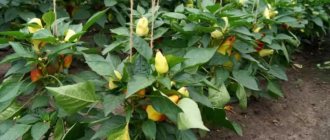
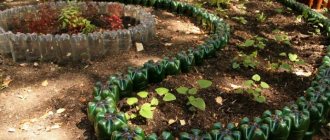
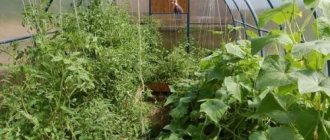
Growing plants in plastic bottles is a new trend that has taken social media sites by storm. But what are the best plants to grow in plastic bottles?
Generally, any plant that doesn't require a lot of space to grow well will do. However, there are some plants that need a certain level of water to grow well, but maintaining a certain level of soil moisture inside plastic bottles can be very difficult or even impossible.
Because of this, there are some plants that cannot be grown in plastic bottles.
In this article I will tell you the 10 best, in my opinion, plants that can be grown well in plastic bottles.
So let's get started!
Basil
Basil is very easy to grow, it does not require much space to grow, and the plant is very easy to care for and easy to water. So it's just perfect for growing in plastic bottles.
Basil needs 6 to 8 hours of direct sunlight, and you should mix potting soil with some organic fertilizer before planting the seeds.
After 5-10 days, the seeds will germinate and in about two weeks you should be able to see your first small basil plant poking out of the soil.
So, basil is an excellent choice for growing in plastic bottles, and this plant is very suitable for beginners. So don't be afraid and try growing your own basil at home.
How to sow seeds in bottles and get sprouts quickly
- calibrate and disinfect the seeds you will plant with a manganese solution;
- cut plastic bags into strips 10 cm wide along the entire length of the bag;
- also cut the toilet paper into strips;
- Place toilet paper on polyethylene and place prepared tomato seeds on top;
- first spray the paper with water from a spray bottle, and place the seeds in the middle, with a distance of 4 centimeters between them;
- roll the strip into a tight roll so that the diameter of the roll matches the diameter of the bottle with the neck cut off;
- if the diameter of the roll is smaller, then you can additionally wind a layer of polyethylene;
- put the roll in a bottle and pour three centimeters of water;
- place the container with the seeds in a sunny place;
- The seedlings will appear in a few days.
Parsley
Growing parsley can be a little tricky and I wouldn't recommend a beginner trying to grow this plant as it can be quite frustrating.
Parsley seeds have a very low germination rate and their germination rate is also quite low compared to other herbs.
But if you want to grow them, you can easily grow them in plastic bottles. It doesn’t really matter to the plant whether it is grown in a regular container or a bottle.
There are quite a few different varieties of parsley, such as flat leaf parsley or Hamburg parsley, but if you want to grow parsley in plastic bottles, Curley leaf parsley is the best choice.
It is smaller than other varieties and does not require as much space as other varieties.
Plastic bottles
Using plastic bottles for seedlings allows you to install them compactly, using a minimum of space. For this method you do not need to buy a lot of soil; this method is simple and pleasant to perform. Those who have experienced it in practice will never give it up.
Where to begin
You need to start by preparing the seeds. First, they need to be calibrated by immersing them in cold salted water. Weak seeds will float, and strong, full-fledged ones will end up at the bottom, and they should be used for sowing. Then the seeds are disinfected in a one percent solution of potassium permanganate or a three percent solution of hydrogen peroxide or in preparations specially designed for this, for example, phytosporin, Baikal EM.
What is the essence of sowing?
Now let's prepare our improvised containers. We cut five-liter plastic bottles into two halves. Those parts where there is a neck will be useful in the future to cover the seedlings that have just been planted in the country, but now we need the lower parts of the bottles.
The first layer, two centimeters thick, will be crushed eggshells (you should start collecting them in advance), then a layer of sand of the same thickness, you will get good drainage. Thanks to this, you don’t have to make holes in the bottom; in a transparent container it will be visible if there is a lot of water. 10–12 centimeters of soil is placed on top of the drainage; all this must be poured with boiling water. We evenly distribute 20 seeds onto the cooled ground, lightly sprinkling them with soil.
Attention! To maintain moisture and warmth inside the bottles, and to prevent the soil from drying out, it is necessary to cover the containers with film or glass.
Now we put our containers in a warm place and wait for shoots. After they appear, the film must be removed.
Watering should be done carefully and as needed. The soil should be constantly moist and not crack, but it should also not be over-watered.
To prevent the seedlings from stretching towards the light, the containers need to be rotated. In order for a strong root system to form, you need to add soil as it grows. This makes it possible to do without diving. When the height of our seedlings reaches 20-30 centimeters, they can be planted in open ground.
Planting seedlings
The ground should already be sufficiently warm at the time of planting. To avoid damaging the roots when planting, you need to lightly press on the sides of the bottle, as if squeezing the soil with the seedlings out. You need to place a bowl with a small amount of water in advance and immerse the contents of the bottle there. The soil will become wet and the roots of the seedlings will easily separate from each other. You just need to tear off the cotyledon leaves and immediately plant the plants in the holes, watering them abundantly. During adaptation, they can be covered with the upper halves of the bottles, but the caps should be unscrewed so that the plant can “breathe”. Seedlings grown in this way always take root well and do not get sick.
The advantage of using plastic bottles for seedlings
What does this method give us:
- At home, dirt from boxes with soil does not spread;
- There is no need for diving;
- When planting in the ground, the roots are not damaged;
- Easy to transport from home to garden;
- As a rule, all plants take root.
Oregano (Oregano)
Oregano is very easy to grow and does not require much care to grow well. So even a beginner in gardening can grow this plant.
Oregano grows best in 10 to 14 inch containers. But you can grow them in smaller containers if you prefer. So you can grow them in plastic bottles even if it is not optimal for the plant.
It's also beautiful when it blooms. So you can use some varieties as ornamental plants if you wish.
Preparatory stage
First of all, in order to grow tomatoes in five-liter bottles, the seeds must be sorted and disinfected, for which a solution of potassium permanganate is used. You need to soak the seeds in it for a quarter of an hour. Next, you need to prepare the material in which the plant seeds will be sown. For this you need:
- polyethylene bags (it is better to use garbage bags);
- toilet paper;
- 1.5 liter plastic bottle with pre-cut neck.
The following steps must be taken:
- Cut plastic bags into strips 10 centimeters wide, then do the same with toilet paper - its pieces should be equal to the length of the strips from the bags.
- Each piece of paper must be placed on plastic strips and sprinkled with water.
- The seeds are laid out on damp paper, the gap between the seeds should be about 4 cm.
- Next, roll the strips into a roll, the diameter of which should match the bottle.
- Pour 30 ml of water into a container and dip the resulting roll into it.
- The bottle should be placed on a windowsill or other place with plenty of sunlight. Sprouts will appear within a few days.
Tomatoes are also germinated using the horizontal method.
Grow tomatoes in a greenhouse in 5 liter bottles
A 5-liter bottle will serve as a container, which must be cut longitudinally.
- Cover both halves of the bottle with toilet paper, laying it out in several layers.
- Seeds must be placed between the layers.
- The paper must be moistened by sprinkling it with water.
- All that remains is to tightly cover the containers with film to obtain a greenhouse effect and wait for germination.
Containers must be placed in a sunny place. Watering is not required with this method.
As soon as 2 leaves appear on the seedlings, the sprouts are transplanted into separate pots. Usually 2 plants are placed in one container. However, this rule applies only to tall varieties of tomatoes, and for low varieties, each sprout needs an individual pot.
Advice! Experienced vegetable growers recommend using peat pots as containers; they help avoid injury to the root system of plants when transplanting into the ground. But this requires certain financial investments.
Thyme
Thyme is another easy-to-grow herb that can be grown in plastic bottles.
Thyme has a great side effect of smelling really nice once grown. So there's another reason to plant thyme in a plastic bottle garden.
Thyme loves sun and doesn't need much water to grow healthy.
Thyme is difficult to grow from seeds, but you can easily grow it from cuttings or simply replant a plant you bought.
How to care for seedlings?
Watering and fertilizing
Water carefully, not abundantly, so as not to form a mess.
After the leaves appear, you can feed them with mineral fertilizers. There are special substances for this that you can buy at any garden store or prepare yourself.
- When the first cotyledon leaf appears, copper is used. Half a teaspoon of copper is dissolved in five liters of water.
- After the second leaf has appeared, urea is used to improve the quality of the green mass. To do this, take half a tablespoon of urea per five liters of water. The solution is diluted and the shoots are sprayed with it.
- Then, as soon as the third cotyledon leaf appears, you need to move on to the next stage - diving.
Picking
- Carefully remove the sprouts. If this is a vertical method, then unwind the rolls and carefully take out one sprout at a time. When growing horizontally, simply remove the sprouts from the paper.
- Next you need to transplant 2 sprouts into separate pots. Peat ones are best suited for this process.
- After this, transshipment is carried out into open ground.
Before carrying out the diving procedure, it is necessary to prepare the soil. The most suitable composition should include:
- 3 parts each of soil, peat, compost;
- 0.5 parts sand;
- 1 part wood ash.
Mix all ingredients thoroughly, steam with boiling water or bake in the oven at 200 degrees for an hour. This is how the soil is disinfected. Next, you need to leave the disinfected soil for a week so that the nutritional microflora is restored.
Before planting, add nitrophoska, which is diluted according to the instructions. This is a mineral fertilizer that strengthens growth, stimulates development and ensures a healthy harvest.
Moving into the ground
Transplantation is carried out after the appearance of three normal leaves on the stem.
- To do this, you need to dig shallow holes, pour 2-3 liters of water into each and place a bush there.
- Then sprinkle the bushes with soil. There is no need to water the bush from above after this.
- Be sure to make a hole around it so that water does not drain during watering.
Green onions
Green onions are very easy to grow in plastic bottles.
They should be placed in full sun or at least 4 hours of direct sunlight per day.
They need to be well and regularly watered to ensure they grow healthy. So these plants really need care.
Be careful not to plant too many onions in one pot. One or two bulbs per plastic bottle should be enough!
You also need to be careful about the variety you choose to grow. There are many different varieties of onions, and depending on which one you choose, your onions will taste slightly different.
Dill
Dill is another easy to grow herb that also grows well in a plastic bottle.
It also doesn't require much care to grow well. Just water the plant regularly and it will grow well!
In order for dill to grow well, it usually requires a container that is at least 12 inches deep, but a slightly smaller container will also not harm the plant.
Dill grows best in full sun and can withstand warmer temperatures.
Unconventional approach
Plastic bottles are an excellent replacement for wooden boxes that were popular just recently. In every home there are many empty bottles that can be used for seedlings and put into use. This is doubly convenient: reusing plastic containers protects the environment, and seedlings feel good in such containers.
Another advantage of this method of growing seeds is that regular watering is not needed: you can safely leave for a few days if business requires it, without worrying that the seedlings will dry out.
Strawberry
Fresh strawberries grown in greenhouses
Strawberries are not easy to grow, but they are not that difficult to grow either.
They can be grown in fairly small containers as they have really shallow roots. So an 8″ deep container will do just fine.
So you can easily plant them in plastic bottles. However, you will need to find a way to support the strawberries as they develop. There is not enough space on the surface of a plastic bottle.
But other than that it shouldn't be a problem. However, strawberries need a lot of water. So they are a bit labor intensive.
What kind of soil is needed to grow plants in plastic bottles?
The type of soil you need to grow plants in plastic bottles or any container really depends on the type of plant you want to grow.
Some plants prefer sandy soil, but most plants will grow healthy in well-drained potting soil.
However, it is very important to fertilize the soil regularly.
Every potted plant, no matter where it is, even if it is a plastic bottle, needs to be fertilized regularly! Because the amount of nutrients in the soil will decrease unless you add more. And if you don't add enough nutrients to the plant, it will starve and either grow poorly or even die.
The type and amount of fertilizer needed is also very plant specific.
Diseases and pests
- Black leg - affects seedlings, the root collar turns black, thins and rots. The plant dies. To prevent the disease, watering should be moderate and crops should not be thickened. Trichodermin mixed with Ecogel can be added to the soil before planting.
- Root rot of tomatoes - the root collar of diseased plants rots, and they themselves wither. The top layer of soil must be removed and a new one should be added, the soil should be disinfected and the tomatoes should be watered with the “Zaslon” solution.
- Gray rot - affects tomatoes in cold rainy weather. Small spots appear on green or ripe fruits, which gradually increase in size and become watery. Gray mold can also cover stems, leaves and flowers. Infected fruits need to be removed and the air temperature raised; if the plant is severely affected, it is destroyed and the soil is disposed of.
- Phoma is brown spots that appear on tomato fruits under conditions of high humidity and excess nitrogen. Internal tissues undergo deep rotting. Affected fruits must be destroyed.
- Fruit cracking occurs due to sudden fluctuations in soil moisture. The control measure is a well-established watering scheme; it should be moderate at intervals.
- Top rot - occurs when there is an excess of nitrogen against the background of aridity. The solution to the problem is moderate application of nitrogen fertilizing and regular watering.
- Spider mites - most often infect plants in dry air conditions and feed on cell sap. The pest can be found on the bottom of the leaves; it also reveals its presence by covering the leaves with a thin cobweb. If the damage is not severe, the insect can be controlled with an infusion of onion or garlic peels; if it is significant, insecticidal preparations can be used.
- The whitefly is a small insect. The lesion manifests itself in the form of sooty fungi. The leaves become covered with a black sticky coating, dry out and die. To treat the disease, the plant is treated with insecticidal preparations.
Growing tomatoes on the balcony in bottles is an interesting method that does not require large expenses or special skills. Even a novice gardener can try his hand at this activity.
Final words
There are many great and creative ideas for growing plants in plastic bottles. You can string them, cut the bottles in half or cut them right down the middle and much more.
Only your creativity is the limit on how you can design and create your own plastic bottle container garden.
I hope this article helps you find some inspiration on what plants you can grow in plastic bottles and maybe even encourage you to start your own container garden.
This is interesting
Method of sowing seeds
Materials required for planting:
- empty bottles;
- nutritious fertilized soil;
- old laces or thick thread (not synthetic);
- stationery knife or scissors for cutting:
- pen or felt-tip pen;
- knitting needle or awl;
- suitable seed material.
Further actions can be performed in order:
- Draw a line for dividing the container with a marker.
- Use scissors to cut the bottles along the marks.
- Make small holes in the lids.
- Pull a cord or thread through the hole, about 10 cm, and tie a knot from inside the cap to secure it.
- Then fill the upper part of the bottle with the prepared nutrient mixture.
- Water it and plant a small amount of prepared seeds.
- Pour a little water into the remaining parts of the container and insert the resulting containers into them so that the string touches the bottom.
The original reclamation system is ready.
All that remains is to wait for the seeds to germinate and add a little water to the lower reservoirs as needed.
