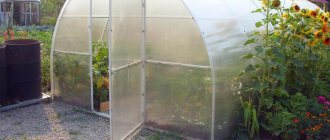
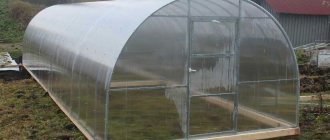
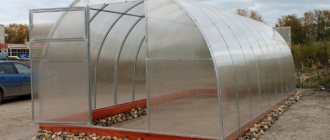
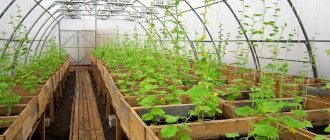
As such, the Metalservice plant received its name in the now distant 1990. But the history of this company from Novosibirsk has even deeper roots. The main focus of the organization since its creation in 1934 has been the supply of rolled metal and its derivatives throughout the Soviet Union. And by and large it remains so.
Greenhouse Nurse
The Metalservice brand is known in narrow circles of specialists, but it gained wide popularity among the population only in 2008. And this is connected with the opening of our own production of specialized equipment and consumer goods. In particular, small-sized greenhouses for gardeners. This is not to say that the range of products in this area is very large. Until recently, the list of greenhouses contained only five items. This:
Large industrial greenhouse.
Crab greenhouse. Let's explain right away. Despite the intriguing name, neither crabs, nor lobsters, nor other crustaceans are bred there. (Who knows though?!) It's all about the crab connections of the structural elements:
- Bogatyrskaya greenhouse.
- Room nurse.
- The greenhouse is a clever nurse.
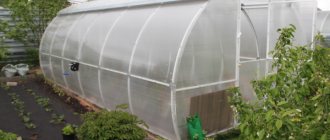
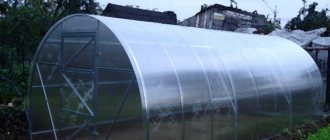
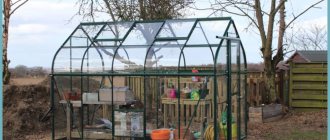
Relatively recently, namely in 2015, a modified model was launched into production - an opening greenhouse nurse - smart girl. Instantly became popular throughout our country. In 2016, the nurse greenhouse with an opening top was sold in quantities exceeding more than 20,000 units, which, given today's competition in the market of ready-made greenhouse structures, is a more than significant figure. It is precisely this heated greenhouse structure that we will devote our article to.
Equipment and general technical characteristics of a greenhouse with an opening roof - a clever nurse
There are only two size options for a greenhouse with a sliding roof:
- width - 2 meters;
- height - 2 meters 10 centimeters;
- length - 4 and 6 meters.
The frame is made of high-quality metal profile 20 by 20 millimeters, with a polymer factory coating. Arched arcs are located at a distance of 1 meter from each other. This allows the structure to withstand significant wind and snow loads. The greenhouse lining is also offered in two versions of high-quality polycarbonate, 1.2 and 1.4 millimeters thick. The greenhouse package also includes:
- roof opening mechanism (winch, rollers, etc.),
- two doors,
- two windows.
Like all other models of greenhouses from the Novosibirsk manufacturer, the Nurse with a sliding roof can, at the request of the client, be equipped with:
- 4 drills - anchors for reliable fastening on open ground,
- bed made of galvanized metal.
Assembling the “Clever” greenhouse with your own hands - step-by-step instructions
Manufacturers made sure that the installation of the greenhouse could be done independently, without the involvement of additional forces and resources. This circumstance also makes “Umnitsa” closer to the people. There is no need to call specialists or rely on someone else - everything is in your hands. You just need to follow the instructions and go through all the assembly steps.
Greenhouse equipment
Stage one. Foundation issue
Long gone are the days when the foundation for greenhouses was always poured with concrete or built of brick. However, when installing this greenhouse, which is particularly durable, you need a special foundation. This can be a classic foundation or a rectangle made from everything that is available on the farm.
Assembled greenhouse on a simple timber foundation
So, the foundation can be:
- brick;
- concrete;
- from timber
The last type of foundation is the simplest - you only need timber, screws and corners. You can fasten the logs with staples. The optimal cross-section of the beam is 100x100 mm. The beams, pre-treated with a wood antiseptic (such as “Senezh”), are connected into a box equal in size to the size of the purchased version of the greenhouse.
Then it is necessary to level the soil in the place chosen for installation and lay the base evenly on it. If it lies unevenly, the frame will also rise unevenly, and in this case the manufacturer does not guarantee the proper operation of the mechanism that opens/closes the roof. To level the foundation, it is better to use a building level. The beams are connected using brackets along the length and width of the greenhouse, as shown in the image. Accordingly, diagonally and horizontally everything should be smooth and identical.
Timber foundation
Having prepared in this way, proceed to assembly.
Parts for assembling the frame
Stage two. Assembly
The process starts with the end pieces and involves 12 steps.
Step one. Installation of ends. The end contains a door block and 3 end arches - top, left, right. End arches and spacers are installed on the door frame. The elements are connected by using end struts. Bolts and crab fastenings are used to attach the arches to the struts and frame.
Installing the upper end bow and end spacers
Fastening the side end arches
Step two. Intermediate and lower struts are attached to the ends using “crabs” and self-tapping screws. All of them are connected in series up to the second end.
Attaching intermediate struts
Step three. Polycarbonate is attached to the assembled ends. Self-tapping screws are used for fastening, preferably with thermal washers.
Cutting polycarbonate
Scheme of fastening polycarbonate with self-tapping screws
End covered with polycarbonate
Step four. The attached polycarbonate is cut with a construction knife along the contour of the greenhouse body.
Important! Fastening the polycarbonate can be done after assembling the entire frame, as shown in the photo.
Frame assembly
Step five. Mounting the roof, which is made up of end arches. They are attached to the intermediate arches using spacers for connection. All elements are fastened to each other with bolts in accordance with the instructions.
Assembling a sliding roof
Step six. 8 roller wheels are attached to the finished roof covering.
Wheel mounting scheme
Step seven. A polycarbonate sheet (entirely) is laid on the roof. Smoothly attached to the frame with self-tapping screws.
How should polycarbonate be attached to the roof (installation of the roof should be done at the very end)
Step eight. The “body” is assembled. Transverse struts are attached to the ends.
Step nine. The fully assembled frame is attached to the base.
Step ten. The installation of trellises is carried out transversely under the roof. They not only serve as a reinforcing element, but can also be useful as a bar for attaching tall and vine-like crops.
Installation of trellises
It may be better to secure the trellis in advance with self-tapping screws to the upper intermediate arches on the ground, and only then carry out the installation
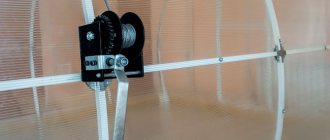
Step eleven. Polycarbonate is installed on both sides of the greenhouse body. A winch is attached to one side. A cable is pulled from the inside into the winch and secured to the bottom of the central arc, which forms the roof frame.
Sheathing the frame with polycarbonate
End trim (if you haven't done this before)
Installing a winch on the central arc of the middle part of the greenhouse on the opposite side from moving the roof
Step twelve. Platbands, as well as clamps and stops that ensure the opening of the roof, are installed in the designated places.
The guides are bent into an arc and mounted on top of the polycarbonate
The stop is attached to the third tier of spacers on the winch side
The roof must be installed on the greenhouse, aligning the wheels with the guides
From the inside of the greenhouse, a cable from a winch is attached to the lower part of the central arch of the roof. The cable from the winch must be pulled to the roof, passing under the stop
Clamps are attached to the end of the greenhouse, taking into account the extreme positions of the roof
Note! The roof must be secured in both open and closed states.
Stage three. Exploitation
Everything is simple here - just remember to open and close the sliding roof in time. Opening/closing is easy, even a child can do it. A reliable winch works smoothly, without failures - this is noted by all users. They also note that the plants grown in the “Nurse-Umnitsa” express gratitude for the fresh air and sufficient moisture from the generous harvest.
Greenhouse "Kremlevskaya"
The Kremlevskaya greenhouse has long been known among specialists as an effective, practical, and very promising structure. It attracts with its durability, relative ease of assembly, and increased wear resistance. Read in more detail.
Feature of the new model Nurse-Clever
The main feature of the Nurse from Siberia in a long series of similar products is, of course, the design of its roof. It would seem that 2 doors and vent windows are quite sufficient to create ventilation in the room. But this is only if we consider the sliding roof only from this point of view. Here's what professional gardeners think.
Doors and windows do not provide adequate ventilation. And under certain circumstances, accidental opening and closing can serve as the basis for the appearance of a draft in the greenhouse. Which can be detrimental to some types of cultivated plants. A fully or partially open roof promotes gentle ventilation throughout the entire area of the greenhouse.
No matter how good modern covering materials are in the form of different types of films and polycarbonate, plants need direct sunlight (morning - evening hours).
During the period of natural pollination, the sliding roof provides the most complete access of insects to vegetable crops.
After harvesting and leaving the greenhouse until next year, the open roof allows natural feeding in the form of leaves to accumulate.
The familiar problem of snow loading on the roof is completely removed. In which case it must be cleaned periodically. In this case, you don’t have to worry about violating the geometry of the frame. In addition, the snow collected in the greenhouse will protect the top layers of soil from freezing. And in the spring it will moisten it with melt water.
Not simple, but folding
In short, “Umnitsa” is not an ordinary greenhouse, but “with character and zest.” It deserves special attention if only because it has a sliding roof, which provides special advantages when used.
Retractable roof structure
The lid opens/closes thanks to roller wheels and special guides
It is not news for gardeners that greenhouse owners experience no less difficulties in winter than in the summer season. A greenhouse structure in cold snowy times requires supervision and protection. In spring and autumn it protects plants from the cold, but in winter it itself needs help. During the cold season, moisture accumulates on the surface of the coating due to the difference in temperature outside and inside. Due to the fact that the temperature outside is below zero, an ice crust quickly forms, which can damage the entire covering material.
Design diagram
If heavy snowfalls occur, and they are not uncommon in our latitudes, the roof of the greenhouse must be cleared of snow. Having exceeded the permissible load threshold or turned into a wet caked crust during a thaw, the snow layer will simply break the roof of the greenhouse, no matter what shape it (the cover) may be. As a result, in the warm season the structure will need restoration, which will entail serious expenses.
Greenhouse "Nurse-Clever" (inside view)
Advantages and disadvantages of a greenhouse with an opening roof Nurse - Smart girl
It must be said right away that there are not many reviews about this greenhouse either on the official website of the manufacturer, trading organizations and dealers, or on specialized websites for gardening enthusiasts. And those that exist are exclusively positive. The main positive reviews include the following qualities of the Nurse's greenhouse with a sliding roof:
High-quality materials are used in the manufacture of the entire greenhouse.
Specific and clear instructions for self-assembly of the Nurse are in the instructions supplied with it.
Easy and convenient operation of the sliding roof.
And of course, all the advantages we have already listed that this type of roof construction provides.
Installation of a factory-made greenhouse
Judging by the reviews from the owners, installing a greenhouse is not difficult, you just need to do it in the right sequence. First, decide whether to place the greenhouse on a foundation or on a rectangular support.
Greenhouse frame diagram Tip. It is recommended to install the bolts from the bottom of the metal. Because the lower part will be installed on a foundation or support.
You can use whatever is at hand as a support. For example, a beam fastened with corners and self-tapping screws. Or bricks laid around the perimeter of the greenhouse. Then you can start assembling:
- Assembly of the greenhouse begins from the ends. The end consists of the door block, as well as the upper, left and right end arches. They are fastened to each other using two end struts. The arcs and spacers are connected to each other with M6 bolts.
- After assembling the end, you need to attach polycarbonate to it. It is better to use roofing screws for this. Then cut the polycarbonate along the contour of the greenhouse.
- When the ends are ready, you can proceed to the roof. It consists of end arcs, intermediate arcs and intermediate struts. All elements must be connected according to the manufacturer's instructions. When assembling, it is better to use bolts, T-shaped and X-shaped fasteners.
- A whole sheet of polycarbonate is placed on the finished roof base, because the kit includes 6m sheets. at 2.100. The sheet must be laid flat on the roof frame. It is better to fasten the covering with roofing screws. Then you need to fix 8 roller wheels on the roof.
- Next, the greenhouse itself is assembled. Transverse intermediate struts are mounted on the ends of the greenhouse. When the greenhouse frame is assembled, it is attached to the base.
- Trellis are installed across the main beams under the roof. They perform two functions. They work as a reinforcing element and as straps for tying tall plants. Polycarbonate is installed on the greenhouse itself on one side and the other. Since the greenhouse opens, a winch needs to be attached to one side.
- The greenhouse kit includes stops, trims and clamps that ensure reliable opening and closing of the top. They must be installed in the designated places.
Attention! The middle pipe should be mounted exactly in the middle between the left and right edges. A small error can lead to malfunctions of the mechanism.
Greenhouse Nurse-clever on the site
DIY greenhouse
Given the low cost of the simplest nurses, with the possibility of their subsequent radical modernization, the process of building such a greenhouse with your own hands seems somewhat doubtful. But if we are talking about improving consumer characteristics or seriously increasing the service life of a structure, it definitely makes sense.
First of all, we can talk about the frame material. If the greenhouse is regularly and effectively ventilated, then it makes sense to consider wood in this capacity.
- Firstly, wood is more resistant to static loads: it bends, but does not break, and after they are removed, it restores its original configuration better than metal.
- Secondly, it is much easier to work with than metal.
- Thirdly, with appropriate treatment, it can last longer than metal, and if you take larch, then many times longer.
You can also use polypropylene water pipes for the frame of the “Nurse” type greenhouse.
The only thing we would recommend to improve is their connection. The use of standard welding and standard components for such systems will be much more justified. At the same time, it would be rational to introduce either steel reinforcement of the appropriate diameter or its fiberglass analogue into the arched elements of the frame, which is even better. The durability of this design is beyond doubt. Also, pipes can be secured using the same crabs with various options for their use.
And finally, to stimulate your creative searches - a selection of options for replacing polycarbonate.
This coating will not last very long with constant exposure to ultraviolet radiation, but certainly no less than polycarbonate.
We recommend other articles on the topic
Popular posts
- Greenhouse for greenery all year round. Types of greenhouses? Mini-greenhouse Compact greenhouse, used for growing greenery in an apartment. It is a glazed box…
- Greenhouses for a summer residence How to choose inexpensive but effective greenhouses for a summer residence A greenhouse for a summer residence is a great way to get…
- Greenhouse retractable roof Retractable roof The appearance of modern cities is now impossible to imagine without new, special technologies in the design of space.…
- Polycarbonate greenhouse in winter Treatment of the internal surfaces of the greenhouse First, you need to carry out fumigation in the greenhouse to remove it from the honeycombs...
