This page is an instruction manual for a calculator for calculating domed structures, including domed roofs and domed houses.
The page with the calculator is located at the link: calculator.
By default, the interface language is set to Russian. You can change it to one that is convenient for you by selecting the desired one in the “Language” drop-down list.
selecting interface language
Initial data.
The "Initial data" area is intended for specifying the geometry of the frame. You can change the settings in the following fields:
“ Polyhedron ” is a polyhedron on the basis of which the entire structure is built. There are two options: icosahedron and octahedron.
“ Frequency, V ” is the number of vertex splits. As the frequency increases, the number of vertices and edges increases accordingly. The larger this value, the more the shape of the frame approaches the sphere and the shorter the length of the edges.
An icosahedron is a polyhedron whose partition frequency value V is equal to 1.
An octahedron is a polyhedron whose partition frequency value V is equal to 1.
A partition frequency value equal to one corresponds to a structure in the form of an icosahedron or octahedron, depending on which polyhedron is specified in the “polyhedron” column. As the frequency increases, the edges of the polyhedron are split into parts. The number of edges that make up a split edge is equal to the split frequency.
Frequency of tiling the icosahedron.
“ Partition class ” - this item is responsible for choosing the partitioning method, and therefore the shape of the final structure.
When the split frequency is two or more, different options for each split are possible. These options are divided into classes. If we project the tiling onto the face of the icosahedron, then all possible classes of tiling of the icosahedron can be represented in the form of a diagram.
Classes of partitioning of dome structures.
In the calculator, Roman numerals indicate the main classes, there are three in total. Arabic numerals indicate variations of the main classes.
Similarly, the partitioning methods are specified for the octahedron.
" Split Method " - allows you to choose between "Equal Chords", "Equal Arcs" and "Mexican".
“ Axial symmetry ” - the choice of an axis of symmetry, which is taken into account when cutting off part of the dome from the sphere and aligning the dome vertically. Possible options:
- Pentad - the axis of symmetry passes through the vertex at which 5 edges converge.
- Cross - the axis of symmetry passes through the vertex at which 6 edges converge.
- Triad - the axis of symmetry passes through the face.
“ Fuleren ” is the choice of a dome shape in the form of a fullerene, which fits (“inscribed”) into the sphere, or describes it (“described”). The Fullerene field is not available when you select the Joint connection option.
dome in the shape of a fullerene
“ Base Alignment ” - allows you to align the base relative to the base plane by changing the lengths of the edges at the base of the dome. The Base Alignment field is not available when you select the Cone connection method or select the Fullerene shape.
The “base alignment” function will change the length of the ribs at the base of the dome so that the vertices of the dome on its outer surface are located in the plane of the base. The tops of the dome on the inner surface of the dome are generally not located in the plane of the base, but are built according to the general principle - towards the center of the dome from its outer surface.
When “base alignment” is enabled, the edges with their wide side lie in the horizon plane in the case when 1/2 is selected in the “part of the sphere” field. In other cases, they do not lie in the horizon plane.
“ Part of a sphere ”—select a part of a sphere that will make up the dome. For domes of different frequencies, different cutoff proportions are possible.
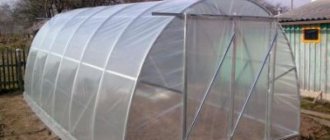
Why are dome-shaped structures attractive?
The growing popularity of domed greenhouses is due to several factors:
- Installation does not require a solid foundation, since its design is much lighter than conventional shelters of similar size.
- The structure is easy to assemble and disassemble, and if necessary, it is easy to move it to a new location.
- The hemispherical shape is highly durable and stable. The cellular frame better withstands strong winds, easily withstands snowfalls and has good earthquake resistance.
- Compared to traditional forms of shelters, the construction of a dome greenhouse is cheaper, since complex equipment is not required for installation. Simple available materials are used in construction - wooden blocks or plastic tubes for the frame, screws, polycarbonate, agrofibre or greenhouse film for cladding.
- Due to the unique sectional structure, there is no need to install internal supports, and this significantly saves building materials.
- Unlike rectangular greenhouses in a hemisphere, there is no need to orient the beds relative to the cardinal points - the plants are always well lit.
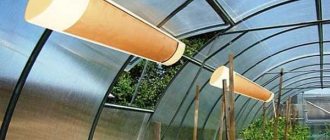
In the geodome it is easy to provide the necessary microclimate for growing several crops of garden crops per year. The soil always warms up well, and to maintain temperature stability, environmentally friendly heat accumulators - water tanks - are used.
In winter, the geodome can withstand even heavy snowfall
Dimensions and connection method
The “dimensions and connection methods” field allows you to set the dimensions of the sphere and select the method of connecting the dome ribs. Field parameters:
“ Sphere radius, m ”—specify the radius of the sphere in meters.
“ Connection method ”—select a method for connecting edges. More details about connection methods can be found in the article: Types of connections and connectors (connectors) for dome structures.
In the drop-down list you can select the following connection options:
- “Piped” is a connection method using connectors. When you select this connection method, an additional field appears in which you can specify the diameter of the pipe that makes up the connector.
- “GoodKarma” is a connectorless connection method in which each edge is made up of two beams. When you select this connection method, an additional field appears in which you can specify the method of connecting the edges clockwise or counterclockwise.
- “Semikone” is a connectorless connection method in which each edge is made up of two beams.
- “Cone” is a connectorless connection method in which each edge consists of one beam.
- “Joint” is a connectorless connection method in which each edge consists of one beam. When you select this connection method, an additional field appears in which you can specify the method of connecting the edges clockwise or counterclockwise. The Joint method is not available for the fullerene dome.
- “Nose” is a connectorless connection method in which each edge consists of one beam. The possibility of choosing this connection method is provided only for a dome in the form of a fullerene. In order for this connection method to appear in the list of connection options, you must first specify the shape of the dome in the form of a fullerene in the “Fulerene” field in the “Initial data” section. To do this, in the “Fulerene” field you need to select one of the options: “Inscribed” or “Described”. When you select this connection method, an additional field appears in which you can specify the method of connecting the edges clockwise or counterclockwise.
For all connection methods, the ribs at the base of the dome consist of one beam.
For polyhedra in the form of an octahedron, the current version of the calculator does not implement the calculation of the “Cone” connection. Instead, the calculator calculates values as for the “Piped” connection type with a zero pipe diameter.
Advantages and disadvantages
No one will argue with the fact that domed houses look unusual. If you want to have a house or dacha “not like everyone else” and have nothing against frame house construction, take a closer look at this technology. The solution is truly non-standard. In addition, they say it is economical. The cost per square meter starts from $200. But as you understand, this is the minimum price. This is an economical option.
This is also a domed house
Pros of domed houses
In addition to the unusual appearance, the advantages of spherical houses are as follows:
- Optimal use of space. The rooms are obtained with a maximum floor area and a much smaller ceiling area. That is, there is less unused head space.
- Smaller external wall surface compared to standard rectangular structures.
- Smaller surface means less heat is dissipated in winter and less heat is absorbed in summer. That is, the maintenance of such houses is more economical.
Precipitation does not accumulate in large quantities - it falls or runs off - On dome structures, precipitation is retained in very small quantities - it simply rolls off.
- The structure is lightweight; a lightweight foundation is required for it. Usually - strip, but pile and pile-grillage are also good. On unstable soils, it is possible to use a slab foundation.
- Any number of windows can be built into the dome. This will not affect the stability of the structure.
- The small house does not have load-bearing walls inside, so the cost of building materials is minimal. Domed houses with a large area must have either load-bearing walls or support columns. But they can be placed almost anywhere, which allows you to correlate them with the desired layout.
- The structure of the dome allows for optimal placement of solar panels.
- In dome-type buildings it is convenient to install a ventilation, heating and air conditioning system. The point is the rounded shape of the roof, which promotes natural mixing of air.
Based on the totality of their characteristics, domed houses look very attractive. In addition, many say that construction requires much less money - due to the smaller surface of the walls, material is saved. According to mathematical calculations, the area of the walls is almost a third less. But if there are any savings, they will not be that big - the construction is specific, using specific components that increase the cost of construction. In fact, the cost per square meter is approximately the same as when constructing a frame of a regular shape.
Minuses
There are also disadvantages and they are also quite serious. In any case, it is worth knowing about them and taking them into account.
- It is difficult to calculate domed houses yourself. The calculation takes place not in two, but in three planes, and this is not at all easy.
- The technology appeared not so long ago; there is no exact description or instructions.
- It is advisable to order such a project and construction from organizations that already have experience in the construction of spherical buildings, and there are not many of them.
The internal layout of domed houses is very specific - There is more waste of construction materials left as they are sold mainly in rectangular blocks/sheets. This reduces the economic feasibility that arises due to the smaller wall area.
- Geodesic domes have unusually shaped doors and windows. They are made to order, which costs more. The good news is that more and more companies can take on such orders, and this leads to lower prices.
- Limited selection of materials for exterior finishing. Only two options are ideal for roofing - soft tiles or wooden shingles. Other materials are inconvenient due to their shape or rigidity. For exterior wall decoration, you can use the same material, but add plaster and painting. There are projects in which the walls and “roof” are made of the same material. So the division is conditional.
The decoration of a domed house has its own characteristics - Due to the presence of rounded walls, the choice of finishing materials for indoor walls is also limited. So, large-format ceramic tiles cannot be used in the bathroom and kitchen, but mosaics are ideal, but they are much more expensive. When finishing with clapboard, the wall area is divided into sections of small width, which are delimited by vertical slats. You should do roughly the same thing when covering walls with wallpaper, but it doesn’t look as colorful as with lining. Decorative plaster and wall painting are no problem for finishing residential and “dry” technical premises.
There is also an unusual layout, but it cannot be definitely classified as a disadvantage. I like domed houses precisely because of their originality. So the non-standard shape of the premises is, rather, a feature that must be taken into account when selecting/ordering furniture and choosing finishing materials.
Dome diagram
The right side of the calculator displays a diagram of a given dome. The dome can be rotated with the mouse and zoomed in and out using the mouse wheel.
In the calculator you can see: frame, roof, diagram and plan by clicking the appropriate button. They can also be rotated, enlarged and reduced.
Scheme
The diagram of the dome shows the designations of edges, faces and vertices.
Roof
Roof faces of different sizes are shown in different colors.
The diagram on the “Roof” tab allows you to exclude individual faces and edges of the structure from the calculation. To exclude a face, you need to click on it with the mouse. To exclude an edge, you need to exclude the faces adjacent to it on both sides.
When excluding faces and edges from the calculation in the “Roofing” tab, the values in other tabs and sections of the calculator are recalculated automatically.
This function can be useful for analyzing possible openings in a structure, for example for doors and windows. And also for the calculation of such structures as gazebos, canopies, canopies and others.
Plan
The plan shows the projection of the vertices of the dome onto a plane passing through the base of the dome.
In the “Plan” tab, you can see the projection of the lower edges of the structure onto the plane at the base. As well as the dimensions from the center of the sphere to the ends of the projections and the height of the ends of the edges.
By selecting individual edges with the mouse, you can see similar information for any edge of the dome.
Clicking the mouse again removes the selection.
If the dome face is excluded in the “Roof” tab, then when you go to the “Plan” tab, the edges of these faces will automatically be highlighted.
To see the entire foundation plan, rotate the diagram with the cursor.
Projects and planning features
It is far from easy to plan a round building in such a way that it is rational, beautiful, and even convenient. There are a few basic techniques that most people follow. The first thing that catches your eye is that there simply cannot be corridors in such a house. They simply have nowhere to lead. This is not bad, but it makes the layout of the house more complicated. Let's start with something simple - how to decorate the entrance to the house.
This is also a house, made using dome technology
Entry group
For our climate, it is desirable that the entrance doors open into a small room, and not into a large room. In this case, a small vestibule helps. O can be allocated from the general area or attached. A covered veranda performs approximately the same tasks. This is a more “civil” way to solve the problem.
Not everyone likes this approach. Today there are other trends in the world - from the front door you enter into a large spacious hall/living room. Such a layout is also possible, but additional measures are needed to cut off cold air - a thermal curtain near the entrance. This is done using convectors built into the floor or by installing several powerful radiators near the door. The first method is more effective, the second is easier to implement. All these nuances are typical for domed houses. The only difference is that you will have to rack your brains to figure out how to fit in the built-in vestibule. The other two methods are easier to solve.
Layout of a domed house: considering ways to organize the entrance group
Let's look at the options for setting up an entrance group using examples. In the picture above, the project on the right, the entrance doors open into the living/dining room. This solution is typical for Europe and America. It is gradually gaining popularity in our country, but due to the harsher climate it often brings inconvenience - each opening of the doors in winter brings a significant portion of cold air, which reduces comfort.
The option on the left is with an attached vestibule. There are two exits from the vestibule - one to the winter garden, the other to the kitchen/dining room. The solution is no less modern, but the problem of cold air entering living spaces has been solved. So this idea is worth adopting.
If you decide to make the vestibule built-in, you will obviously have to allocate some area of the house. The minimum is three squares (on the left project). It would be logical if there would be a living/dining room next.
Two options for built-in vestibule/hallway
Another way is to allocate a large area and use it as a hallway. Place a wardrobe here, a hanger for things “for now” (draft law). If space allows, you can install a small sofa. For a private home, having a hallway is practically a necessity. Dirt and sand are less dragged into the house. And this is another argument in favor of a dedicated entrance group. Attached or fenced off - it’s your choice. But the entrance area is convenient. At least in our realities.
Organization of space
Most often, the central part of the space of a domed house is allocated for common areas. From this central area you can access all the other rooms, which are arranged in a circle. In general, the central room turns out to be inconvenient, since it is “very walkable.”
The central part will be used too actively, so this area cannot be made functional
You won’t be able to relax in it if it’s a living room, it’s not very convenient to cook in it, if you come up with the idea of using this room as a kitchen, or as a dining room, it’s also not the best option. Projects that use this space in this way are presented above. It looks great in the picture, but in real life you can’t count on an intimate atmosphere here. So the walk-through rooms are not the most habitable.
You can put a ladder in the center
Not the worst way to use this passage area is to install a staircase. After all, most domed houses have two floors, and a spiral staircase just begs to be reached here. You just need to take into account that if you simply twist it around a pole, it will be inconvenient to use - the turns will be too sharp. If you design a staircase like a “well,” it will be difficult to build it yourself. So this part will have to be entrusted to someone.
Otherwise, domed houses are planned in the same way as ordinary ones. The basic rule to remember is: to ensure that engineering systems are not very expensive, all “wet” rooms are located close to each other. The location of bedrooms, offices and other “dry” rooms is up to your taste.
Measurement results
The contents of the “measurement results” block become visible when you click on the title of this “measurement results” block.
Block with measurement results
The name of each field is self-explanatory.
The “Dimensions” block indicates the number of sizes and the number of elements themselves:
“Faces” - the first number indicates the number of sizes, the second number shows the number of faces. In the diagram, edges of the same size are shown in the same color.
“Ribs” - the first number indicates the number of sizes, the second number indicates the number of ribs. In the diagram, ribs of the same size are shown in the same color and indicated by the same letters.
“Vertices” - the first number indicates the number of vertices to which different edges are connected, without taking into account the fact that fewer edges are connected to the vertices at the base. The second number shows the number of vertices.
What is a domed house
Domed buildings are often called sky houses, after the name of the construction company that massively promotes buildings of this unusual shape. Another name for a dome-shaped house is a sphere house. A distinctive feature of the skyhouse is its round shape. The dome is a very rigid and reliable structure and can cover a large space without using any additional intermediate supports.
The outer surface area of a sphere is always less than the area of any other figure with the same internal volume. That is why, when building a domed house, fewer building materials are used for its external surface.
Ribs
The ribs block shows the type, dimensions and number of all ribs of the calculated dome.
The following symbols are used in the diagram:
Designations on rib drawings
- Index of the edge and its color in the diagram. Latin letters are used as an index.
- The number of edges of this type (index).
- The value of the dihedral angle between the plane of the rib and the adjacent dome face.
- Numerical designation of the vertex into which the edge rests at its end.
- The value of the dihedral angle between the outer plane of the edge and the cutting plane.
If the right side of the edges is not displayed correctly, then increase the width of the browser window in which the calculator is open. Recommended width is 1920 pixels.
When cutting ribs with a miter saw, it is sometimes convenient to orient the rib with the wide side facing down. Then the rotation angles of the saw will differ from those obtained here. To recalculate them, you can use a separate miter saw angle calculator.
6.4. Momentless theory of cylindrical shells
In Fig. 6.13, (a) shows a circular cylindrical shell in a cylindrical coordinate system x
,
j
.
Rice. 6.13
For such a shell, . We obtain the equations of the momentless theory by considering the equilibrium of the small element abcd
, separated from the shell by two adjacent generatrices and two cross sections perpendicular to the
x
.
Components of surface load intensity in the direction of the x
,
y
and
z
: , and .
Summing up the forces in the direction of the x
, we get (Fig. 6.13, (b))
.
Forces in the y-
they will give
.
Forces acting in the direction normal to the shell, i.e. in the direction of the z
, give the equation
.
After dividing by these equilibrium equations we obtain the form
, , . (6.15)
The hoop force depends only on the magnitude of the normal component of the load.
Let us consider, as an example, the calculation of a horizontal pipe of circular cross-section, filled with a liquid with a volumetric weight g
, and supported at the ends (Fig. 6.14).
Design results
To save the design results, you can use the calculator page address, which automatically changes depending on the entered data.
The resulting link can be conveniently used to transfer the dome structure to other people with the parameters you specified.
You can download the model of the resulting structure in .obj format using the “upload” button. It is located after the calculation results at the bottom of the page in the block of useful links.
Calculation of a domed house
A traditional architectural dome is a vault formed using brick or stone masonry. Such domes are extremely rarely used in the construction of private houses. The development of construction technologies and the use of modern materials has made it possible to create new techniques in the construction of dome structures.
There are several types of domes, but for private construction two types of dome structures are most often used:
- arched dome (umbrella dome) - a dome that looks like an umbrella and is formed by a series of curved ribs, the lower sides of which are located around the circumference of the base of the dome, and the upper sides converge at its center;
- geodesic dome - a dome that is a grid of many flat figures inscribed in a sphere. If it is necessary to give the dome maximum strength, then a triangle, the most rigid flat figure, must be inscribed in the sphere.
Making the ribs of an arched dome is a labor-intensive and complex process, and their installation typically requires the use of heavy construction equipment. Assembling a geodesic dome is much simpler than an arched one; all installation work can be done manually, since its elements are smaller and lighter.
The material for making the geodome frame can be very different, for example, wood, metal, plastic. The ribs (spacers) are attached to each other using cuts (connectorless), special connectors (connector), overlapping and other methods.
For the edges of the dome structure, the choice of materials is even more diverse: wood, plywood, OSB board, SIP panels, extruded polystyrene foam, polystyrene foam, and much more.
Due to the specific design, not all companies accept orders for the manufacture of a domed house. If you wish and have some experience in performing construction work, you can build a skydome yourself.
Calculations of dome structures are complex, so it is easier for a non-specialist to use ready-made online calculators, for example, this one:
https://acidome.ru/lab/calc/
Calculator blocks
When opening the calculator page on devices with the most popular screen sizes, you can only see the top area of the calculator. Blocks are usually visible in it:
- "Initial data"
- "Results and methods of connection"
- "Rib sizes"
- "Measurement results"
- Dome diagram
- Buttons for switching tabs: “Frame”, “Scheme”, “Roof”, “Plan”.
To see blocks with drawings of edges and diagrams of faces and vertices, you need to scroll down the page.
General view of the calculator page.