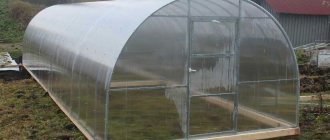
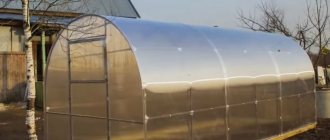
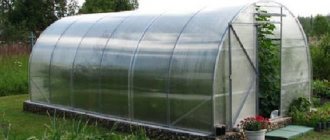
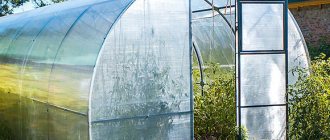
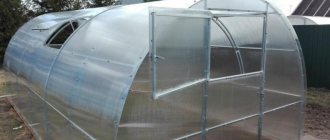
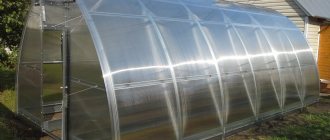
The greenhouse with the juicy and bright name “Orange” is one of the newest developments by Russian designers. To this day, it has no analogues in terms of price-quality ratio, as well as in terms of the material used. The fact is that its frame is made of a closed galvanized pipe of rectangular section 20x30 mm, with a rolled seam (lock) and even an internal arch, due to which the overall rigidity of the entire structure is increased. This entire “Orange” structure is covered with a 180-micron zinc coating, which guarantees the safety of the greenhouse for many years. The standard length of the “Orange” is 4 meters, width – 3, and height – 2.1 meters. Using the insert module, the Orange greenhouse can be increased to absolutely any length - as long as it is a multiple of 2 meters. But for the winter, manufacturers recommend installing supports in the greenhouse, although when covered with cellular polycarbonate, this greenhouse can easily withstand loads equal to a snow height of 20 cm.
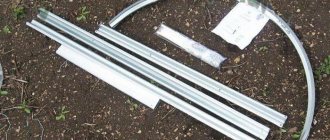
The packaging of the greenhouse is so compact that it is most often picked up by pick-up, in your own car. Indeed, despite the fact that the Orange greenhouse has a V-shaped profile, this greenhouse weighs only 70 kg, while other structures similar to its shape would have weighed 25% more, and from profile pipes - even twice as much. And “Orange” is supplied in three boxes. So, the main qualities that manufacturers sought to combine in “Orange” were reliability, aesthetics and lightness. And they seem to have succeeded.
What does the Orange greenhouse consist of?
The Orange greenhouse is a frame made of stainless steel and polycarbonate covering. The frame of the structure is made from a profile pipe, 0.7 cm thick.
It is worth noting that the steel has a layer of zinc on the bottom and top sides, so the material does not corrode.
The frame is very light weight and has additional stiffening ribs. The cellular polycarbonate covering is fixed to the base using galvanized tie strips.
Design Features
To ensure that the finished greenhouse is strong and reliable, reinforcement ribs are installed under the roof on each of the arches.
Note: In addition, since additionally made holes in the profile can reduce the strength of the structure, therefore, when assembling the greenhouse, polycarbonate sheets are laid on the roof surface and secured with steel tapes, which are secured to the base of the arches.
To do this, the tapes are thrown over the structure and from both sides below with a nut and bolt and the connection is tightened. Thanks to this, it is very quick and easy to assemble and dismantle the structure.
General characteristics of the Orange greenhouse
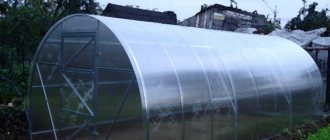
The shape of this greenhouse resembles an arch with a narrowed top. The places where the doors and vents are located have additional reinforcement so that the entire structure does not deform and quickly wear out.
The standard Orange greenhouse has the following dimensions:
- Length 6 m;
- Width 3 m;
- Height 2.1 m;
- The distance between the arcs is 1 m.
The design is equipped with a V-shaped profile, the net weight is 70 kg. The entire set of the Orange greenhouse is assembled in 3 boxes, which are compact and easily fit into the trunk of any car.
If desired, the structure can be strengthened or extended with prefabricated sections.
It is worth noting that the greenhouse covering can withstand loads in the form of precipitation up to 20 cm, but it is still better to put supports in the winter.
Assembly
The structure was created in such a way that the gardener could spend a minimum of time and effort on assembling the structure. As has been proven experimentally, two men completely assembled the structure in just 2.5 hours without the presence of additional complex tools, and without haste. To do this, you need to make a foundation in advance and when it is completely ready, install the greenhouse structure.
So that the summer resident can accurately assemble the structure, the manufacturer has marked all the parts, and the procedure for work is described in detail in the attached instructions, which must be read carefully. In addition, polycarbonate sheets are inserted into the doors and windows, and many parts of the structure are assembled and securely attached.
To complete all the work you need to stock up on:
- Wear gloves to avoid getting hurt on the sharp edges of the greenhouse sheets.
- Screwdriver or screwdriver.
- Using a knife cutter or electric jigsaw.
- A 10mm wrench. If you don’t have one, ordinary pliers will help out.
Pros and cons of the Orange greenhouse
The main advantages of the Orange greenhouse are the following:
- Fairly easy to transport;
- Simplicity and speed of installation of the structure;
- Maximum transmits sunlight;
- Easy care;
- The greenhouse body is quite resistant to high humidity;
- It has a high level of strength and can withstand significant loads and gusts of wind;
- Not afraid of temperature changes;
- Durable enough to use;
- A fairly wide doorway, which makes it easy to transport a garden wheelbarrow and carry equipment;
- If desired, the greenhouse can be enlarged;
- Great for growing a variety of plants.
Despite the large number of advantages, the Orange greenhouse also has some disadvantages that should definitely be taken into account, namely:
- It is necessary to install a greenhouse of this type on a perfectly flat area, otherwise it will not be possible to fix the structural elements correctly and firmly;
- There are small gaps near the windows and doors; they allow cold air inside the greenhouse.
Why choose the Orange greenhouse
There are practically no downsides to this design, unless you take into account the fact that the construction of this greenhouse will cost a little more when compared to a conventional film greenhouse.
First, let's look at the advantages of a greenhouse:
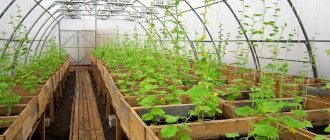
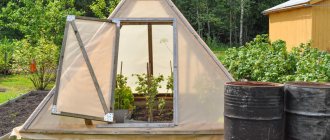
- The parameters and shape of such a greenhouse are so convenient that you can enter the greenhouse and move around in it without bending. This is an ordinary greenhouse with a dome-shaped roof. But it is made in such a way that even directly at the walls there remains sufficient height for tall plants and people to move at full height.
- The greenhouse is very easy to assemble and, if necessary, can even be partially disassembled and transported to another location. The materials used are not very heavy, but their reliability is not inferior to other designs. Practice shows that even an inexperienced gardener can assemble such a greenhouse with his own hands in 3-4 hours.
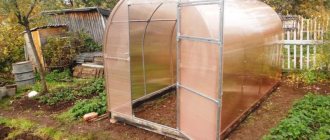
- The greenhouse is universal, so you can place it anywhere in your summer cottage or garden. The greenhouse does not require preliminary arrangement of the foundation and can be installed directly on the soil. You will only need to level the area in advance and, if necessary, make several holes for better compaction of the structure
- The most important thing is that growing plants in such a greenhouse increases productivity by almost 100%. Compared to other structures, the Orange greenhouse perfectly retains heat and an appropriate microclimate, which allows you to create favorable conditions for the growth of even the most capricious crops.
Installation of the orange greenhouse frame (step by step)
In principle, assembling the Orange greenhouse is quite simple and straightforward, but the basic algorithm must be followed:
- Using a tape measure on the prepared area, measure the length of the greenhouse and drive pegs along the edges.
- From the installed pegs, measure the width of the greenhouse and also place the pegs.
- Check the perpendicularity, namely, take a long thread and stretch it from peg to peg.
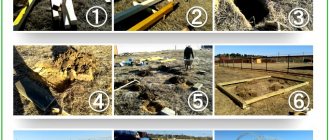
- Dig holes along the entire perimeter of the resulting rectangle, approximately 20 cm each and at a distance of a meter from each other.
- Assemble the frame, starting with the upper end arcs.
- Attach extensions to the side arches, on which the tightening straps are fixed.
- Assemble the intermediate arcs of the structure.
- Install all the arcs into the recesses, but do not fix them.
- Pull the tie straps out.
- Alternate all the arcs one by one and fix them with tension tapes.
- Install the end stand.
- Install the door and window.
No way without alignment
The statement that when installing a greenhouse it is enough to simply dig holes, without leveling, this is obvious misinformation.
- The area on which the greenhouse is installed must be fairly level.
- Leveling the greenhouse during installation is a very labor-intensive and important process.
Do you have any doubts? Proof of this is any video on installing greenhouses, look carefully.
Hole for installing a greenhouse.
- First, the greenhouse is installed as if in the usual, randomly dug holes, and then the already installed frame is shown. Let us say right away that without careful leveling the greenhouse will not be installed.
Installed frame arches.
Tools – the bigger the better
The next important point during assembly is screwing in the screws for securing various elements.
- This is where surprises may await you. They conclude that the core markings on individual parts were done incorrectly.
- The absence of screws with a drill for fastening individual elements forces you to drill holes after carefully measuring the distance and placing a core in the right place.
- In other words, some parts have screws with a drill, but others do not. Apparently a packer error, but unpleasant.
So the absence of the need to use a special tool is more a wish than a reality.
Maybe this is our national tradition, to make sure that assembling something is varied and exciting, and the pleasure of assembling does not end too quickly?
Our advice is that when purchasing a quick assembly greenhouse, be sure to take all the tools and various fasteners you have. Practice shows that this will not be superfluous and will save you a lot of time.
Well, we attribute this not to the design features of the greenhouse, but rather to the quality of production.
We hope that the manufacturer’s representative will read this article and draw the appropriate conclusion about establishing quality control in their production.
Manufacturing tricks - strength
I would also like to add a few words about strength.
- The installation and fastening of longitudinal ties does not cause any complaints, with a few exceptions. The longitudinal ties themselves are made of galvanized profile.
- But apparently due to the desire to save money, the manufacturer decided to arrange the fastening by simply cutting through the profile and bending the edges, thereby significantly weakening the profile itself by more than 2/3.
Fastening longitudinal ties.
- After all, as you know, the rigidity of any structure is ensured by the integrity of the entire part, and not by its individual part.
Take a thick cable and tie it with threads to the stuck car, and now try to pull it out. What will happen? That's right, the threads will break.
- It would be more correct to rivet a transverse fastening made of galvanized steel sheet. In this case, the rigidity would increase by an order of magnitude with a slight increase in the cost of the greenhouse itself.
- As for the end posts, everything is the same as with the transverse fastenings, but only in reverse.
End stand mounting angle.
- A strip of metal in the form of a corner is riveted onto the end posts. The length allows you to secure the stand using two self-tapping screws.
- But the first glance at such a mount raises a lot of questions. The stand itself is powerful and bending it is quite problematic, but the fastening let us down.
- Moreover, it is riveted only on one side and two self-tapping screws do not save the situation.
Installed end stand.
- It would be much more correct to install these fasteners much shorter, but on both sides.
- In this case, such a fastening would have a rigidity exactly twice as high as the existing one, which bends already when it is installed. An obvious drawback intended to simplify the production process.
Installation of greenhouse cover "Orange" (step by step)
In order to cover the Orange greenhouse with sheets of cellular polycarbonate, you should follow these steps:
- Cut the polycarbonate sheet into the necessary elements according to the dimensions specified in the instructions for the greenhouse model.
- Remove the protective film from each cut piece.
- Using self-tapping screws, attach the polycarbonate sheets to the greenhouse frame.
- Polycarbonate should be overlapped on the central arches and secured with tie tapes.
- Connect the joints of short and long tie strips using bolts and nuts.
Assembling the frame
The assembly of the frame begins with the installation of the end arcs. They include 3 parts: side (2 pieces) and central.
- Insert the side parts into the grooves of the central one.
- Attach extensions with tie straps. In this case, the tapes are designed to hold polycarbonate sheets.
- Next, the intermediate arches are assembled. In this case, the corner is attached to the upper part of the arc with screws.
- The finished elements are placed in the dug holes. The tie strips should face outwards.
- The arcs will not stand, but will lie down - that’s okay, that’s how it should be. Then they are connected to each other by longitudinal ties that have a recess in the middle part. The beginning of the tie is attached to the first arc, the corner and middle to the second, and the end to the third.
- End posts are installed at the back and front of the greenhouse. They are equipped with elements with holes for screws. There should be 2 posts fixed on the outer arcs perpendicular to the ground.
- Then the cross ties are used, and the front cross members are installed. The next stage is attaching the latches and hinges to the windows and doors. The hinges, in turn, are attached directly to the greenhouse.
The base of the frame consists of a closed profile pipe, the thickness of which is 0.7 millimeters. The frame is lightweight and has additional stiffening ribs
The best models of the Orange greenhouse
Below are the names and brief descriptions of the most popular models of the Orange greenhouse, which have proven themselves to be the best.
Greenhouse "Orange-Pro"
One of the popular models, it is easy to maintain and highly efficient. The greenhouse has the most compact dimensions when folded and is very easy to install.
It is worth noting that the Orange-Pro greenhouse model can reach a length of 8 m and occupy an area of 24 square meters. In order to cover such a structure, only 5 sheets of cellular polycarbonate are needed.
This greenhouse has a closed profile, and it is also reinforced with additional axles, so it can withstand significant loads very well and is not susceptible to gusts of wind. This greenhouse has 2 doors and an additional window for ventilation.
Greenhouse "Orange Reinforced"
A practical and durable greenhouse, but the configuration is the same as the standard model.
- It is worth noting that this model is designed for bad weather conditions, therefore it is extremely durable and resistant to winds, frosts and significant precipitation.
- The Orange Reinforced greenhouse is equipped with additional transverse profiles for stronger structural rigidity.
- The maximum length of such a greenhouse can be 10 m.
Greenhouse "Orange-K"
One of the largest and most practical greenhouses. This greenhouse is durable and reliable in operation.
The frame for the Orange-K greenhouse is a galvanized square profile, which is additionally painted, so the frame is as resistant to corrosion as possible.
As reinforcement, the greenhouse is equipped with additional diagonal slats.
What attracts gardeners to Orange
Long gone are the days when you had to create a greenhouse yourself from scrap materials. Today, by visiting a specialized store, you can purchase any model of product at an affordable price. Polycarbonate greenhouses have excellent characteristics and have already won over many people.
The main advantages of the structure include:
- ease of installation;
- lightness of construction materials;
- strength;
- aesthetics;
- high productivity;
- long service life.
The basis of the frame is a closed pipe, the surface of which is coated with zinc (180 microns). The substance can extend the life of a greenhouse and will withstand the most difficult weather conditions. The zinc coating does not deteriorate under the influence of aggressive chemicals that are constantly used on vegetables and fruits. Product packaging plays an important role. The entire product, when disassembled, will fit in a passenger car. Other designs are more heavy, especially when the profile pipe reaches 140 kg.