0
0
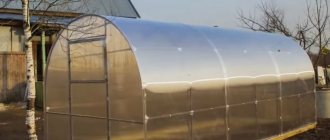
A greenhouse with the Kinovskaya brand is considered an excellent choice for budget-conscious summer residents who want to have a high-quality greenhouse. Do-it-yourself assembly according to the drawing can be done in 1 day.
- Overview of Kinovskaya type greenhouses
- Characteristics of different variants of greenhouses in the Kinovskaya line
- Self-assembly of a greenhouse according to instructions
- Owner reviews and greenhouse care
Basic technical data
The assembly and operation of the greenhouse should be carried out strictly in accordance with the instructions and rules set out in the technical data sheet. The technical passport must be kept.
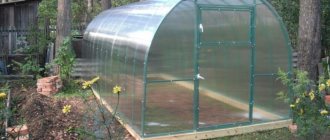
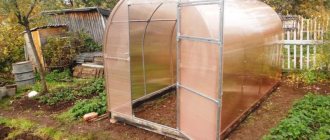
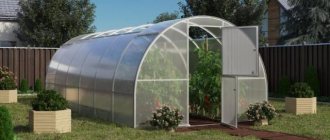
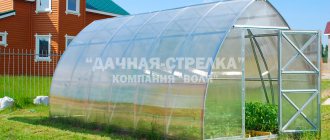
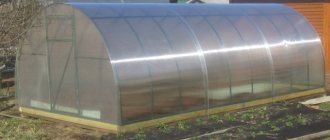
The KINOVSKAYA greenhouse is designed to create a microclimate favorable for growing horticultural crops in summer cottages and household plots. The greenhouse can have different lengths depending on the wishes of the buyer. The length of the basic greenhouse kit is 4 m, width 3 m, height 2.1 m. The width of the doorway is 0.95 m, height 1.85 m. The length of the greenhouse can be increased by purchasing and installing two-meter extension kits. The area of the covered soil depends on the length of the greenhouse.
The frame of the greenhouse is made of galvanized steel, which in turn prevents corrosion and is not of great value to ill-wishers, so it can be left unattended for a long time.
The greenhouse is assembled using screws and nuts. The greenhouse is mounted directly on the ground, by burying special ends of the frame, or on a wooden frame. The kit includes everything needed to attach the covering. The greenhouse is equipped with a covering, at the request of the buyer. The greenhouse has two openings at opposite ends and each opening has a door and a window.
To cover a 4 meter KINOVSKAYA greenhouse you need three sheets of cellular polycarbonate measuring 2.1m*6m, for a 6 meter greenhouse 4 sheets of cellular polycarbonate measuring 2.1m*6m, for an 8 meter five sheets measuring 2.1m*6m.
Before putting into operation, the greenhouse must be assembled and installed on the ground in accordance with the requirements of the instructions. The connection of parts and structural elements of the greenhouse frame must be carried out through all the provided holes with which the greenhouse frame is equipped. In the case of installation and assembly of the greenhouse not by representatives of the manufacturer, the buyer must check the quality of the assembly for compliance with the requirements of the instructions.
In winter, it is necessary to limit the snow load on the greenhouse cover (no more than 20 kg/m2). The accumulation of snow masses on the greenhouse cover is unacceptable. If it is impossible to remove the snow cover, it is necessary to strengthen the frame with self-made supports. If possible, do not install the greenhouse near trees and buildings from which snow or branches may fall, thereby damaging the covering and frame of the greenhouse as a whole. The recommended distance is at least 1 meter. It is recommended to clean the greenhouse with warm water; stubborn dirt can be removed with liquid household detergents using a soft rag or sponge. Do not use abrasives or highly alkaline cleaning compounds to clean polycarbonate sheets. Dry wiping the surface will damage the protective ultraviolet layer of the coating and shorten the service life of the polycarbonate. It is also prohibited to use abrasive materials, brushes and metallized cloth to clean the polycarbonate surface. When disinfecting a greenhouse from pathogens of fungal and bacterial diseases, do not use sulfur bombs to avoid corrosion (blackening) of the greenhouse frame.
Main advantages of the model range
Spacious and durable design
Products are distinguished by affordable prices without loss of quality. The affordable cost is explained by the use of all components of our own production. All three products offered to plant growers have a number of valuable advantages:
- The arched shape allows for maximum sun exposure. A special coating protects against ultraviolet radiation;
- characterized by low weight (from 40 kg) and high strength indicators;
- the Kinovskaya polycarbonate greenhouse can withstand any temperature changes (from -30 to +100°C), it does not have to be removed for the winter;
- fire resistance and resistance to chemicals;
- When assembled, the building looks like several compact boxes. They can be transported by car;
- a complete set of components, including tie strips for laying polycarbonate;
- Includes detailed illustrated instructions, plus a video with assembly instructions;
- a variety of sizes allows you to choose the most convenient option;
- there is no need to pour a foundation;
- a beginner without experience in such work can handle the installation of the product;
- the ability to purchase a complete set or just a frame without polycarbonate;
- Construction warranty – 1 year, service life – 20 years.
Standard equipment with one additional section
Greenhouse equipment
The KINOVSKAYA greenhouse is packed in a box, all parts are connected to each other with stretch film, the cardboard box protects your car from damage during transportation. All parts are numbered in accordance with the instructions, except for the fittings.
| № | the name of detail | Part length (mm) | Number of pieces Greenhouse 4m | Number of pieces extension 2m |
| 1 | Arc | 1610 | 21 | 9 |
| 2 | Extension | 850 | 14 | 6 |
| 3 | Stringer | 1380 | 21 | 7 |
| 4 | Rack | 1420 | 4 | 0 |
| 5 | Threshold | 960 | 8 | 0 |
| 6 | Door extension | 850 | 4 | 0 |
| 7 | End cross member | 788 | 4 | 0 |
| 8 | Mowing | 1475 | 4 | 0 |
| 9 | Door pillar | 925 | 2 | 0 |
| 10 | Window stand | 512 | 4 | 0 |
| 11 | Door crossbar | 900 | 7 | 0 |
| 12 | Door bevel | 1039 | 4 | 0 |
| 13 | Spacer | 710 | 0 | 7 |
| 14 | Frame reinforcement | 1465 | 3 | 3 |
| 15 | Window crossbar | 870 | 4 | |
| 16 | Window mowing | 930 | 2 | |
| 17 | Support | 200 | 18 | 6 |
| 18 | Corner | 36 | 6 | |
| 19 | Screw m4/40 | 520 | 120 | |
| 20 | Nut m4 | 520 | 120 | |
| 21 | Self-tapping screw | 120 | ||
| 22 | Washer | 120 | ||
| 23 | Tension tape | 5790 | 7 | 3 |
| 24 | Short tie tape | 350 | 7 | 3 |
| 25 | Pinch bolt | 7 | 3 | |
| 26 | Latch | 4 | ||
| 27 | A loop | 10 | ||
| 28 | Hook | 2 |
Comparative review of greenhouses of the Kinovskaya series
“Kinovskaya”: frame made of galvanized steel 0.7 mm. Snow load 80 kg/m2. Weight – 40 kg. Cost 4m. – from 10 tr.
“Kinovskaya-Agro”: frame made of a closed galvanized profile pipe of square section (20 by 20 mm) designed specifically for the northern regions of Russia. Cost 4m. – from 12 tr.
Greenhouse Kinovskaya Premium
“Kinovskaya-Premium”: frame made of galvanized closed pipe. Snow load up to 300 kg/m2. Weight – 75 kg. Cost 4m. – from 14 tr.
“Kinovskaya-Lux”: frame made of galvanized pipe (30 by 20 mm), with a polymer coating. It can withstand any amount of snow, but manufacturers still recommend throwing away the snow to preserve the coating. Weight – 82 kg. Cost 4m. – from 15 tr.
Greenhouse Kinovskaya Premium plus
General assembly instructions
- The frame parts are installed so that the side flanges of the profile face the covering.
- The item number indicated in the package corresponds to the part number in the pictures and is indicated by the corresponding markings on the parts in the packaging.
- To assemble greenhouses you will need: M7 wrench, cordless screwdriver, M4 drill, Phillips or flathead screwdriver, depending on screw configuration, sharp knife with replaceable blades, scissors with long blades for curved cutting of polycarbonate into ends, tape measure 5 m or more, tape , marker, stepladder.
When instructions are man's friend
Before starting installation, we recommend watching the assembly video. The instructions are worthy of the most positive reviews: it is compiled in the form of a 3D presentation, after viewing the sequence of actions becomes extremely clear. The written manual is also done in as much detail as possible.
The tool you will need is the simplest:
- screwdriver (you can get by with a screwdriver);
- wrench 14;
- jigsaw (or any sharp knife).
Greenhouse assembly instructions
A general view of the frame is shown in Figure 1 a. The parts are installed so that the side flanges of the profile face the coating. The frame is assembled from numbered elements, some of which are assembled from several parts with the same number. There are free holes in some parts; this is a consequence of the unification of parts. The joints of the parts are made by overlaying profiles and fastening with screws and nuts along the holes. The greenhouse must be assembled without final tightening of the screws; slack in the connections is necessary to level the greenhouse at the installation site. When assembling, be careful not to damage the parts, because... they do not have sufficient rigidity until final assembly. Use stands (such as chairs) during intermediate stages of assembly to evenly raise the frame being assembled.
Greenhouse "Kinovskaya" made of polycarbonate - an ideal do-it-yourself greenhouse
Among all the parameters taken into account by the buyer when choosing a greenhouse, the ratio of quality and price is one of the most significant.
One example of such a successful combination will be the Kinovskaya greenhouse, the installation of which can be completed in just one day.
In addition, the varieties of this greenhouse have a number of undoubted advantages and features, which will be discussed today.
Greenhouse Kinovskaya "Premium"
The main distinguishing feature of this modification, and at the same time an advantage, is the use of a high-strength profile in its design. It is made from galvanized pipe, making this greenhouse as durable and reliable as possible.
This structure was originally created specifically for snowy winters, so a square meter of surface of the Kinovskaya-premium greenhouse can withstand up to 300 kilograms of snow. In addition, its frame has increased resistance to corrosion.
Sequence of greenhouse frame assembly (4m)
- Remove the wire connection of the parts
- Sort greenhouse elements by numbering
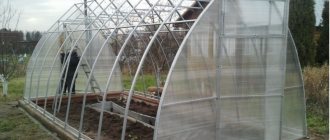
It is recommended to start assembling the greenhouse with element No. 1 (arc). Lay out all the elements of the arcs on the site in front of you. There are 21 pieces in the set for a 4-meter greenhouse. These should make 7 arches (3 arches for each element).
After you have finished connecting all elements No. 1, elements No. 2 (extension cord) are attached to the ends of each of the seven arches; there are 14 of them in the set, 2 for each arch (with a large number of holes at the bottom of the arch). When all these elements are assembled, you can begin assembling the ends of the greenhouse.
The entire connection of the elements of the end to the arc occurs through the corner (element No. 18) as indicated in Figure No. 1-B
Take one arch so that in the future it will be convenient for you to add elements by throwing them on the frame. Place all the end elements in order on the ground. The elements are shown in Fig. No. 1 (b). Connect elements No. 4 and No. 6 together so that the larger number of holes on element No. 6 (door extension) is directed downward. Next, arrange elements No. 5 (threshold). For each end, 4 pieces, add elements No. 7 (end crossbar) and elements No. 8 (miter).
After the ends are assembled, we attach element No. 3 (stringer) to the end arc, as shown in Fig. No. 5 (a), there are 21 of these elements in total, you should get 7 racks, then on these racks from elements No. 3 you throw a pre-prepared arc, in Fig. No. 5 (a). As soon as you have thrown the first arc and fixed it with a bolted connection, take again elements No. 3 (stringer) in the amount of 7 pieces. and continue to build up the frame by overlapping elements No. 3 on top of each other.
Having increased elements No. 3, we again take the pre-prepared arc and attach it to the stringers. Thus, you should have 4 arcs fixed at one end. Using the same scheme, we assemble the second end of the greenhouse.
When both ends are assembled, they need to be placed opposite each other. Complete the connection between the two halves of the greenhouse by adding the last arc, throwing it over the top of the frame (for convenience, use a stepladder or any other ladder). After you have assembled the frame, proceed to assembling the doors and windows, using Figure 1 (c) to arrange the door elements. It shows the location of the element schematically. First of all, we connect elements No. 9 (door post), there are 8 of them in the greenhouse, 4 pieces each. on every door. Having connected these elements together, we add elements No. 11 (door crossbar), there are also 8 pieces in the design, 4 pieces each. on every door. Having acquired all these elements, you can add elements No. 12 (door bevel). And, finally, we assemble the window itself from elements No. 15 (window crossbar) and No. 10 (window post), reinforcing it with element No. 16 (window bevel).
Parts number 10 and 15, connect to each other, sides with a large number of holes, you should get in the upper left and lower right corners, sides with a large number of holes, for attaching part number 16 (window bevel).
When assembling the door and window elements, use Figure 4, which clearly shows the connection nodes. The window is attached to the door with hinges (item No. 27). Please note that the window profile No. 15 (lower) overlaps the edge of the door crossbar (element No. 11). This is done to eliminate cracks and gaps in the structure.
Window: After assembling the window, we attach it to the door frame, so that one of the hinges of the window is secured together with part No. 12t. As shown in Fig. 4 A (see footnote).
When you have finished assembling the door, you can tighten all the screw connections, and then begin attaching the door to the end of the greenhouse, as shown in Figure 3 (a). Please note that the hinge installed in the middle of the door is attached together with element No. 7 (end cross member).
When both ends with doors are assembled, we begin to install the reinforcement elements for greenhouse No. 14. There are 3 of them in the set. They are installed on the fourth arc from the end, i.e. in the center of the greenhouse. Reinforcement elements are installed with the side flanges of the profile facing outwards, as shown in Figure 3 (b). All reinforcement elements are attached to the existing bolted connections of the greenhouse frame.
Finally, we install the remaining elements No. 18 (corner) from the ends onto the stringers for attaching the polycarbonate and on the arch extensions, element No. 2 for attaching the tape, as indicated in Fig. No. 7.
At the selected location for installing the greenhouse, it is necessary to dig a trench along the perimeter of the frame to a bayonet-shovel depth. Install the frame in the trench. Check with a cord that the diagonals of the frame are equal. The overall settlement of the greenhouse into the ground is such that the lower parts No. 5 (threshold) of the doorway and the lower stringer of the frame, element No. 3 are approximately 10 cm above the ground. Again, check the equality of the diagonals with a cord and adjust the position of the corners of the greenhouse frame. Level the frame by adding soil or deepening the trench so that the longitudinal elements are straight, horizontal and parallel to each other and so that the arcs are equal when viewed from the side. Perform final tightening of all screws.
Before covering the frame with polycarbonate, it is recommended to make technological holes with a diameter of 3-3.2 mm with a drill in all elements of the end of the greenhouse for easy fastening of polycarbonate sheets in the future.
Cellular polycarbonate is installed with a strictly defined side outward (towards the sun) having a protective layer from ultraviolet radiation. Be sure to check this when purchasing or before installation. The protective layer usually has the printed side of the shipping film. On the other side of the sheet there is a transparent film. After marking the sheet, but before cutting it, mark the protective side of the sheet on each piece, because After removing the shipping film, the sides of the sheet are not visually different. The transport film is removed from both sides immediately before fixing the coating to the frame.
It is best to cut polycarbonate sheets with a jigsaw, or you can also use a fine-toothed hacksaw or a construction knife. Sheathing the frame with cellular polycarbonate should begin from the ends. Before installing the sheet, be sure to seal the ends with tape to prevent dust, moisture and insects.
For easier fastening, we recommend the following pattern method. A four-meter greenhouse requires three six-meter sheets (two for the arches and one for the ends, three meters for each end). Mark a six-meter sheet, carefully cut it into three meters, so you get two sheets of 3x2.10 meters, you need to fasten it with the 3-meter side down (the honeycomb along the end of the greenhouse). Remove the shipping film, having previously marked the correct side, and seal the ends of the sheet with tape. Attach the ends of the greenhouse, leaving an allowance on each side, and secure the cladding piece with self-tapping screws. At the same time, watch the geometry of the end at the top and bottom of the frame, as well as on the sides from the center. Please note that the door trim should overlap the profile of the opening at the top and bottom, and the window trim should overlap the sides. After the sheet fits tightly to the frame, you should cut off the excess exactly along the arc. Cut the doorway and window with a construction knife in the center of the profile so that no cracks or gaps form.
After you have sheathed the ends, you should proceed to the top coating of the frame. The roof of the KINOVSKAYA greenhouse is covered with two sheets of 6 * 2.1 m, and each frame insert that extends the greenhouse is covered with one sheet. Before installation, determine the side and remove the shipping film, seal the ends with tape and carefully install the sheet on the frame so that a canopy is formed on both ends of the sheet, and the edges of the sheet fit tightly to the frame without gaps.
After the sheet is accurately aligned, you can begin to secure it with a metal tension tape. On the outside of the extensions, the corners (item No. 18) were previously secured with 2 screws so that the flange of the corner was facing the ground. On one side of the frame, to these corners, using M4/40 screws, attach a metal strip over the greenhouse skin, bending it along the profile of the arcs. Align the tape with the arc of the frame and pull the sheet against the greenhouse so that the sheathing fits snugly against the greenhouse frame. The sheathing sheets are overlapped together, and the excess forms a canopy (about 7-8 cm) above the ends.
The greenhouse is equipped with latches for fixing doors and vents in the closed position and hooks for fixing the vents in the open position. These parts are installed and holes are drilled for them in place after final assembly.
Assembling the case: anyone can do it
It is recommended to start the installation of the greenhouse body with the arches. Then comes the assembly of the ends; stringers (longitudinal load-bearing units) are attached to the ends. The pre-prepared arches remain to be placed on the stringers and secured with bolts and nuts.
Complete assembly by two people takes approximately two hours. We are not talking about professionals; an ordinary summer resident can easily handle the installation, even alone. The installation kit includes a clamping tape, with which the polycarbonate is quickly and securely attached, as in the photo.
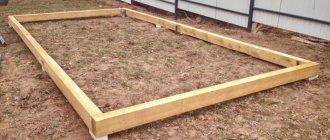
The Kinovskaya greenhouse is designed to be installed on the ground without a foundation; T-shaped fastenings are used for fastening in the ground. But for greater wind resistance, it is recommended to install the greenhouse on a frame made of wooden beams, for which there are holes for self-tapping screws on the T-shaped fastenings.
We cut, cut and fasten polycarbonate
In order to correctly cut a polycarbonate sheet, you need to assemble half of the end. Using a marker, we trace the pattern on the sheet along this half. Rational cutting of parts will help you save valuable material. Don't forget about allowances. Correct placement of patterns on a sheet of plastic, with all the necessary allowances - see photo.
Place the polycarbonate on the assembled body and fix it using the fasteners included in the delivery kit: self-tapping screws with O-rings and mounting tape. On the roof, the arrangement of polycarbonate sheets is provided overlapping; it is permissible to use a connecting H-shaped profile (photo).
At the ends there are two doors with vents. It is advisable to position the windows as follows: one at the top of the door, and the one opposite at the bottom. This way we will create conditions for natural air circulation. If necessary, additional arched transoms can be purchased.
The Kinovskaya greenhouse will quickly recoup the money invested in it. Having received a rich harvest, you can effectively invest in expansion. The next profitable purchase could be, for example, the Kinovskaya PREMIUM greenhouse, which does not need to be removed for the winter.
Operating conditions requirement
Due to the oscillatory movements of the greenhouse due to gusts of wind, it is necessary to tighten the loose fastening nuts or replace the fasteners.
In winter, if the greenhouse is not used for its intended purpose, namely, a positive temperature inside the greenhouse is not maintained, in order to avoid frame breakage due to snow load, the top sheets of the greenhouse cover MUST BE REMOVED , for this purpose removable tension tapes are provided. When removing the top covering, mark the outside with a marker.
General characteristics and purpose
The peculiarities of climatic conditions in our country do not allow us to obtain a consistently high yield when grown in open ground. Heat-loving plants require cultivation in greenhouse structures and the yield directly depends on the quality of the greenhouse structure. The optimal choice for the Russian region was proposed by the manufacturer KIN, which has launched the production of greenhouses suitable for planting and growing almost any garden crops in the spring and summer.
Even in harsh winter conditions, high-quality heating of the greenhouse space allows you to maintain the temperature above zero. The greenhouse is covered with high-quality polycarbonate sheets, and the arch-type frame structure is made of galvanized steel. Greenhouses are available in several versions, the most popular of which is the “Kinovskaya Premium” model.
The optimal choice for the Russian region was proposed by the manufacturer KIN, which has launched the production of greenhouses suitable for planting and growing almost any garden crops in the spring and summer.
Warranty
1. The manufacturer guarantees the quality of the greenhouse frame (hereinafter referred to as the product) and that the product is new, completely complete, unused and free of any defects.
2. The warranty period for the product under the KINOVSKAYA trademark is 12 (twelve) months from the date of sale to the buyer through the retail network.
3. The warranty extends, within the warranty period specified in the warranty card, only to defects found in the sold product that are of a manufacturing nature, provided that the consumer has a passport for the product with a seal or stamp of the manufacturer, a correctly completed warranty card with completed information about product, buyer, date of sale, seal or stamp, signature of buyer and seller.
The warranty does not cover the following damage:
- Poor quality assembly carried out in violation of these instructions.
- Defects caused by replacing the supplied fasteners with self-tapping screws, rivets, etc.
- On parts of fasteners subject to natural wear.
- Defects caused by careless handling, use of the product for other purposes, or violation of operating conditions.
- Defects caused by improper storage.
- Defects caused by natural disasters (flood, fire, lightning, etc.)
Flap. Write reviews, help others
Write reviews, help others
Go to the cityCinema: I watched the film at the Rodina cinema, where it was presented by the scriptwriter, the famous creator of the series “Streets of Broken Lanterns”, “Deadly Force”, “Opera. Chronicles of the Homicide Department” Andrei Kivinov (I took his autograph afterwards) and the performer of one of ...(read more)
Rating:
New on Flap:
There is a result from use
I started having varicose veins about two years ago. The first manifestations began during pregnancy, and after pregnancy, when I returned to work, veins appeared. The work is mostly sedentary, and by the end of the day, my legs and back hurt very badly. Folk...(read more)
Rating:
always fresh, beautiful flowers
I constantly order flowers here for my women (wife, mother and mother-in-law) for special occasions or just to make it nice. I don’t go to stores myself – I don’t have the time or desire. And here I ordered as many bouquets as needed, and in an hour or two you have them. Very...(read more)
Rating:
Price level:
Average
Great hotel at a good price!
For many years now, when I come to St. Petersburg, I stay at the Polustrovo Hotel. I like everything: the friendly staff, the cleanliness of the rooms, the delicious food, and the fact that there is a free gym with all the necessary exercise equipment. There is a beauty salon with a solarium. ...
(read more)
Rating: I bought an air purifier from this online store, I chose non-cash payment method, I paid immediately after placing the order, I strongly asked that they send it quickly, because... the next day I had to go far away to visit my relatives, and this purifier...
(read more)
Rating: My work laptop was damaged when I was on the subway from work. And the problem was that some of the buttons stopped working, and there was no question of working on the laptop. I sent it to the service center and asked them to do it as quickly as possible. Thank you …
(read more)
Rating:
Price level:
Average
Now “Salavat Yulaev” is playing worse than “Ak-Bars”. “Ak-Bars” is not a one-time winner of the Gagarin Cup, but “Salavat Yulaev” is in complete ass. And it will be there for a long time until the club’s management is kicked to hell. And, to kick the club’s management you need to...(read more)
Rating: Six months ago, my wife and I moved into a new apartment and smelled the smoke of a cigar from the stairwell, which was constantly drawn towards us. We discussed this issue with our neighbors, but the problem was not completely resolved. Therefore, we decided to look for a good cleaner...(read more)
Rating:
A few words about the leadership of Salavat Yulaev
Isn’t it time to drive the management of the hockey club “Salavat Yulaev” to the neck? And not only in the neck, but generally beyond the borders of the Republic of Bashkortostan. They are thrown away by experienced players as if they were unnecessary things, and then they wonder why the former ...(read more)
Rating:
Design Features
The Kinovskaya greenhouse structure, according to the customer’s wishes, can have different lengths, but the basic length parameters are four meters, with a width of three meters and a height of just over two meters. To extend the greenhouse base, special additional kits can be used.
In the manufacture of the frame, high-quality galvanized steel is used, which prevents the formation of corrosive changes. The assembly process is based on the use of a screw and nut connection. Fastening is carried out directly into the ground using the technology of burying frame ends or for fastening to a wood base. The basic package includes everything necessary to secure the coating to the frame. Sheet plastic is supplied at the request of the customer.
The Kinovskaya greenhouse structure, according to the customer’s wishes, can have different lengths, but the basic length parameters are four meters, with a width of three meters and a height of just over two meters
