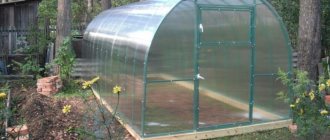
Today, a polycarbonate greenhouse on a summer cottage is not at all uncommon. Although at first glance all greenhouse buildings seem the same, in reality they have many differences in both frame design and quality of execution. We are talking about those buildings that are made in a handicraft manner without taking into account the load and operating conditions. But still, the overwhelming majority of designs are durable, reliable with long service life: manufacturers are not ashamed of such products. Among such successful high-quality products is the reinforced greenhouse “Ural Estate” made of polycarbonate.
Characteristics of the structure
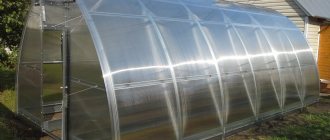
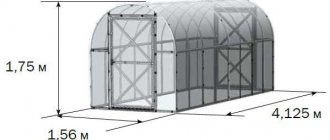
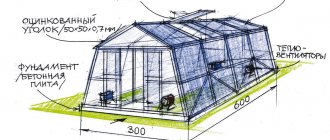
The width of the structure is 3.0 m, which allows you to arrange three beds with a width of 0.68 cm and passages between them of 50 cm. But you can also make two beds with a passage in the center - this will be decided by the owner himself, depending on the type of crops grown. The building height is 210 cm - the most comfortable for caring for plants. Even tall vegetable growers will find it convenient to work in a greenhouse. The length starts from 4 meters: with the help of additional two-meter segments you can extend the greenhouse to the desired size.
To produce a base for sheets of polymer plastic, a profile with the following sections is used:
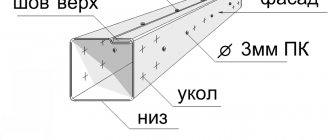
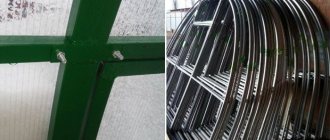
- Square pipe 0.30x0.3 cm - for making the base of the frame, arc elements and solid ends where doors and transoms are located.
- Profile 0.20×0.20 cm - for the manufacture of doors themselves, vents, cross ties.
All metal elements of the Uralskoy Usadba polycarbonate greenhouse from the manufacturer have already been primed. The ends and arcs are non-separable, so the design has high strength characteristics.
Assembling a polycarbonate greenhouse: instructions, video
Own greenhouses on your own plots are the best option and can be used throughout the year. In addition, you can easily assemble them with your own hands. And in this article we will tell you what material is needed, how to pour the foundation, and in general, what assembly of a greenhouse is like.
First, let's figure out what kind of greenhouses there are. If you sort them by shape and complexity of installation, then greenhouses are:
- Arched - have the shape of an arch;
- Tent - similar in appearance to arched ones, but wider, for large-scale vegetable growing;
- Greenhouses based on a mitlider are special, one might say, professional greenhouse structures of an unusual shape.
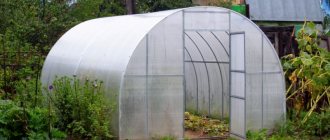
Arched greenhouses. As already mentioned, this look is quite simple. However, assembly is a responsible undertaking. And therefore, if you have numerous questions and this is your first experience in construction, it is better to find a video about assembly on the Internet. Nowadays, many people record video lessons teaching a variety of things. So detailed instructions for assembling the greenhouse will find their place.
The installation time for an arched greenhouse does not exceed one day. It is only important to understand the size, and take into account that it is better to carry out the assembly on a flat piece of land. For strength and stability, you should pour a small foundation around the perimeter of 20-30 centimeters.
If you can’t do this yourself, you can always hire workers - this operation will cost you around 10 thousand rubles. Next comes the installation of the frame, the material for which can be purchased at absolutely any hardware store. Finally, the greenhouse is covered with polycarbonate walls, pre-ordered, taking into account the shape and size.
The gaps between the sheets are treated with a sealant - for example, silicone.
After this, it will be necessary to cultivate the land and prepare the soil for the future garden - fertilize, distribute the soil, etc.
Tent
Tent structures. These greenhouses are the most common of their kind. The assembly instructions are almost the same as in the case of arched ones. Installation takes a longer time, since tented greenhouses are often large in size and are intended mainly for large-scale cultivation of vegetables.
Optimal sizes range from 50 to 150 square meters. Such greenhouses, accordingly, require a larger and more durable frame. And he, in turn, is a reliable and, alas, expensive foundation. You definitely can’t do this with your own hands. For experienced specialists, creating a greenhouse will not be difficult, but their services are paid.
And if you plan to grow vegetables in winter, then a regular greenhouse may not cope. It will need to be insulated. The easiest way would be to install a special, insulated polycarbonate on the frame.
It has double glazing, which improves air circulation and, accordingly, maintains the required temperature.
This will not make installation of walls any more difficult; it is important to understand that such a structure can only be prepared in an area with relatively warm winters.
Equipment
The frame kit includes the necessary fasteners, polycarbonate sheeting and instructions. As everyone who has already purchased a greenhouse of this brand says, everything is described in such detail in the instructions that even those who have never before been involved in the construction of greenhouse structures can assemble the structure.
It is advisable to install the building on a wooden beam that can be treated with antiseptic agents. You can also use a concrete foundation.
In addition to the usual kit, you can buy structural additions:
- two-meter sections;
- dividing partitions for dividing the room into parts;
- window for installation in the roof surface. It is equipped with automatic ventilation. But you can also purchase this device for Usadba greenhouses separately;
- watering system. Moreover, you can choose any model based on the size of the greenhouse.
How to care, standard design equipment
The standard set of the “Estate” product consists of the following components:
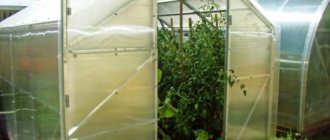
- 2 end elements with openings for doors and windows.
- Arcs.
- Screeds and longitudinal elements of the base.
- Sealant for windows and doorways.
- Set of fasteners, bolts, screws, self-tapping screws, handles.
- Pieces of cellular polycarbonate (4 x 6 mm, length 2.1 m).
- Greenhouse assembly instructions.
The kit may additionally include: a roof transom, an automatic mechanism for the transom, additional partitions, and a drip irrigation installation. The structure is able to withstand loads in the form of snow masses and wind (snow - up to 25 kg per square meter and wind gusts up to 11 m/s).
The greenhouse must be looked after, and then it will last for many years. Snow must be cleared from the structure itself and removed in the area around the greenhouse.
It is necessary to ensure that ice does not form and to wipe the greenhouse free of water. Abrasive chemicals and cleaning agents should not be used under any circumstances. In summer, you need to wipe the surface with a soft cloth soaked in plain water. It is very important to monitor the condition of painted parts, touch them up in a timely manner and check their strength.
The lineup
The basis for a whole series of models was a standard greenhouse. The differences in some cases are minor (reinforcement, use of paint), in others they are quite large, for example, the shape of the frame. Each change is indicated by a specific letter, which is added to the name. The letter "K", for example, means painted. The service life of such structures is much longer: the paint protects metal elements from corrosion damage.
Particular attention is paid to models with the additional letter “U”, which means “reinforced”. With standard sizes, it has a much smaller distance between the arcs - only 0.5 m. But still, the most popular are the reinforced “Usadba” greenhouses with the designation “KU” - these are durable structures intended for use for about 20 years.
The company also produces “Mini” brand greenhouses. They are slightly lower and narrower: height 2 m, width 2.5 m, so the price of such a design is more affordable. Each model is equipped with two windows and the same number of doors.
Note: Despite the fact that the structure is slightly smaller in size, it must also be installed on a foundation.
The structures of the “Dome” brand look very unusual: they really resemble church tops in shape. With a height of 230 cm, the width of the greenhouse is 210 cm. Due to the fact that the structural elements close together, creating an acute angle on the roof, it is impossible for snow to linger on the surface of the structure. Therefore, even the most heavy and frequent snowfalls and blizzards are not a problem for the mini greenhouse “Usadba”.
How to install the structure
Greenhouses “Usadba” and “Usadba KU” are mounted only on a previously prepared foundation. The foundation is made of concrete and timber, which must first be treated with an antiseptic. If for some reason the foundation cannot be installed, then there is another option for mounting the greenhouse - installation on the ground using lugs that are welded to the longitudinal components of the frame.
The disadvantage of the latter installation method is that in the spring, when the snow melts, deformation of the structure may occur. Therefore, the optimal and most rational solution is to install a solid concrete-wood foundation.
The foundation can be laid in just a couple of hours. A solid foundation has some advantages. Firstly, protection from rust, since the frame is insulated from the ground. Secondly, the structure installed on the foundation is more stable and can withstand strong gusts of wind. Wood beams are suitable for the foundation, the cross-section of which can be:
- 100 x 100 mm;
- 100 x 150 mm;
- 150 x 150 mm.
To secure the structure well, you will need nails and screws. The length of the nails should be 120 mm.
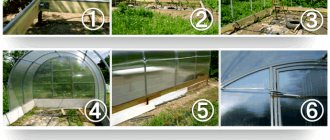
The longitudinal elements of the frame have the required number of holes in order to properly secure the greenhouse. Assembly time does not exceed 3-5 hours, the design is not complicated, and even a gardener without skills in building this type of structure can handle the assembly.
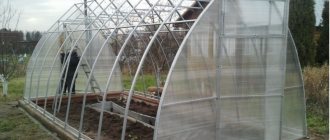
After the foundation is made, the frame is installed, and after that, the structure is covered with sheets of cellular polycarbonate, which, in turn, is securely fixed. The main thing is to follow the instructions that come with the kit.
If we look at the reviews about this greenhouse, most of the reviews are positive. Some gardeners prefer to introduce their own innovations and strengthen the structure.
Types of greenhouses Summer resident and characteristics
The best greenhouse is a structure in which all materials are ideal for growing vegetables in it at any time of the year and under any conditions.
A garden greenhouse is one of the best options, the parameters of which fully correspond to the shape and size of the ideal structure for cultivating plants.
This is an arched structure that will fit into any garden thanks to the wide range of sizes available in width and length.
In fact, this is a series of greenhouses, each of which has its own design features.
A summer house greenhouse is a structure based on a frame made of galvanized profile pipe, which is sheathed with cellular polycarbonate. It comes with detailed assembly instructions, so you don't have to waste time understanding installation principles. All parts are already ready to be fixed with each other. You can easily assemble a greenhouse with your own hands in four hours.
When purchasing a prefabricated greenhouse, many gardeners worry about the quality of the prefabricated parts, because in order to save money, some manufacturers use inappropriate and untreated metal and low-quality polycarbonate. The design itself may not be thought out, which is why the functionality of the structure will leave much to be desired.
The quality of the Summer Resident greenhouse is due to strict control in the production of every part made of metal or cellular polycarbonate.
The frame components are not prone to corrosion due to the galvanized coating, the welds are well processed, and all parts of the metal base are painted.
Thanks to a well-designed frame design, the greenhouse can withstand heavy snow loads. The assembly instructions will help you find out specific numbers.
The simplest design from this series is the Summer Resident Standard. It is made of galvanized profile with a section of 20x20 mm. The distance between the arcs in this case is a meter. The greenhouse can easily withstand a snow load of 70 kilograms per square meter.
Another greenhouse option is the Reinforced Summer Resident. This is a modification of the Standard, which allows it to withstand higher loads on the structure. In this case, the frame profile has a cross-section of 30x30 mm, and the distance between the arcs is 0.65 cm. The reinforced greenhouse can withstand loads equal to 80 kilograms per square meter.
Summer resident Lux is the latest modification of the greenhouse. It is called the most reliable and stable design in the presented series. It has double arches between the gables and is complemented by special connectors for frame pipes. The profile cross-section is 20x20 mm, and the distance between the arcs is equal to a meter.
The summer resident greenhouse made of cellular polycarbonate is available in different sizes. The area of the smallest greenhouse is eight square meters.
The length of such a greenhouse is slightly more than four meters with a height of 2.1 meters and a length of two meters. The area of the largest greenhouse in Dachnitsa is 30 square meters.
If desired, the greenhouse can be increased by two meters in length by fixing additional arcs.
Assembling a greenhouse is really very simple. The arched structure is classified as complex, and creating such a greenhouse from scratch on your own is quite difficult. After all, in order to bend a metal profile, you need to have skills in working with a pipe bender.
To cover the frame with polycarbonate, you only need a screwdriver and self-tapping screws with thermal washers. The cost of a high-quality greenhouse Summer Resident is very affordable.
Fastening the greenhouse to the ground
You can’t just assemble a greenhouse and place it on the ground. The first good gust of wind will easily overturn your new thing. Therefore, it is necessary to ensure that the greenhouse “holds” securely to the soil surface.
Usually two options are offered: mounting on piles or to a wooden frame. Each of these options has its pros and cons. Wood, even if it is treated with a special composition, will rot sooner or later. But it is heavy enough to hold the greenhouse in place even in strong winds.
The piles must be installed in a special way so that the base of the greenhouse is smooth, without bumps. We chose piles so we can show how they behave in practice.
