High yield of organic greens and vegetables from early spring to early winter? The dream can come true! You can increase the yield of greenhouse crops with the help of a properly insulated greenhouse. And we tell you how to do this in our material.
Most of our country is characterized by seasonal soil freezing. To speed up the start of the planting season and protect the future harvest from unexpected frosts, gardeners carefully grow especially capricious crops in greenhouses. And in order to increase productivity, you need to build a greenhouse with warm beds placed in a box made of slabs of high-quality thermal insulation material PENOPLEX FOUNDATION®.
A set of measures to prepare a greenhouse for winter
The greenhouse allows you to get fresh vegetables and herbs to the table, from early spring until the first months of winter. But during the warm season it becomes dirty; harmful bacteria, insects, and dirt accumulate on the walls and behind the crossbars. There are plant remains in the beds, pathogens, pest beetles, harmful elements in the soil, and infections in the air. Such negative factors can damage the structure itself and the future harvest; in order to avoid sad consequences, it is necessary to carry out a set of measures to prepare the greenhouse for winter:
- clean, take out trash;
- wash;
- dry;
- disinfect;
- digging, tillage;
- insulate;
- strengthen the structure.
Preparing the greenhouse for winter, first of all, it is necessary to remove all unnecessary
Emergency insulation of the structure
Often, owners of summer cottages need to urgently warm up the greenhouse. This may be necessary if the temperature has dropped sharply or the structure has been damaged mechanically, which has led to it becoming very cold inside.
Attention!
The choice of an emergency heating method should be based on financial capabilities.
Often the heating method is combined with additional work. For example, urgent insulation can be carried out simultaneously with disinfection, for which different methods are used, one of which is sulfur fumigation. Thanks to it, you can get rid of fungus and harmful microorganisms that appear in the soil and on the walls of the structure due to high humidity and exposure to high temperatures.
To do this, you need a sulfur block for a polycarbonate structure - one piece can pay for about 20 m3. Combine this method of insulation with burning a checker - the plants will not suffer from this.
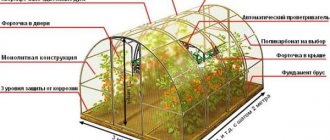
Greenhouse thermal insulation
- How to keep warm in a greenhouse
- Location of the greenhouse in space
- Other ways to insulate a greenhouse
The thickness of the outer plastic sheets of the greenhouse should be 1.5 cm. The thickness of the outer plastic sheets of the greenhouse should be 1.5 cm.
How to keep warm in a greenhouse
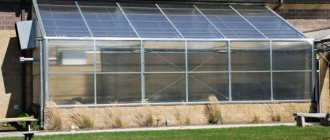
The most suitable material with high thermal insulation performance is polycarbonate sheets. This translucent plastic ensures minimal heat loss. A more advantageous material in terms of heat preservation is a three-layer coating, which consists of two polycarbonate layers and an air layer.
The thickness of the outer sheets of plastic should be 1.5 cm. For the inner layer, a thickness of 4 mm is sufficient. To minimize heat loss, special rubber seals should be used.
Insulation of the foundation and lower part of the greenhouse is of no small importance. The minimum depth of laying the foundation must be no less than the depth of soil freezing. Optimal thermal preservation indicators are typical for foundations made of adobe blocks, soaked in a cement solution and covered with a layer of polymer mastic
Roofing material must be laid on top of the foundation blocks, and the inside must be insulated with foam plastic and a layer of sand 40 cm thick.
Sheet polycarbonate is the most suitable material with high thermal insulation. Sheet polycarbonate is the most suitable material with high thermal insulation.
Location of the greenhouse in space
The correct location of the greenhouse structure helps to save energy resources and reduce heat loss. When constructing a greenhouse, you should select an area where solar illumination will be maximum:
- greenhouse structures in the northern regions should be directed from east to west;
- for Central Russia, the meridian orientation is represented by the location of the structure from north to south.
It is important to minimize shading of the greenhouse, and also, if possible, protect the building from strong winds
Insulation of the foundation and lower part of the greenhouse is of no small importance. Insulation of the foundation and lower part of the greenhouse is of no small importance.
Other ways to insulate a greenhouse
The gardener always has the opportunity to use other options to make the greenhouse structure warmer:
- use of high beds. The standard height of such a ridge should be 40 cm. In addition, the lower layer of soil will require insulation;
- the use of a heating cable, which should be laid along the greenhouse beds with a depth of 10 cm. A special type of such cable operates from a standard electrical network and combines efficiency with low costs;
- installation of a water heating system. This method is expensive and time-consuming. However, water heating is very efficient and reliable.
There are other ways to increase the temperature inside the greenhouse. Choosing the optimal option involves taking into account the terms of use of the greenhouse structure, as well as the cost of materials and maintenance costs of the system used. published econet.ru
If you have any questions on this topic, ask them to the experts and readers of our project here.
What is needed for the job?
There are many sealants on the market that can be used immediately after purchase. But most of them do not form a dense coating. The reason for this is poor tolerance to the vagaries of weather and sudden changes in temperature.
Experienced gardeners recommend using mastic, which is suitable for sealing minor cracks and seams. Thanks to special components, these mixtures can be used in different temperature conditions: from severe frosts to heat. If you use them correctly, you can get excellent results.
Rubberized gaskets will also cope with this task perfectly. They can be different, with a porous structure and a dense outer layer. This is an ideal solution for sealing a structure on a metal frame or when working with a strip foundation.
Second layer of thermal insulation
Effective insulation of greenhouses is carried out by installing a second film layer. Polyethylene film is the most accessible and cheapest material. Today, modern markets offer stabilized films with high levels of wear resistance, elasticity and frost resistance.
It has excellent transmission capacity for ultraviolet rays and oxygen; has a light-scattering effect, which is important for greenhouse crops; resistant to dust formation. Manufacturers of film products guarantee a service life of the film coating of up to 7 years (Richel - PE film)! Such a service life has not been observed in any known film of previous years.
The quality of new generation materials cannot but please greenhouse owners.
Ethylene vinyl acetate copolymer film is ideal for insulating a greenhouse structure - a particularly durable material with a light transmittance of 92%.
Various methods of sealing glazing: a - using sealing mastic; b - putty-free glazing; c - using a sealant; g - fastening the glass to the T-section sprocket; d - fastening glass with putty to a wooden sprocket; e - connecting glass using a clamp; 1 - glass; 2 - sprats; 3 — clamps; 4 - sealing mastic, putty or sealant; 5 — clasp KL-3; 6 - pins
Characteristics of copolymer film:
- resistance to wind loads and punctures;
- long service life;
- excellent light transmission;
- strength;
- frost resistance;
- elasticity;
- antistatic properties (dust repellent);
- hydrophilic surface (condensation rolling off);
- energy saving up to 40%.
A simple frame made of wire, metal or plastic pipes (whatever is at hand) is installed inside the greenhouse. The frame structure must have 5 cm indentations from the main walls of the greenhouse. The air cushion that appears between the walls of the main and additional frames reduces heat loss by up to 50%. Significant energy savings are guaranteed only if tightness is maintained at the joints and fastenings of the film - special clip locks (Richel) and sealants (polyurethane, silicone) have been developed for this purpose.
Joints
The complete process of transforming a greenhouse for the harsh winter season involves sealing the joints. According to many experts, they are the main cause of heat loss. Through small holes between the finishing materials used in the construction of the structure, cold air enters inside. Both film and glass greenhouses need sealing.
The presence of joints leads to drafts, which negatively affect the process of fruit ripening. Even if a hydraulic barrier was used when creating the heifer, it is recommended to carry out an additional procedure for sealing the joints.
Energy saving screens
Horizontal curtain systems for greenhouses at night are another way to retain heat. A heat shield made of aluminum fiber fabric (ALUMINET) prevents the cooling of greenhouse structures. Under the influence of reflective components (aluminum has a high heat-reflecting ability), the infrared heat of the earth accumulated during the day is returned back to the greenhouse. When using screens with aluminum elements, heating costs are reduced - 50% energy savings are achieved. The greenhouse can be left covered with a heat-reflecting screen for 16 hours, since daylight hours in winter are only 8 hours.
There are other screens with a lower percentage of energy savings. For example, diffuse or shading curtains (such as LS 10) save 40% of energy, and film curtains save 30%. Polyethylene screens are installed permanently.
Horizontal shading is installed in separate sections under the roof of the greenhouse. All sections of the screen are driven synchronously by a special curtain mechanism - a cable drive or rack and pinion drive is used for this. There is also vertical shading, but it is still less common.
Automated curtain systems are suitable for industrial-scale greenhouse structures, and for small greenhouses you can design a screen yourself that will work on the principle of a roller blind. The heat-insulating material is attached to a horizontal shaft (aluminum pipe) with a drum mechanism and wound into a roll. Fastening elements are installed on the other end of the canvas. The shaft with the roll is fixed under the ceiling of the wall opposite to the entrance. As needed, the canvas is unwound under the surface of the greenhouse in approximately 1 m increments. All components of such an energy-saving roller blind can be found freely available at any hardware store.
Warming with air
In this case, as can be understood from the name, heated air acts as a heat carrier.
- Quite often, heating is now used in practice using gas catalytic burners, which heat the air in a greenhouse by burning natural or bottled gas. Cylinders are used in cases where heating is needed for a short period of time, for example in cases of frost.
- Another type of air heating is similar to water heating, only in this case, perforated polyethylene hoses are laid from the fuel boiler, through which warm air is supplied to the greenhouse, warming the soil.
- And finally, heating the greenhouse using a good old stove-stove. Despite its primitiveness, this method should not be written off. Its cheapness, simplicity and effectiveness speak for themselves.
Cold bridges and thermal curtains
Perhaps the very first thing to do for insulation is to treat all cold bridges (cracks, joints, attachment points) with heat-insulating compounds. In the autumn-winter period, the greenhouse experiences enormous atmospheric loads, so it is better to use a two-component polysulfide composition as a sealant. Such sealants always remain elastic and are not afraid of any hurricanes or downpours. This unique product has been developed specifically for the maritime sector, where protection from water and wind is of paramount importance.
Sealing gaskets should be installed along the perimeter of the door and window openings - these measures will require minimal costs, but will significantly reduce heating costs. To seal the opening elements, sponge gaskets with glue already applied are used. The gasket elements are installed by applying and pressing them with the adhesive side in the required sealing areas.
Additional heating tools
The fastest way to insulate greenhouses with improvised means is plastic bottles of water. But you can use it in the off-season; it will not help protect against frost.
In winter, you can use the following as additional heating:
- high beds with insulation of the lower layer;
- laying cables along the beds;
- gas heating (gas heaters, injection infrared heaters);
- soil chimney (the stove is located outside the greenhouse, the chimney is placed in the soil);
- catalyst burners.
We advise you to read about how to choose or make a polycarbonate greenhouse with your own hands.
Soil preparation
When setting up a greenhouse for the winter season, first of all you should carefully prepare the soil. Maximum thermal insulation will be provided by a strip foundation.
Soil preparation can be divided into stages.
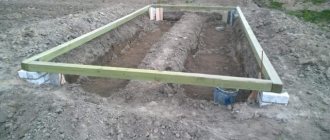
- First, the future foundation is marked. After marking, a cast-off is installed, which is usually made from boards. This casting will help determine the internal and external boundaries of the base.
- The next step involves excavating the soil to the required depth. Sand is poured into the bottom of the dug trench to protect the supporting structure. If possible, it is worth taking care of waterproofing the underside.
- Formwork is installed on the prepared trench. The most important requirement is its strength.
- Having decided on the formwork, you can move on to reinforcement. After installing the reinforcing mesh, the structure will become even stronger.
- The last stage is pouring concrete. It is recommended to lubricate the formwork walls with a water-based composition before doing this, so that after the mixture has hardened, it will be easier to separate the elements from it.
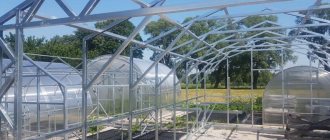
Typical construction
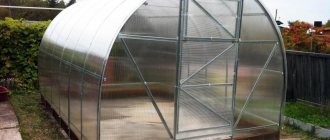
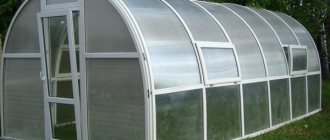
To make a polycarbonate greenhouse correctlyTo make a polycarbonate greenhouse correctly
To install a greenhouse, you should choose a flat, well-lit area away from buildings and trees. It is better to avoid a place with high soil moisture.
Construction is carried out in several stages.
Foundation
The sequence of work is as follows:
- Markings are made along the entire perimeter of the future greenhouse and a trench is dug 0.2 - 0.3 m wide and 0.7-0.8 m deep;
- a layer of sand 0.2 m thick is poured onto the bottom, which is then carefully compacted;
- for waterproofing, roofing material is laid on the sand cushion;
- a reinforcement cage is mounted: rods are laid at the top and bottom of the future foundation and connected to each other by transverse sections of reinforcement;
- formwork is installed, which should be 0.2 - 0.5 m above ground level;
- concrete is poured;
- insulation is carried out with polystyrene foam, a blind area is made.
The height of the formed base is determined by personal preference.
Walls
The sequence of work depends on the type of material used. If you plan to install a finished factory-made product, follow the instructions.
The assembly of the wooden frame begins with a beam of the bottom trim, laid on the base. All timber must be treated with special agents to prevent rotting. The vertical racks are installed in such a way that the edges of the polycarbonate sheets rest on them.
Having installed the vertical posts, check their spatial location and secure them with braces. If the greenhouse is long, several intermediate posts should be provided.
Main walls are laid in one brick. Window openings are formed at a height of 0.5 - 0.75 m from the ground level, maintaining a distance of two to three bricks between them (0.5 m or 0.75 m). The frames installed in them must have transoms to ensure ventilation.
Roof
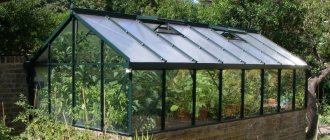
The gable roof has become most widespread due to the possibility of free flow of atmospheric water. The roof planes have an inclination angle of 20 – 25°. Laying of the lower strapping beams with a section of 120 by 150 mm is carried out along the side walls on the roofing paper. The fastening of the ridge (made from timber of the same size) to the strapping is carried out using paired rafters. For the latter, you can use timber measuring 70 by 100 mm.
Traditionally, double glass with a thickness of at least 4 mm is used to cover the roof. Glazing is carried out using 40 x 75 mm grooves with the formation of gutters for condensate drainage. However, recently, roofing work is more often carried out using cellular polycarbonate. The latter is characterized by lighter weight and ease of installation work.
A greenhouse built using it can last at least 12–15 years.
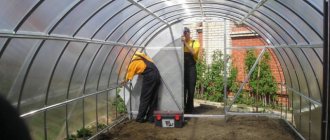
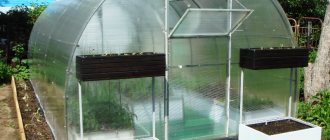
How to insulate a polycarbonate greenhouse from the inside in two layers of film
Air is the best heat insulator. Therefore, we need to secure the second layer with bubble wrap along the inner arches of the greenhouse. We choose the densest and cheapest material. Insulating a polycarbonate greenhouse in two layers with bubble film gives the effect of a thermos and reliably retains expensive heat.
Tip 3: Buy film with large bubbles, as shown in the photo in rolls of 100 m2.
Before installing the second layer, take a transparent sealant and seal the overlapping areas of the outer polycarbonate layer.
On the arches inside the greenhouse, it is necessary to secure the film with wire as shown in the photo. We choose the step by eye. The main thing is that the material fits tightly to the arches. Don't forget about overlap.
Video: Option for insulation with a second layer of film
Nowhere without a vestibule
It is impossible to properly insulate a polycarbonate greenhouse without a vestibule at the entrance. In this place there will be a container for watering, an electrical panel, an automatic watering system and a small table for gardening tools.
We make an opening for the door (frame) from 50mm x 50mm timber and attach it to metal structures. The door is knocked down from the same timber and secured to the frame with hinges. For rigidity, we mount a jumper in the middle of the door.
It wouldn’t hurt to buy and glue rubber seals for the doors.
The vestibule lintel and the door are sheathed with 4mm polycarbonate along the second arch. We fasten it, like the second layer in the greenhouse, with screws.
Using transparent sealant we go through all external joints.
A cheaper insulation option is regular film
Infrared heaters
Insulating and heating a greenhouse are different tasks. If we're done with the first step, then it's time to hang up the heaters. The most modern and economical greenhouse heating is infrared heaters. On a 6-meter structure, we attach three panels in the center. Heater power ranges from 0.5 kW/h to 1 kW/h.
Unpack, install fasteners, select the angle of installation, unscrew the cover bolts, 3 bolts, open the cover, hang up the IR heater, look at the connection diagram, install the thermostat, Result 2
It is better to hang 4 panels of lower power than 3 of 1 kW each.
The principle of operation is very simple. The panel heats not the air, but the soil in the greenhouse. The principle of solar heat. For example, for cucumbers, such heating of a polycarbonate greenhouse, and even a properly insulated one, is simply heaven. Plants grow quickly and produce a full harvest even in winter.
The price of infrared heaters for greenhouses ranges from 1800 rubles. up to 3000 rub.
The Leroy Merlin store sells Ballou panels: - 0.6 kW - 2300 rubles - 1.0 kw - 2500 rubles - 1.5 kw - 3000 rubles.
The thermostat will significantly save money on heating a polycarbonate greenhouse. Price approximately 700 rubles.
Installing a thermostat in a greenhouse
It is difficult to understand the connection diagram of the BALU thermostat the first time. A little later I will definitely post a photo from our greenhouse.
Tip 4. Hang the device 1 meter from the beds in the coolest place, not far from the electrical panel.
Another useful device for saving energy is a timer for turning on and off infrared panels. It is especially useful in the spring, when the natural daytime temperature in the greenhouse is sufficient, and the heating is switched on at night.
If possible, install an electric meter to understand the final cost of the winter harvest.
How much electricity does it take to heat a 20m polycarbonate greenhouse?
Answer: For 4 days of the experiment, when the heater and gun were turned on to maintain the temperature at 17-20 degrees - 700 rubles.
Prices for cucumbers and tomatoes in the winter of 2016 exceeded 250 rubles. Yes, and there would be something to pay for. Artificial, tasteless, plastic vegetables will become a thing of the past if you make a small piece of summer with your own hands.
We hope that insulating a polycarbonate greenhouse will not be difficult and will allow you to grow quality vegetables with your own hands all year round.
Where did we start?
What did you get?
Video: heating a greenhouse with your own hands:
Polycarbonate in winter. Two greenhouses at the back of the house.
School repair
Tagkidacha IR panels heating tomatoes Buildings Do-it-yourself greenhouse Insulation
Active heating
In addition to insulation, which protects the structure from heat loss, in winter it is necessary to use special heating means and methods.
Air heating of a greenhouse
This is especially true if the greenhouse is used year-round or sown seeds of heat-loving plants are left in it for the winter.
Biological heating
This method combines affordable cost with a relatively small amount of time and effort. The main task is to warm the soil and protect it from freezing during temperature fluctuations in winter; for this, environmentally friendly substances are used. The most popular solution is to arrange “warm” beds, which is done as follows:
- Excavation of soil in the area designated for planting, creation of a trench about 80-90 cm deep.
- Creating a drainage layer. It is optimal to use expanded clay: it retains heat well and is safe for plants.
- Laying the organic layer. It can be made from paper, thick branches, stumps; the main task is to form a dense bottom, the rotting of which occurs slowly.
- Laying a layer of leaves, hay, mulch. The thickness should be 18-20 cm.
- Formation of a biofuel layer. It serves as the main heat source; For preparation, a mixture of compost and manure with small sawdust and wood shavings is used. Thickness – 20 cm.
- The top layer is black soil or meadow soil with peat additives. The finished bed should protrude above the soil surface.
- Organic layers decompose when moisture from precipitation or groundwater enters the soil. The process is accompanied by an abundant release of thermal energy, which goes directly to the root system.
Using heating devices
Biological heating, despite many advantages, also has a disadvantage: it is aimed at the soil without affecting the air temperature. The use of heating equipment allows us to solve the problem; For this purpose, devices of different designs and power can be used.
The efficiency of heating largely depends on the area and layout of the building: for example, the corners freeze the most
For this reason, even at the design selection stage, you should pay attention, for example, to round polycarbonate greenhouses: their heating will be most uniform if the device is positioned correctly
Today, active heating can be organized using the following types of equipment:
- Solid fuel stove. It runs on coal, firewood, briquettes, sawdust pellets, warms the atmosphere well, but requires frequent addition of fuel. In addition, the heat distribution may be uneven and the greenhouse will have to be ventilated from time to time.
- Electric heaters. They maintain optimal thermal conditions and can work together with sensors that regulate air temperature. The downside is the high cost of equipment and high energy costs. In addition, installation of such equipment is possible only in dachas with permanent electricity.
- Water heaters. This option is suitable if the greenhouse is located in close proximity to a house or outbuilding that has heating. The batteries are installed inside the structure along a long wall; they provide economical and efficient heating. The downside is the fact that the system takes up a lot of space, which is not suitable for compact greenhouse buildings.
- Infrared equipment. Such panels are economical, compact, provide uniform atmospheric heating, but are more expensive than their analogues. They are usually purchased for industrial greenhouses.
When choosing equipment, you need to pay attention to power, dimensions, method of operation and cost. Its use allows you to create optimal conditions for growing heat-loving plants in the most severe frosts
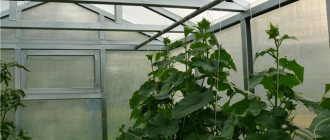
Greenhouse greens: what are the benefits?
Among the main advantages of growing greens indoors:
- Diversity of cultures. In a greenhouse you can grow onions and garlic, dill, parsley, lettuce, cilantro, spinach, and herbs. These crops have similar requirements for agricultural technology and get along well in common beds.
- In a greenhouse it is possible to grow very capricious crops with increased requirements for temperature and humidity levels.
- Heated shelters make it possible to harvest crops all year round, even in winter and autumn, when vitamins are especially needed.
- Indoor soil makes growing safe; greens are rarely affected by insect pests.
- Greens can be grown in shelving, hydroponic or aeroponic ways, saving scarce space and reducing costs.
- It is easy to care for plants in a greenhouse, maintaining normal levels of heat and humidity. Organizing drip irrigation, automatic ventilation and lighting accelerates the growth of greenery and reduces the amount of work required.
Before you think about building a greenhouse for greenery, it is worth considering some disadvantages:
- A properly equipped facility is not cheap.
- In cold climates, maintaining a winter greenhouse will cost a significant amount. It is worth considering the costs of electricity, plumbing, and structural repairs.
- Annual soil replacement is required. With year-round operation, the top layer of soil will have to be replaced every 3-4 months.
- Indoor soil requires an increased amount of fertilizer.
Preliminary information
Requirements for planted crops
- expediency;
- rationality;
- profitability.
So, expediency.
Do you need this or that culture? And where will you put the surplus if it is formed due to incorrectly planned planting volumes? Rationality implies the correct determination of the timing and volume of planting, and the use of optimal agricultural techniques. When choosing a crop, it is necessary to determine in advance how realistic the owner’s capabilities are to create optimal conditions for growing a given sample.
Expediency and rationality are also ensured by the correct choice of the variety of crop being grown. By correctly selecting the design and arrangement of the greenhouse, and rationally planning the change of plants in the greenhouse bed, you can achieve effective year-round operation of this green conveyor.
Recent posts Chainsaw or electric saw - what to choose for the garden? 4 mistakes when growing tomatoes in pots that almost all housewives make Secrets of growing seedlings from the Japanese, who are very sensitive to the soil
There is probably no need to explain what profitability is. This criterion is important for those who decide to make income from the greenhouse. Greens and flowers, in terms of profitability, are almost the same. But greenery is the solution to the problem of winter vitamin deficiency, flowers are bright shades in the autumn and winter landscape, joy and a peaceful atmosphere in the house.
Classification of crops
Crops grown in greenhouses can be divided into types:
- greenery;
- vegetables;
- roots;
- fruits;
- berries;
- medicinal plants;
- flowers and other ornamental plants.
When organizing a rational process, plants planted in greenhouses are classified into the following groups:
- Predecessor crops, which serve as early-ripening cold-resistant vegetables and herbs. Examples: early carrots (early), radishes, spinach, dill.
- Main crops. They can be tomatoes and cucumbers, sweet peppers and eggplants.
- Intermediate crops serve to fill the space not occupied by the main plantings. As it grows and develops, the main culture gradually replaces the intermediate one. This technique ensures rational use of greenhouse space.
- Winter crops. Examples: sorrel, chicory, parsnip.
In addition to plant foods, medicinal and ornamental plants can be grown in a greenhouse. Both for yourself and, especially, for sale. Examples: roses and peonies, dahlias, nasturtiums, asters.
Self-construction
In order for the independent construction of a greenhouse to be successful, you need to think through everything in advance. At the initial stage, it is necessary to make drawings and select a location for the building. On the sketch you need to accurately indicate its parameters, as well as the location where the structure will be located.
When choosing a place to build a greenhouse with your own hands, you should take into account such factors.
- Sunlight. Plants in a greenhouse need the maximum amount of daylight. The most convenient location for this will be the location of the building from west to east.
- Wind protection. When constructing a greenhouse, you can provide protection from strong winds.
- Convenient approach to the building. Sufficient operating space should be prepared to allow access to the greenhouse with carts and buckets.
When starting construction, you should dig a pit - its depth should be at least 2 m. When choosing the size, take into account that the length of the structure can be arbitrary, and the width should not exceed more than 5 meters. If you choose other parameters, for example, build a structure 6 meters deep, then the heating of such a structure will be uneven, which will greatly increase heating costs.
The edges of the pit should be leveled for subsequent pouring of concrete. The frame of the future greenhouse structure is installed on the concrete foundation. When the foundation construction work is completed, they proceed to the construction of the base for the structure, and thermal insulation is fixed on top. A polycarbonate roof is installed on a metal base.
If the greenhouse is installed in the northern regions, then foil is used to insulate it, which is used to cover the walls in several layers. Such insulation is done only in the cold season.
If you make heated floors, you can install heating in the greenhouse. The optimal temperature for plants should be maintained in the greenhouse room from 25 to 35 degrees Celsius, while the humidity in the greenhouse should be taken into account. A prerequisite must be constant ventilation in the room. If all requirements are met, optimal conditions will be created for the operation of the greenhouse all year round.
When installing a roof, polycarbonate is more often used - with a sheet length of 12 meters, a flat surface is created, which eliminates the appearance of joints, as a result of which drafts will not appear in the room. To prevent corrosion, all fastening parts are pre-lubricated.
Profitability
Experts estimate the average profitability of a winter greenhouse at 20%.
When growing flowers and herbs, it reaches 30% and higher, the profitability of vegetable greenhouses is no more than 15%.
Payback periods depend on the size of greenhouses and the level of demand.
To get the maximum benefit from your greenhouse business, you must:
- Choose the right crop to grow. Undemanding greens are suitable for novice farmers; flowers or strawberries are suitable for more experienced farmers. Vegetables should only be grown in regions with a temperate climate and low competition.
- Build a high-quality greenhouse that will not require annual repairs. Structures made from decommissioned double-glazed windows are not suitable for business. Consider the issue of lighting and heating.
- Choose a growing technology. Soil technologies are too expensive, and consumers do not like crops grown hydroponically. A compromise option is hanging growing or shelving technologies. The soil layers are placed in tiers, each equipped with lighting and an irrigation system. Strawberries can be grown in special mats placed in vertical or horizontal plastic sleeves.
- Control the composition of the soil. The greenhouse business requires frequent replacement of the soil; with continuous cultivation and dense planting, it is quickly depleted. It is necessary to apply fertilizer every 2 weeks.
- Use varieties cultivated for growing in greenhouses. They are disease resistant, have a short growing season and excellent yield. It is recommended to focus on the 2-3 most popular varieties, excluding constant experiments with new products.
A greenhouse business can become successful and provide the owner with a constant profit
In order not to be disappointed, it is important to analyze your capabilities long before the start, draw up a detailed business plan and think through the issues of product sales
How to choose the right system
When choosing a floor heating system, you need to take into account not only your financial capabilities, but also the features of the greenhouse. If there is a source of warm water nearby, then the choice of heating method is obvious. Even if there is cold water, heat can be provided by installing an inexpensive coolant.
Types of heated floors
On a note! Also, when choosing a system, it is necessary to take into account the cost of the coolant. The price range of such devices can fluctuate greatly, which will affect the work budget.
When choosing a heating system, consider the cost of the coolant
Interior lighting
In the summer, human intervention in creating decent lighting inside the greenhouse will not be needed, but in the winter season this will become one of the conditions for the establishment of cultivated crops. In this case, you will need to purchase special gas-discharge lamps marked DNAT and DNA3.
The minimum illumination standard itself depends entirely on the number and type of crops grown. In most cases, the calculation is based on the area of the building, where one square meter requires 100 W of electricity.
The lamps will need starting equipment, which can be found in specialized stores or from a photo of a winter greenhouse.
The lamps used tend to get very hot, which forces them to be placed exclusively in lamps with a reflector designed for this purpose.
Options for using insulation for foundations
Using dense material, you can protect the foam if you place a special protective screen of half or a quarter of a brick around the perimeter.
It will reliably protect the insulation from small rodents. Another effective method is foam glass. The material has excellent resistance to moisture and copes well with the function of insulation. Its peculiarity is that it is not at all afraid of rodents, which often become a problem for summer residents and owners of country houses. Experts highlight one drawback - the high cost.
To create more favorable conditions inside the greenhouse, you can attach a block to the south side of the house. Another practical option is to place the greenhouse between stationary, stable walls (provided that the design of the main building allows such placement).
Installation of infrared film
Preparatory work for the construction of heated floors in a greenhouse is the same for all models, and infrared film is no exception.
New nursery idea: warm floor
The sequence of work is as follows:
- You should start by removing the soil - 50 cm. The bottom is covered with sand and compacted.
- Then polyethylene is laid. It is overlapped or connected with tape.
- The insulation is installed; it should not have a reflective surface.
- A heating element is laid, which is pre-cut into strips of the required size. The distance between the strips is 10 cm. The film is fixed on mounting plates or tape.
- The canvases are connected into a single circuit, the device is connected to the thermostat. All couplings are insulated.
- The heating element is covered with polyethylene.
- The film is covered with a layer of wet sand, and a metal mesh is laid on top.
- The removed soil layer is returned to its place, and temperature sensors are installed in its middle.
After this, you should test the warm infrared electric floor in the greenhouse.
Negative factors associated with deepening the structure into the soil
Knowledge is power, this has been known for a long time. And when we are talking about such a responsible enterprise as the construction of a greenhouse, then there is no way to make a mistake in this case.
The very idea of such an “underground” has its advantages, but there are many more disadvantages.
Preparing a pit can be expensive on your wallet; It is extremely important to calculate the correct depth, which should be below freezing of the soil; It is prohibited to install in areas with high groundwater levels, otherwise a drainage system will be required; The construction of the greenhouse will require the use of the highest quality moisture-proof concrete.
Based on all of the above, the cost of a buried greenhouse and the technology for its construction is several times higher than the cost of pleasure.
Selecting a location
A winter greenhouse is built on a site that meets the following requirements:
- illumination There should be no tall trees or buildings providing shade on the south side;
- elevation. A greenhouse built in a lowland is flooded with meltwater in the spring;
- wind protection. In a ventilated area, the cost of heating the greenhouse will be exorbitant;
- close location of a water supply or natural source. A prerequisite, since plants need watering;
- convenient access. Fertilizers and soil have to be brought to the greenhouse (the soil is periodically changed), and the harvest is removed from it.
The last condition: the location is chosen so that the greenhouse can be located in the north-south direction.
Belt type
Arranging a strip foundation will help cope with the problem of harsh climate. This option is used together with insulation. The foundation is placed slightly below the soil freezing index. The simplest method is to add monolithic tapes to the overall structure. It is the optimal choice for small greenhouses.
Expanded polystyrene is often used as foundation insulation. This material has a number of advantages and positive technological qualities. Experts recommend wrapping the material in polyethylene before use. It will provide additional protection from moisture and dampness.
The second option is polystyrene foam. It can be used in combination with the above insulation.
Strong arguments in favor of PENOPLEX®
Do not forget one very, very important point: you will spend this amount on insulating the base only once during the entire life of the greenhouse, since PENOPLEX is a truly durable material. Biostable (unfavorable for the development of dangerous and harmful microorganisms, fungi and mold), chemically and physically neutral. Eco-friendly (its use in greenhouses is safe) - allows you to grow useful and healthy products, creates favorable natural conditions for them.
And the last, but compelling argument in favor of this method of insulating greenhouses. This is not a dacha initiative of local “Kulibins”, but a proven technology that has long been successfully used by the agricultural leaders of the industry.
Insulation using this technology is also used for industrial greenhouse complexes. As a clear example, I will cite the illustrative experience of the Maysky agricultural complex in the Republic of Tatarstan. The productivity of industrial greenhouses with a total area of more than 50 hectares today is more than 15,000 tons of vegetables (cucumbers, tomatoes, peppers, eggplants and others).
How and with what to insulate your greenhouses is up to you. But do not forget that the stingy pays twice: by choosing low-quality materials from an unknown manufacturer, you risk simply throwing money away, leaving greenhouse plants without protection from the cold.