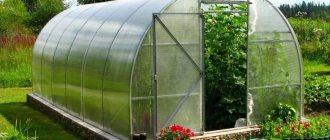
What summer resident does not want to receive abundant harvests of large and high-quality vegetables every season? But to achieve this by growing crops in open ground, you need to put in a lot of effort. In addition, there is always a risk of losing part of the harvest due to sudden frosts, unfavorable weather, pests or diseases. A simple and effective solution to all these problems is a glass greenhouse.
Glass greenhouse
Advantages and disadvantages of glass greenhouses
The use of greenhouses on a personal plot allows you to protect seedlings and crops from frost, provide the most favorable conditions for growth, significantly extend the summer season, increase productivity and provide yourself with a large amount of fresh and high-quality vegetables.
Features of glass greenhouses
Today, despite fierce competition, glass is still widely used as the main material for greenhouse cladding. And the reason for this is not only the conservatism of some summer residents, but also the undeniable advantages of the material.
- High transparency and light transmission indicators - the possibilities of natural lighting are used to the maximum.
- Glass does not lose its transparency over time.
- Chemical inertness - glass is not afraid of contact with pesticides, fertilizers, acids or alkalis.
- Durability - glass does not corrode, does not rot or degrade under sunlight. In fact, the durability of greenhouses with such cladding is limited only by the service life of the frame.
- Easy to maintain - dust and other contaminants are removed from the surface without any problems. Also, you are not limited in your choice of detergents.
- Resistance to abrasive influences can also be considered an advantage.
- Low rates of thermal expansion - the linear dimensions of the glass cladding elements of the greenhouse will not change significantly with increasing or decreasing temperature.
- Possibility to build a greenhouse almost free of charge using old windows or glass doors.
- A damaged element of a glass greenhouse can be easily replaced.
- Compared to other types of cladding, glass is the most attractive in terms of aesthetics. If you want all the buildings on your site to be pleasing to the eye, choose glass greenhouses.
The glass greenhouse looks very attractive
However, a greenhouse with such cladding has a set of disadvantages that should be taken into account.
- The main disadvantage of glass is fragility. Heavy hail or a thrown ball can cause serious damage to the skin of the greenhouse, and it is very easy to cut yourself on the resulting fragments. This problem can be solved by using tempered glass or triplexes, but the cost of the greenhouse will increase significantly.
- High thermal conductivity - compared to polycarbonate greenhouses, glass heats up and cools down faster. In extreme heat or very cold weather, this can have a negative impact on the condition of seedlings and crops.
- Glass is a heavy material. Therefore, a greenhouse with such cladding requires a powerful foundation and a very strong frame. In addition, the heaviness of glass makes working with it much more difficult.
Breaking loads on glass
Design
Creating a glass greenhouse begins with choosing its design. There are several options that vary in complexity and have certain features.
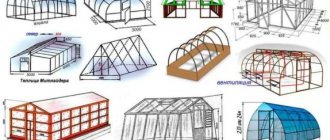
Table. Main types of glass greenhouses.
| Greenhouse type | Peculiarities |
| With a gable roof | Classic option. The complexity of construction is average. The slope of the gable roof ensures efficient snow removal. |
| With a pitched roof | A simpler option that requires less material and work. Often used as an extension to a residential building or fence. It should be located on the south side so that the plants in such a greenhouse receive enough sunlight. |
| Mitlider's greenhouse | An improved version of the standard glass greenhouse. One of the slopes is raised above the other, and a continuous row of transoms is mounted into the vertical wall between them, which makes the ventilation system more efficient. |
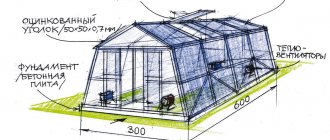
| Greenhouse thermos | Most of the building is located below ground level and consists of a solid brick or concrete wall. High thermal insulation rates, the best option for a winter greenhouse. High cost, requires a lot of materials and labor for construction. |
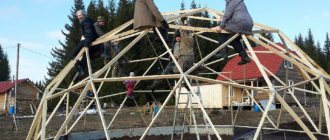
| Dome greenhouse | An ideal greenhouse in terms of distribution of natural light over the area. High resistance to wind from any direction. The complexity of the construction is extremely high; it requires the creation of a complex frame and glazing elements of non-standard shape. |
| Pyramid greenhouse | In a greenhouse of this design, the most optimal temperature regime is created for plants. More complex in design than a standard greenhouse with a gable roof, but simpler than a domed greenhouse. |
When it comes to metal, there are several different options.
- A greenhouse with a frame made of metal corners welded to each other . If you have even basic welding skills, then making such a building will not be difficult. The glass is fixed to the frame using clamps.
- Metallic profile . When constructing the frame, grooves are created into which the glass is then inserted and secured with sealant and rubber seals.
- Galvanized profiled pipe - frame elements can be connected to each other by welding or using self-tapping screws and bolts. Glazing occurs using glue or using an aluminum clamping profile.
Frame made of galvanized profiled pipes
Note! When preparing to install a glass greenhouse with a metal frame, you should pay special attention to the issue of corrosion protection. Otherwise, the profile or corners exposed to moisture and air will begin to collapse over time.
There is an option to build a glass greenhouse on your own site for almost free. To do this, it is necessary to use old wooden window frames, which remain in large quantities after the installation of plastic windows in houses. It should be understood that the appearance of such a greenhouse will leave much to be desired.
The next question that needs to be resolved is what type of glass will be used to build the greenhouse. The simplest and most inexpensive option is ordinary window glass 4 mm thick, fixed to the frame using glazing beads, clamps or a clamping profile. A greenhouse with such a covering is only suitable for seasonal use - warming it up in late autumn or winter is very difficult and expensive.
Standard glass 4 mm thick
If you want to get high levels of thermal insulation in your greenhouse, then use single-chamber and double-glazed windows as the cladding material. The cost, complexity and weight of the structure will, of course, increase, but at the same time you get the opportunity to delight yourself with fresh vegetables all year round.
Single-chamber and double-chamber double-glazed windows in section
Now, having chosen the shape, frame and type of glazing, you need to choose a place for the future greenhouse. The construction site should be assessed according to the following criteria.
- Illumination - the place under the glass greenhouse should be evenly illuminated and not have serious shading from trees or buildings. The best solution would be to orient the building so that its long wall faces south.
- Landscape – a greenhouse requires a relatively large flat area.
- Situation with winds - it is undesirable for a glass greenhouse to be located in a place blown by strong winds. Try not to build a building behind the passage between two closely located houses - in this place the effect of a “wind tunnel” will be created, and constant drafts will not have the best effect on the condition of the plants.
- Distance from water pipes and electrical networks - the closer they are to the greenhouse, the lower the subsequent costs will be for connecting automatic watering, lighting and heating in the greenhouse.
The last (but not least) stage of planning a glass greenhouse is drawing up a drawing. In the simplest version, it is enough to use only a ruler, pencils, an eraser and paper (preferably graph paper or squared paper). You can also create a 3D model of the future greenhouse - this will allow you not only to clarify some of the features of the building, but also to imagine what it will look like in life.
If you are new to this business and have not made 3D models before, then pay attention to Google SketchUp - it is a simple and intuitive program that will not require you to spend long hours of work to master.
One example of work done using Google SketchUp
To better understand the process of drawing up a drawing, we provide step-by-step instructions.
Step 1. Determine the size of the glass you will purchase for your greenhouse. As an example, we will choose a sheet of 1600x2200 mm.
Step 2. Select the type of foundation for the greenhouse. The option with a height at ground level is suitable for buildings used only seasonally. To grow crops in cold weather, you will need a foundation with a base height of 20 to 90 cm. In this case it will be 40 cm.
Example of a greenhouse with a high plinth
Step 3. Select frame material and dimensions. As an example, let's take a wooden beam with a section of 100x100 mm and a strapping board of 25x150 mm.
Beam 100x100 mm
Step 4. Calculate the dimensions of the glazing element. The width, equal to the distance between the vertical posts, should be no more than 1 m. Height - the distance from the base to the top trim. Considering the dimensions of standard glass, assume a width of 1 m and a height of 1.6 m.
Step 5: Calculate the height. It consists of a base, lower frame, glazing element, top frame and roof. Without taking into account the latter, the total figure will be: 40 cm + 15 cm + 160 cm + 5 cm = 220 cm height. For a roof, this indicator depends on the width of the greenhouse and the angle of the slope.
Scheme for calculating the height of the greenhouse
Step 6. In a similar way, calculate the length of the greenhouse, which is the sum of the lengths of each individual rack and glazing element. For example, in a greenhouse with four “windows” the calculation is as follows: 20 cm of outer posts + 400 cm of glass + 30 cm of intermediate posts, for a total of 4.5 m.
Scheme for calculating the length of the greenhouse
Step 7. Calculate the width of the structure. On average, it is 3-3.5 m and consists of the lengths of the outer posts, glass, doors and intermediate posts.
Scheme for calculating the width of the greenhouse
Step 8. Transfer all calculations to the drawing, check the dimensions.
Outline sketch of a greenhouse
Diagram of the end frame of a glass greenhouse
An example of a drawing of a gable thermos greenhouse
Step 9. Mark on the drawing the locations for the transom windows.
Step 10. Based on the dimensions, calculate the required number of glass, timber and other materials.
Note! The minimum permissible slope angle is 15°. The more snow you get in your area, the more slope you need.
Prices for double glazed windows
double glazing
Calculation of the quantity of materials
As an example, a calculation will be performed for a structure 3.8 m long, 2.9 m wide and 2.2 m high.
First of all, the required amount of glass will be calculated. Standard sheet dimensions are 2200x1600 mm. Base area 1000–1200 mm. The area of the side of the greenhouse is calculated as follows: 3.8 x 2.2 = 8.36 m2.
Next you need to calculate the area of the end part: 2.9 x 2.2 = 6.38 m2. We sum up the side parts and multiply by 2: (8.36 + 6.38) x 2 = 29.48 m2. In this way we obtained the surface area of the walls.
We determine the surface area of the base: 1 x 3.8 x 2 + 1 x 2.9 x 2 = 13.4 m2.
We subtract the resulting value from the surface area of the walls: 29.48 - 13.4 = 16.08 m2.
Next, determine the approximate roof area and add 10% to cover errors: ((3.8 x 2.9 x 0.269) + 3.8 x 2.9) x 1.1) = 15.4 m2.
Accordingly, you will need approximately 31.5 m2 of glass. We determine the area of one sheet: 2.2 x 1.6 = 3.52 m2.
The number of sheets is determined as follows: 31.5 / 3.52 = 8.95. Accordingly, you will need approximately 9 sheets of glass.
Next, you need to calculate the amount of timber. An example of the calculation is shown in the diagram:
An example of calculating a greenhouse frame made of timber
Based on this, you can determine the number of parts for a greenhouse of certain sizes. For a structure measuring 6x3 m you will need:
- timber 250x100 mm - 18 m;
- timber 100x100 mm - 18 m;
- slats 100x60 mm - 60 m;
- edged board 100x30 – 20 m;
- 50x50 – 2 m;
- board s20 – 4 m.
To carry out construction work, you will need to prepare the following elements:
- screws and bolts;
- nails;
- bars or metal corners;
- leg-split;
- roulette;
- pegs;
- twine;
- building level;
- silicone based sealant;
- sand;
- cement;
- welding machine;
- electric drill;
- glass;
- Bulgarian;
- antiseptic agents for wood processing;
- waterproofing material.
It is important to prepare tools and materials in advance so as not to be distracted while working.
Creating a foundation
For a glass greenhouse, given its heavy cladding and frame, a monolithic strip foundation made of concrete with a brick base will be required. The arrangement can be divided into sequential stages.
Step 1. Clear the construction site, remove all vegetation, debris and stones from it.
Step 2. Mark the foundation using pegs driven into the ground and a rope stretched between them.
Step 3. Dig a trench 25 cm wide and 30 cm deep.
Trench for the foundation
Step 4. Level the walls of the trench and compact its bottom.
Step 5: Fill the trench with sand, gravel, or a mixture of both. The thickness of this layer is 10 cm.
Step 6. Build the formwork using boards and pegs. Its height is from the current bottom of the trench and up to 1-5 cm above the ground level. The thickness of the boards used should be no more than 25 mm, so that the end result is a concrete strip with a section of 20 by 20 cm.
Construction of formwork
Step 7: Prepare the concrete. Choose the brand of cement, as well as its proportions with crushed stone, sand and water, based on your own considerations. Use a large container or rent a concrete mixer for mixing.
Step 8. Fill the formwork halfway with concrete mixture.
Formwork is poured with concrete
Step 9. Lay the reinforcement bars on the concrete. For greater strength of the strip foundation, you can twist a complex three-dimensional structure from wire.
Laying reinforcement
Laying reinforcement at corners
Step 10. Pour the concrete mixture to the edge of the formwork. Control the horizontal position using a level and stretched ropes.
Second pouring of concrete mixture
Next, all that remains is to cover the formwork and concrete with polyethylene and add water there for 5-7 days so that the concrete does not crack due to the difference in humidity of the inner/outer layer. After this, the foundation must dry, strengthen and settle for another 3 weeks. After this period, remove the polyethylene and formwork. The next stage is the arrangement of the basement.
Prices for fittings
fittings
Arrangement of the basement
Step 1. Prepare the required number of bricks. Lay them “dry” on the foundation to estimate the layout of the plinth.
Step 2. Prepare the solution.
Step 3: Start styling. Build the base using the “half brick” method. Control the position of the bricks using a level and tensioned threads.
Laying the plinth
Using a building level
Work on laying the plinth continues
Brick laying options
Bricklaying
Step 4. After installation, remove excess mortar so that it does not spoil the appearance of the base.
Removing excess solution
Step 5. Insert anchor bolts from above into the joints or into the holes drilled in the brick. In the future, the latter will be used to fasten the glass greenhouse frame. In this case, choose places for the bolts a little to the left or to the right of the location of the vertical post. The interval is from 1 m, but not less than 2 anchor bolts on each side of the greenhouse.
Location of anchor bolts
Step 6. Place a waterproofing layer of roofing felt or similar material on top of the brick.
As a material for the plinth, in addition to brick, you can use foam concrete blocks or their analogues.
Brick prices
brick
Greenhouse design features
Unlike film- or polycarbonate-clad structures, which can be single-story, arched, or even polygonal, glass greenhouses are typically constructed as a gable or simple house-like frame . Other architectural forms here either require enormous costs or are completely unworkable.
Due to the high weight and increased fragility of the coating, these structures require the construction of a capital base and a reliable frame. The basis for such structures is a block or monolithic tape. A wooden beam or high-strength steel is most often used to make the frame.
On average, the height of erected buildings varies between 1.8−2 meters (with a height of long side walls of 1.5−1.8 meters). The optimal size of the area is from 2x4 to 3x6 meters.
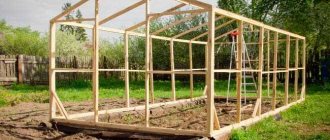
Glass greenhouse with wooden frame - step-by-step instructions
Divide the process of constructing a glass greenhouse into the following stages:
- construction of the lower trim;
- installation of vertical racks;
- construction of the upper trim;
- roof arrangement;
- glazing.
Each stage, in turn, is divided into separate steps, performed sequentially one after the other. So, let's start with the construction of the lower trim.
Construction of the lower trim
Step 1. Measure and cut a beam with a section of 100x100 mm. There should be four segments - two along the length of the greenhouse, two along its width.
Step 2. Treat the timber with an antiseptic.
Treatment of timber with antiseptic
Step 3. Cut the ends of the beams for a half-timber joint as shown in the image below.
Cutouts on the bars
Step 4: Mark the holes for the anchor bolts and dowels and then drill them.
Drilling holes for anchor bolts
Step 5. Lay the beam on the foundation according to the markings and fasteners, check the correctness of the diagonals. It is recommended to first lay a waterproofing material - for example, roofing felt, as shown in the diagram below.
Step 6. Secure the entire beam to the brick plinth using anchor bolts. To prevent them from interfering with the glazing of the greenhouse in the future, drill niches for the heads of the anchor bolts in the bottom trim. An alternative method is to lay a ripple board on top, as in the image below, and secure it with screws.
How to attach timber to a plinth
One of the options for creating a seat on the base for fastening the frame
Installation of vertical racks
Now install the uprights. They will require timber with a cross section of 50x50 or 100x100 mm. For greenhouses with polyethylene or polycarbonate cladding, the vertical posts are fastened using corners, but in our case this is not suitable - they will interfere with further glazing of the frame.
Step 1. Cut the beams according to the number and height of the posts.
Step 2. Select a beam for the first corner post and drill a hole for the dowel in its lower part. Drill holes in the harness in the same way.
Step 3. Insert the dowel into the bottom trim and insert it to the required depth. By doing this, you not only connect the rack and the base of the frame, but also fasten the beam of the lower frame to each other in the corners.
Vertical stand mounting diagram
Step 4. Place the vertical post on the dowel and check if the fixation is secure.
Step 5. To maintain verticality, nail down temporary slopes.
The stand is fixed with temporary bevels
Step 6: Repeat steps 2-5 for the remaining corner posts.
Step 7. Install intermediate vertical posts. To do this, you can also use dowels or insert them into the cut of the lower trim and attach them to screws. An alternative method is to secure it with metal plates, as shown in the image below.
Installation of intermediate vertical posts
Prices for anchor bolts
anchor bolts
Construction of the upper trim
The arrangement of the upper frame trim is similar to what you have already done for the lower one, but there are no problems with anchor bolts. However, here you will have to work at height, so the presence of a stepladder and assistants is mandatory.
The top frame is also often called a Mauerlat, since it is not only an element of the greenhouse wall, but also a kind of support for the rafters.
Step 1. Measure and cut timber for the top trim along all sides of the greenhouse.
Step 2. Make cuts in the material for a half-wood connection.
Top trim diagram
Step 3. Install the timber on the vertical posts, align them with each other.
Step 4. Secure the top trim to one of the corner posts using self-tapping screws or dowels.
Step 5. Repeat operation 4 with the diagonally opposite corner, and then with all the remaining ones.
Step 6. Secure the top trim with the vertical posts using self-tapping screws. Instead of a “plane-end” connection, it is permissible to use a connection with metal fastening plates.
Roof arrangement
The last stage of creating a frame for a glass greenhouse made of wooden beams is arranging the roof. Here it is very important to monitor how strong and reliable all the connections are - this structural element will hold not only heavy glass, but also a considerable amount of snow.
Step 1. Attach a vertical post, also called a headstock, to the top frame beam in the gable of the greenhouse. Use either a flat-to-end connection or metal mounting plates. Repeat this step with the opposite gable.
Headstock mounting diagram
Step 2. Install and secure the ridge beam on the posts.
Step 3: Prepare the rafters. If necessary, make cuts from the ridge and cornice sides.
Step 4. Secure the rafters to the gables using angles or nails.
Installing a roof truss on the frame of a homemade greenhouse
Options for attaching rafter legs
Step 5. Repeat step 4 with the remaining rafters. They should be located on the same line as the vertical wall studs.
Ready frame
Note! An alternative way of arranging a roof is to assemble trusses on the ground, install ready-made structures on the top frame and lay the ridge beam.
Glazing
Now proceed to the last, but at the same time the most important stage - glazing the greenhouse. You should start with the walls.
Step 1. Mount wooden glazing beads or slats with a cross-section of 20x20 or 40x20 mm in the opening on the inside of the greenhouse. Fasten with small nails.
Step 2. Cut out the glass using a special tool. The width and height should be 2-3 mm less than the dimensions of the opening between the posts. If this is not done, the wood, which swells when wet, will compress the glass.
Glass cutting
Step 3: Apply putty or silicone sealant to the area where the glass will be installed.
Step 4: Use the suction cups to hold the glass and place it on the putty. To create a gap at the bottom, place matches if necessary.
Suction cup holder for glass
Greenhouse elements for glass installation
Schematic glass fastening
Step 5: Install the glass on a waterproof seal, such as isobutyl or polybutadiene rubber. After applying the sealant, lay each glass panel in place and secure on all sides with rigid rubber blocks.
Step 6. Immediately after installing the panel in place, secure it with a semicircular strip or overlay (bead).
Glass seals
Step 7. Repeat steps 1-6 with the remaining openings.
The roof glazing is carried out in a similar way. The operation is carried out from the bottom up - from the eaves to the ridge. The beads on the inside must be reinforced, as they carry an increased load. A reasonable solution would be to replace them with small-section timber or boards with appropriate fasteners. Install a wooden plank or board on the eaves side to prevent the glass from sliding down under snow load.
If two or more elements are used in one opening when glazing a roof, install them with an overlap of 5 mm relative to each other or carefully seal the connection with a sealant.
After completing work on the walls and roof of the greenhouse, windows and doors are knocked down from medium-section timber (up to 100x100 mm), glazed and installed on hinges. Additionally, you can equip the transom doors with thermal cylinders to provide the greenhouse with an automatic ventilation system.
Transom opening diagram
Video - Example of building a glass greenhouse with a profile frame
Self-installation steps
The installation of a greenhouse structure is carried out in stages, and all actions must be carried out in strict accordance with the construction technology and drawings of such structures.
Arrangement of the base of the structure:
- assembly of a frame from boards treated with special means in accordance with the dimensions of the future greenhouse structure;
- installation of a wooden frame on a flat piece of land;
- checking the diagonality of the installed wooden frame and installing pieces of reinforcement at the internal corners.
Installation of fastenings for frame PVC arches:
- cut fourteen reinforcing sections with a length of seventy centimeters;
- marking the frame along the long sides at intervals of ninety centimeters;
- deepening the reinforcement sections from the outside of the frame in accordance with the markings made;
- marking the frame along the width with the mark of the area for the doorway, followed by a deepening along the completed mark of the reinforcement.
Manufacturing of PVC arcs for greenhouse construction:
- welding two three-meter pipes with the installation of a cross, which makes it possible to obtain internal frame arches;
- production of external elements of arcs using welding and straight tees;
- finished arch structures must be placed on reinforcement fixed in the ground.
Installation of stiffeners:
- cutting sections of PVC pipes with a size of 8.5 centimeters;
- welding of cut sections between the cross and the central tee, which can significantly strengthen the structure frame;
- fastening on a wooden frame and making horseshoe-shaped clamps from a strip of metal.
- fastening the PVC frame using self-tapping screws to the base of the boards.
Construction of door and window openings:
- draw a straight line from the reinforcement, buried along the width of the wooden frame, to the outermost PVC arc;
- inset at the level of these marks of oblique tees.
If you plan to use a material such as polyethylene film as a covering, then you should fasten the tensioned covering to a wooden frame using a regular wooden lath and nails. Greenhouse doors and vents can also be made from PVC profiles and tees. They need to be covered with film and installed in the openings.
When arranging a greenhouse frame with a coating based on polycarbonate sheets, you should perform the following steps:
- place wooden blocks on a wooden frame base between the stiffening ribs;
- fastening polycarbonate sheets using self-tapping screws with thermal washers.
You may also be interested in an article about building a year-round greenhouse.
Glass greenhouse made of metal corners
If you don’t want to bother with wood, but at the same time know how to handle metal and a welding machine, then a glass greenhouse made from corners is your choice. In terms of the general design, it does not differ from a building made of timber, the only difference is that steel corners with a section of 25x25, 50x50 and 100x100 mm are used as the material for the lower and upper frames, vertical posts and roof.
Steel corners
Step 1. Lay the corner 100x100 or 50x50 mm on the plinth or foundation and secure with anchor bolts. In this case, the vertical part of the corner should be located on the inside of the greenhouse.
Step 2. Make support posts from 25x25 or 50x50 mm angles welded into a T-shaped profile, also called a T-profile.
Connecting two corners into a tee
Step 3. Construct the corner vertical posts as follows: weld the third corner to the brand of two corners on one side.
Construction of a corner vertical post
Step 4. Weld the vertical posts to the bottom trim.
Step 5. Mount the top trim using the same principle as the bottom.
Step 6: Connect the rafters and roof ridge to the ground as shown in the image below.
Connection of rafters and roof ridge
Step 7. Weld the rafters with the ridge onto the top frame.
Step 8. Perform glazing as follows: apply silicone sealant to the edge of the glass and install it in the internal frame formed by the corner profile. To fix it from the outside, use either clamps or small corners that are welded (or bolted) and press the glass.
Greenhouse glazing scheme
Video - DIY glass and metal greenhouse
Types of structures with characteristics
The use of glass cladding requires the creation of greenhouses with even planes. However, even the lack of flexibility did not prevent us from coming up with a wide variety of greenhouses.
The classic option is a gable structure in the shape of a house. With the correct calculation of the slope, snow accumulations do not linger on the slopes.
The lean-to option is an extension to the house. The greenhouse resembles half of a gable structure.
Important! Lean-to greenhouses are always attached to the wall of a building on the south side.
A dome-shaped greenhouse has increased strength. Inside, optimal natural lighting is provided due to the refraction of light streams. The downside is the complexity of the design.
Externally, Mitlider's greenhouse resembles a gable structure. However, the roof of a glass greenhouse has a special structure. One slope is made higher than the opposite one by about 40 cm. This design ensures better ventilation.
Thermos greenhouses can be recessed or partially recessed. The side walls are made of brick or concrete and are mostly located in the ground. Only the glass roof protrudes from the surface.
The pyramid, similar to a domed greenhouse, perfectly diffuses daylight. The design is more complex than the gable version, but simpler than a domed greenhouse.
Another difference is the frame of the greenhouse under glass, where the material is metal or wood. In the first case, the differences can be similarly distinguished. Metal frames are made from a profile pipe or corner. It is not advisable to use a round pipe due to the difficulty of attaching the glass casing.
Greenhouse made from old window frames
The main and probably the only advantage of such a greenhouse is minimal costs. The design of the building is similar to a greenhouse made of wooden beams - there is a foundation, lower and upper frames, racks, between which old window frames with glass are installed. It is worth saying that in most cases wooden windows are not used for roof cladding - they are too heavy.
DIY greenhouse from old windows
Step 1. Build the lower and upper trims and vertical posts. You can read more about this in the section on building a glass greenhouse with a wooden frame.
Step 2. Prepare the frames - remove handles and other unnecessary elements from them. Clean the glass from dust and dirt. Securely secure the window sashes and those vents that will not be used for their intended purpose with glue or nails.
Step 3. Secure the frames to the frame using fastening metal plates and angles.
Greenhouse frame
Step 4. Cover the roof with cellular polycarbonate or polyethylene film.
DIY window frame greenhouse
Using wooden frames will create a durable frame that will support the structure for many years. You can find out more details by reading this article.
With the proper approach to the matter and following the instructions, a glass greenhouse built with your own hands will become not only a place for growing a good crop, but also a real decoration for your personal plot.
Recommendations for choosing glass
To cover the greenhouse, you can use various types of glass, the dimensions of which must correspond to the dimensions of the frame:
- single (2.5 mm thick). The material is quite fragile. It can be used for the side walls of greenhouses in wooden frames, the largest size of which does not exceed 50–60 cm;
- double (3–3.5 mm thick). The insufficient strength of glass does not allow it to be used for upper windows;
- showcase, having a thickness of more than 6 mm. The material is highly durable and requires reliable fastening and strong supports;
- multilayer. It consists of outer layers of glass and an intermediate layer of plastic. The material has a high price, is resistant to impact, and is safe, since the fragments are held in place by a plastic gasket;
- hardened. Its strength is 4 times higher than that of ordinary glass. However, upon impact, it shatters into tiny fragments that cannot cause injury. Collecting such small glass fragments from the garden is problematic.
The thickness of the glass, depending on the distance between the supports and the brand, can be 2–6 or more millimeters.
As the thickness increases, the strength of the glass increases.
Multilayer triplex can be used for the top panels and walls of the greenhouse. This, naturally, will affect the cost of glazing, but will avoid problems with carelessly broken glass and the collection of small fragments. The wide range offered by manufacturers allows the use of glass with heat-reflecting or heat-absorbing properties. These glasses are coated with a special thin coating that reduces heat loss and enhances glazing.
The choice of glass for a greenhouse must be made taking into account its purpose. For example, for a room with tropical plants, multilayer glazing is suitable to reduce heating costs. For growing herbs and vegetables, ordinary glass or old glazed window frames are suitable.
The use of double-glazed windows will entail additional costs, but will create more favorable conditions for the growth and development of plants. The following types of glass bags are used for glazing greenhouses:
- single-chamber. They have an air gap between two glass sheets, which provides sound insulation and thermal protection. Low weight and reasonable price allow the use of single-chamber bags for glass roofs and walls of small greenhouses;
- two-chamber. They differ from single-chamber ones in the increased number of glass sheets and layers and significantly reduce heat loss. However, they are heavy. They can be used to insulate the wall of a greenhouse on the north side;
- heat-saving. The space between the sheets of glass is filled with an inert gas, which reduces the thermal conductivity of the structure;
- energy saving. A thin coating is applied to the glass surface of the bag, which transmits solar heat and light rays on one side.
Depending on the financial capabilities of the owner of a summer cottage or a country cottage, it is possible to equip a glass greenhouse with both inexpensive and used materials and modern glass packages. This determines what conditions will be created for plant growth inside the structure.
