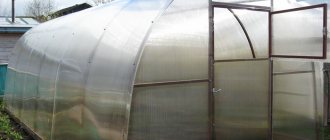
At the moment, polycarbonate is one of the main materials used in the construction and arrangement of private households, garden plots and greenhouses. Working with it begins with cutting, and not only the appearance, but also the strength of the polycarbonate structure depends on how correctly it is done. Therefore, it is extremely important for every summer resident or owner of a private house to know how and with what tools to cut this material.
Cutting polycarbonate
Polycarbonate - what it is like
Polycarbonate is a hard, transparent or translucent plastic that is highly durable and, compared to glass, lighter in weight.
There are two main types of this material.
- Monolithic - is a solid sheet of polycarbonate.
Monolithic polycarbonate
Prices for monolithic polycarbonate
monolithic polycarbonate
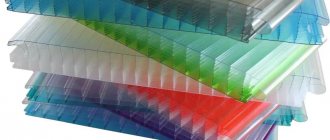
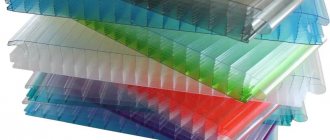
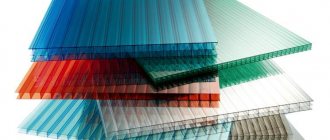
- Cellular (cellular) polycarbonate - in it, between the solid upper and lower layers of the material there are hollow cells with partitions. A sheet can have one, two, three rows of cells, sometimes even more. The cell walls also play the role of stiffeners.
Cellular polycarbonate
Types of cellular polycarbonate
Prices for cellular polycarbonate
cellular polycarbonate
Table. Main dimensions of polycarbonate sheets.
| Length and width, m | Sheet type | Standard thicknesses, mm |
| 6.05x2.05 | Monolithic | 2, 3, 4, 5, 6, 8, 10, 12 |
| 6x2.1 | Cellular | 4, 6, 8, 10, 14, 16, 25 |
| 12x2.1 | Cellular | 4, 6, 8, 10, 14, 16, 25 |
Density of polycarbonate
In this article you will find everything you need to know about the density and other characteristics of polycarbonate! In addition, we recommend reading the article about what thickness of polycarbonate is best to use for a greenhouse.
Cellular
Application depends not only on what thickness of polycarbonate is best used for the greenhouse, but also on the internal structure
A wide range allows the sheets to be used for different jobs. What thickness of polycarbonate is better for a greenhouse, and for what structures? According to the internal structure of the material, the following uses are practiced:
- 4 mm (2R) – temporary greenhouses and small canopies that are not subject to significant impact loads, pressure and bending;
- 6 mm (3R, 3RХ) – used as walls and roofing in small greenhouses. Requires additional load-bearing rafters and narrower window frames.
- 8 mm - has a more durable sheet and can be used in the construction of medium-sized greenhouses and greenhouses;
- 10 mm (5R) – used for cladding vertical surfaces of large areas;
- 12 mm (6RS) - can be used as a roofing covering in greenhouses with significant spans. Thanks to its complex structure, it can better withstand significant loads.
Please note: Polycarbonate for a winter greenhouse must be thick and have a multi-chamber internal structure. This will provide additional thermal insulation for the structure.
It is recommended to use sheets with a thickness of at least 10 mm for walls, and 12-16 mm for roofs. This thickness is due to the need for protection from snow loads.
The characteristics table will allow you to choose the type of cellular polycarbonate for the greenhouse, which is best suited for the walls and roof
Polycarbonate cutting tools
One of the advantages of this material is that tools for working with it can be found in almost every home.
The following tools are successfully used for marking and cutting polycarbonate:
Among industrial equipment, milling machines with numerical control and special types of lasers are suitable for these purposes.
Tools for cutting polycarbonate: hacksaw, circular saw, band saw
At the same time, there are tools that cannot be used to work with polycarbonate under any circumstances, otherwise there will be a risk of damaging the sheet and obtaining extremely unsatisfactory results.
- A hacksaw for wood – its teeth are too large; they do not so much cut polycarbonate as tear them. You will end up with a lot of nicks, burrs and cracks on the edges.
- Construction scissors or plastic scissors - they are suitable exclusively for thin monolithic sheets of material. Otherwise, when polycarbonate (especially cellular) is compressed from both sides, the sheet is deformed near the cut.
Wood saw cannot be used
Now let's take a closer look at the preparation and cutting process itself using the most popular tools.
How to treat timber under a greenhouse against fungus
Processing timber for a greenhouse is a fairly important point, thanks to which it is possible not only to prevent the process of rotting, the appearance of fungus and mold, but also to significantly increase the service life of the building material used in the work. In order to impregnate timber under a greenhouse, there are a large number of special protective agents that can be easily found for sale on the market of goods and services. In specialized construction stores you can find impregnations for any type of building material. It is worth understanding that for greater reliability, it is best to apply several layers of the composition to the timber.
Preparation and marking
This step-by-step instructions for preparing the workplace are common for all types of tools used, except for the industrial laser and milling machine.
Step 1. Clear the work area of debris and unnecessary objects. This is necessary not just for reasons of cleanliness, but so that they do not interfere with the process and do not leave dents, scratches or other marks on the back of the sheet.
Preparation of the workplace
Step 2. Lay a sheet of plywood, chipboard or fiberboard on the site. Now the cutting area is as level as possible.
Step 3. Transfer and place the polycarbonate sheet on the work area. If it has a laminated, mirror or UV coating, then it should “look” up. Do not remove the protective film from the sheet until you have finished cutting the material.
Step 4. Make preliminary markings in the form of a diagram on paper, observing the scale.
Cutting drawing for polycarbonate sheet
Step 5. Transfer the markings from paper to polycarbonate. For measurements, use a tape measure, a metal ruler, and a rule; to draw cutting lines, use a black marker.
Marking a polycarbonate sheet
When working with large-area sheets, place a board on top (at least 100 mm wide) and walk only on it so as not to damage the surface of the polycarbonate. Examples of cutting material for the gable of greenhouses are shown in the image below.
Cutting a polycarbonate sheet for the greenhouse gable
Step 6. Not far from the cutting line, on the left and right, place boards at least 4 cm high and at least 10-15 wide under the polycarbonate. Their ends should “peek out” from under the sheet on both sides. The boards act as supports, necessary to ensure that the tool does not cut directly into the substrate material.
Step 7. As when applying markings, when cutting polycarbonate, do not move along the surface of the sheet itself, but along a wide board lying on it. Working as a kind of “ski,” it reduces the risk of damage and deformation of the material under the weight of the cutter.
An example of using a board base
When working with pieces of polycarbonate or sheets of small sizes, a workbench or a fairly large table is used instead of a working platform.
General recommendations
When choosing how to cut monolithic polycarbonate or its hollow analogue, you need to pay attention to the thickness of the material and the shape of the cutting lines. It is most convenient to divide thin sheets with a knife; straight cuts are made with a grinder or circular saw, and rounded ones are made with an electric jigsaw.
If the polycarbonate has a mirror or laminated coating, it must be turned with the decorative side up when marking and cutting. The protective film is not removed until the work is completed in any case.
Monolithic mirror polycarbonate Source metalmontazh26.rf
If you need to make a round or shaped hole in a sheet, it is first drilled through with a metal drill. The drill should enter the material next to the marking line inside the cut shape and pass between the internal partitions. Then a jigsaw file or a thin sharp knife is inserted into the resulting hole, with which the entire figure is cut out.
The elements of the cellular coating are fastened to the frame with self-tapping screws with special thermal washers made of polycarbonate or silicone with a foam rubber gasket and a cap for the fastener head. They hermetically seal the mounting holes, preventing moisture and dust from entering them. To avoid the appearance of cracks, holes for self-tapping screws are pre-drilled, retreating from the edge by 3-4 cm.
Cutting polycarbonate with a knife
A knife is the most affordable of the tools suitable for cutting monolithic or cellular polycarbonate. For such work, stationery or construction knives with retractable and replaceable blades are used. It is better to take a construction one, as it has a comfortable handle and a more reliable blade locking mechanism. It’s also a good idea to cut polycarbonate using a shoemaker’s knife.
Shoe knife
Regardless of the type of tool, it must be well sharpened - a dull knife will not only significantly slow down the process, but will also leave a lot of burrs on the material. A construction knife is best suited for working with small sheets, cutting them and adjusting them to size.
Construction knife with replaceable blade
But, compared to an electric jigsaw or grinder, cutting polycarbonate with a knife with a retractable blade will require more time. It is not very convenient for them to work with sheets of large area. It is also worth considering that stationery and construction knives are suitable for cutting polycarbonate with a thickness of up to 6-8 millimeters, but no more.
It is advisable to use a stationery, construction or shoe knife exclusively for cellular polycarbonate. Monolithic sheets of similar thickness are too hard to cut with such a tool.
Step 1. Prepare the work area. Detailed instructions on how to do this are outlined in the section above. Mark the polycarbonate with a black marker.
First you need to prepare everything
Step 2. Test the knife on scraps of material or that part of the polycarbonate that will not be used - you need to check the sharpness of the tool. If it is insufficient, replace the blade (for stationery and construction knives) or sharpen it (for a shoe knife).
Polycarbonate can be fixed with electrical tape
Step 3. Apply a rule or thick metal ruler to the cut line. If they are not available, use a flat board or building level. When working with large-area sheets, your assistants should follow the rule and the sheet itself - this will increase the accuracy and quality of cutting.
Alternatively, you can mark the cut lines with the same electrical tape
Step 4. Place the knife blade near the end of the cut line. When working with thick polycarbonate, hold the tool perpendicular (or almost perpendicular) to the plane of the sheet. If the polycarbonate is thin, then it is permissible to hold the knife at an angle of 30-45°. Slowly insert the knife into the end of the sheet to leave an initial notch there.
Cut with a knife
Step 5. Guide the knife from the notch along the cut line. A rule or ruler will help you follow the cutting pattern.
When cutting with a knife, it is convenient to use a long ruler or rule
The cutting speed should be low; accuracy is more important here. When working with rounded elements, be careful not to allow burrs or cut-ins beyond the line drawn with a marker. Don’t be afraid to leave excess – you can trim it later.
When cutting polycarbonate with a knife, use a ruler or rule
Step 6. If the cut polycarbonate sheet does not separate from the rest of the material, run the blade again along the cutting line. It is prohibited to break or bend the material - there is a risk of cracks and other defects.
Step 7: Trim any burrs, if any. Trim the excess to fit the sheet to size. If you were cutting cellular polycarbonate, then glue the ends with construction tape or electrical tape to prevent dust and debris from getting into the cells.
If the thickness of the polycarbonate (monolithic only!) is less than 30 mm, it can be cut with large scissors
Job is done
Manufacturers
The same types of polycarbonate from different manufacturers can differ significantly in basic technical parameters. This is due to the peculiarities of production and the quality of manufactured products. Among the manufacturers of polycarbonate for greenhouses, which one is better? The most popular brands are:
- Carboglass is a Russian manufacturer of fairly high-quality products, which provides a guarantee of up to 15 years of operation without reducing the main characteristics. The cost of his products is significantly higher than average.
- Novattro is also a domestic manufacturer. According to reviews, its products are of decent quality, which is confirmed by a 14-year guarantee. Average price range.
- Sunnex is the trademark under which Plastilux produces its product. Very popular in the domestic market. 8 year warranty. Average price range.
- Vizor is a Czech brand widespread in Russia. The quality of polycarbonate is mediocre, which is reflected in the warranty - only 5 years. But the cost is almost half the price of leading domestic brands.
- ITALON is a Chinese manufacturer. The cost of its products is very reasonable, as is the quality. 5 year warranty. The range of products is very limited, both in color and thickness range.
Sources
- https://polikarbonat.guru/montazh/raskroj-polikarbonata-na-tortsy-teplitsy.html
- https://homeli.ru/dvor-i-sad/teplitsy/kak-pravilno-krepit-polikarbonat-na-teplitsu
- https://propolikarbonat.ru/raskroj-sotovogo-polikarbonata
- https://house-lab.ru/strojmaterialy/osnovnye-xarakteristiki-polikarbonata-dlya-teplic-kakoj-luchshe.html
[collapse]
Cutting polycarbonate with a grinder
The next most popular tool after the knife is the angle grinder, better known as the “grinder”. It is well suited for sawing large sheets of polycarbonate in straight lines. If you need to make a cut with rounded elements, for example, to cut out the end wall of an arched greenhouse, then it is better to use a knife or an electric jigsaw.
angle grinder
To cut polycarbonate, use metal cutting wheels, preferably those designed for working with aluminum. This is explained by the fact that when using them, the temperature in the cutting zone will be lower than when using a steel wheel. Accordingly, the risk of melting the edges of the polycarbonate sheet will also be less. Using a grinder at low speeds will help make the chances of melting even smaller (and at the same time reduce the likelihood of burrs).
Cutting wheel with a diameter of 125 mm for aluminum
For safety reasons, use the angle grinder with a guard. In addition, do not under any circumstances use cutting wheels of inappropriate main and seat diameters or saw blades from a circular saw - this is dangerous!
Step 1. Prepare the sheet and platform for work as described in the instructions in one of the previous sections of the article. When working with an angle grinder, install supports and scaffolding boards to the right and left of the cut line. Do not remove the protective film from the sheet.
The sheet must be supported by supports
Step 2. Test the grinder on pieces or unnecessary parts of polycarbonate. This way you will practice and gain a little experience working with similar material and an angle grinder. After this, cutting the main sheet correctly will be much easier and safer.
Marking before starting cutting is mandatory.
Step 3. Turn on the angle grinder, let it reach the required speed and move the cutting wheel to the end of the sheet along the cutting line.
Step 4: Start the cutting process. Slowly move the grinder cutting wheel forward along the cutting line. Control the position and do not rush, otherwise there is a risk of leaving a large burr. When cutting cellular polycarbonate along the stiffening ribs, the cutting line should be positioned so that the cutting wheel of the “grinder” does not cut into the walls of the cells. Wear safety glasses to prevent plastic shavings from getting into your eyes.
Starting to cut polycarbonate with an angle grinder
Step 5. Once the cutting process is complete, turn off the angle grinder and unplug it. As a rule, the sheet is cut off immediately and completely; no additional work with a knife is required.
Completing the cutting process
Step 6. If you are cutting cellular polycarbonate, then after completing the process, remove plastic shavings and dust from the cells. To do this, use a jet of compressed air, a vacuum cleaner or a fan.
Step 7. Seal the edge of the cellular polycarbonate sheet with construction tape.
You can cut in a similar way using a circular saw. Choose saw blades with fine teeth that are designed for cutting metal or plastic. Immediately before starting to insert the disk, let it reach the required number of revolutions. The base plate of the tool, which must be pressed against the sheet, will help you increase cutting accuracy.
Cutting polycarbonate with an electric jigsaw
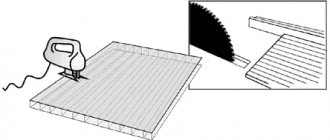
The choice of an electric jigsaw as a tool for cutting polycarbonate sheets can be called a kind of compromise between the cutting speed of a grinder and the safety (as well as the relative simplicity) of working with a construction knife. In addition, the jigsaw is great for cutting out semicircular/circular elements and parts of complex shapes.
Using an electric jigsaw to cut polycarbonate
The main thing is to choose the right file. First, pay attention to the shape of the teeth. Straight or wavy teeth will give you a straight, clean cut—exactly what you need. With adjustable teeth the opposite is true - they are designed for working with wood, so an electric jigsaw with such a saw will not cut, but tear polycarbonate, leaving a lot of notches, burrs and other defects in it.
Secondly, pay attention to the number and size of the teeth. They should be frequent and small. These properties are determined by the TPI parameter - the number of teeth per inch. In our case, give preference to files with TPI from 9 to 13 or more.
Thirdly, ask the seller what material this or that file is designed for. You need blades that are designed to work with metal, plastic or plexiglass. If possible, choose specialized files - they will give a clean cut with a minimum of defects.
File for working with acrylic glass, plastic and polycarbonate
Step 1. Mark the polycarbonate sheet and prepare the work area.
Step 2. Install the file into the electric jigsaw. It is advisable to use a new and sharp blade. Carefully fix it and adjust it - if it is not fastened correctly, the file will vibrate and leave defects on the polycarbonate.
Step 3. Move the jigsaw connected to the mains to the end of the sheet along the cutting line. For greater convenience, make a notch in this place in advance with a sharp knife with a retractable blade. Do not remove the protective film from the sheet until the cutting process is completed.
Cutting polycarbonate for a 4 m Kremlin greenhouse
Step 4: Press the jigsaw base plate onto the material. Make sure that the force applied to the tool is not excessively large, otherwise the polycarbonate will bend along the cut line. It is advisable to have your helpers or clamps hold the sheet in place without allowing it to move or vibrate.
Step 5. Turn on the electric jigsaw and let the saw reach the desired speed. As soon as she does this, start cutting into the material along the cutting line, slowly and carefully move it forward, pressing the jigsaw base plate to the polycarbonate plane. Be especially careful on curved areas. Pre-practicing cutting rounded parts on pieces and scraps of polycarbonate is a good idea, which will give you experience and make things easier.
Starting to cut out a complex shaped element using a jigsaw
Finishing the polycarbonate cutting with a jigsaw. If you do not want to stand on the material, even if there is a scaffolding board, then first make a cut on one side, then on the opposite side
Step 6. Once you are finished using your electric jigsaw, turn it off and unplug it. Clean the cells of the polycarbonate sheet from chips using a vacuum cleaner or a jet of compressed air. Use a knife to trim off the excess and clean the edge of the sheet from defects. Cover it with construction tape to protect the cells from dirt and dust.
When working with several thin sheets of polycarbonate, you can save significant time by simultaneously cutting several sheets stacked. Before cutting, make sure that the sheets do not move relative to each other.
Video description
To avoid stepping on the sheet, you can make the cut in two passes, starting from the middle and continuing first in one direction, then in the other, as the workers do in the following video:
When using an angle grinder, small plastic sawdust, formed during cutting, gets into the honeycomb of the material . They become electrified, stick to the walls and spoil the appearance of the finished part. These must be removed before placing the end profile on the edge. This is done using a vacuum cleaner or compressed air compressor.
You can wash debris from the channels with strong water pressure, directing the stream to the end of the canvas. But you will have to wait until it pours out and completely evaporates from the channels, and only then begin installation work.
Cutting polycarbonate with a hacksaw
A hacksaw with fine and fine teeth is sometimes used to cut polycarbonate sheets into straight square and rectangular pieces. The process is similar to cutting with a construction knife, so if you decide to use a hacksaw, then read the corresponding step-by-step instructions above.
Hacksaw for metal
Please note two points:
- hold the hacksaw at an angle of approximately 30°;
- secure the polycarbonate sheet as well as possible; if you have a workbench and a vice or clamps, then use them.
But it will be more convenient and, most importantly, of better quality to cut the material using an electric jigsaw or a construction knife with a retractable blade.
Stages of cutting and installation of polycarbonate
Common mistakes made by newbies
Of course, untrained people do not always cut polycarbonate into the ends of the greenhouse correctly and the first time. We suggest you familiarize yourself with the most common mistakes made by beginners:
- Incorrect sheet orientation. The material should be cut along the location of the honeycombs;
- wrong choice of material. Often sheets that are too thick are purchased for a greenhouse. This not only leads to an increase in the cost of the entire structure, but also complicates installation work;
- cutting by eye. Remember, to ensure correct cutting of polycarbonate at the ends of the greenhouse, a diagram must be developed;
- When creating a circuit, thermal gaps are not taken into account. It is also important to consider that connecting profiles will be installed during assembly.
We also suggest that you familiarize yourself with the thematic video, which describes all the features of cutting polycarbonate fabric.
If you strictly follow the instructions, marking and cutting the polycarbonate sheet is easy. This means that it will not be difficult to assemble the greenhouse yourself, without resorting to the services of installers.
Ready-made polycarbonate is used to cover roofs, greenhouses, verandas, canopies, swings, sliding windows, etc. Popularity…
Laser
The most accurate, fastest and highest quality tool for cutting polycarbonate sheets is an industrial laser. Using modern technologies and numerical control, it provides cutting accuracy up to 0.5 mm, high speed and, most importantly, perfectly smooth edges along the cutting line.
Photo of a polycarbonate laser cutting machine
However, equipment with such outstanding characteristics and advantages is very expensive, so purchasing it for one-time or rare use is impractical. It's another matter if you are going to open a workshop for the manufacture of greenhouses, roofs, canopies and polycarbonate fences. It should be understood that working with an industrial laser requires appropriate skills, which are almost impossible to learn on your own.
Laser engraving on polycarbonate
Laser cutting of cellular polycarbonate
Site selection
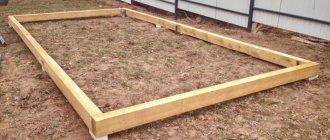
Before you begin assembling a timber foundation for a greenhouse, you will need to select a plot of land. As a rule, such a site should be located in the sunniest place, protected from strong gusts of wind. Once you have decided on the location, you will need to remove all existing weeds and debris. If the area is uneven, it will need to be leveled. Where required, it is necessary to remove excess soil, and somewhere, on the contrary, add it. Once the area is prepared, you can begin marking. For these purposes, special pegs are used, which are installed in the corners of the future polycarbonate greenhouse, after which the thread is pulled.
Attention! It is not recommended to install the greenhouse on a beam on an uneven area.
