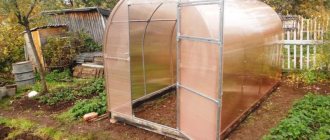
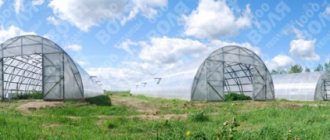
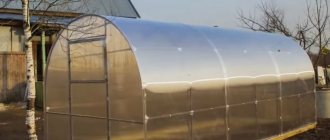
A greenhouse is a structure necessary to be able to enjoy the fruits of heat-loving crops as early as possible. And in some regions, growing certain species is completely impossible without the presence of this structure in the garden plot. That is why summer residents are careful and attentive when choosing a greenhouse. Previously, these structures were traditionally made on the basis of a metal or wooden frame covered with film or glass. And although traditional materials still continue to be used, gardeners are increasingly purchasing polycarbonate greenhouses.
Among the large selection of ready-made greenhouses, there are options in different price categories and quality. But one of the most reliable and often purchased by summer residents is the Dachnaya-Strelka greenhouse, which is produced by.
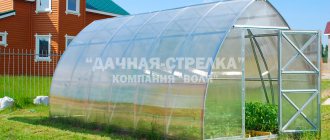
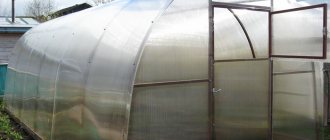
Greenhouse "Dachnaya-Strelka"
What should a polycarbonate greenhouse be like?
Before we begin studying the technical characteristics and installation instructions for the Dachnaya Strelka, let’s figure out what a good greenhouse should be like. Knowledge in this area will help you make the right choice when purchasing and not be disappointed in the purchase during operation.
Types of greenhouses with pitched roofs
The main points that you should pay attention to when choosing a greenhouse for your summer cottage are given below.
- Study the frame carefully - what is it like in the model you have chosen? Immediately exclude from the possible options those that include plastic pipes. Yes, such arcs will be enough for a greenhouse, but for a structure such as a greenhouse, plastic arcs are completely unsuitable. Of course, they significantly reduce the cost of construction, but they will not last long. And they are unlikely to survive a snowy winter at all. Therefore, opt for galvanized or painted metal pipes.
- By the way, why should painted or galvanized pipes or profiles be the basis of the greenhouse frame? It's simple: metal structures with a protective coating resist corrosion perfectly. Remember that the air humidity in the greenhouse is always quite high. This means that the metal here is more susceptible to corrosion. In addition, autumn procedures for treating greenhouses against parasites and pests are often carried out using strong active chemicals that harm the “bare” metal.
The frame of a good greenhouse should be made of galvanized/painted metal
- When studying the design of the greenhouse, pay attention to the distance between the arcs. This is more important for regions where there are strong winds and precipitation, especially in winter. The more often the arcs of the greenhouse frame are located, the stronger the structure’s resistance to heavy snowdrifts, which can accumulate on the roof of the structure and easily break it.
- Pay attention to the ventilation system. Compared to traditional greenhouse options, the polycarbonate structure practically does not allow air to pass through, and if the ventilation is poorly organized, the plants will suffocate and will not grow. There should be vents and doors at both end parts of the structure.
- Look at the quality of polycarbonate. It must be durable enough and have protection from ultraviolet rays. Otherwise, the greenhouse will be fragile, and under the influence of sunlight, the polycarbonate will simply crack and become unusable. For greenhouses, polycarbonate with a thickness of at least 4 mm is used, more is better. In this case, the density must be at least 0.7. And in regions where there are strong winds and snowfalls, the thickness of greenhouse polycarbonate should be at least 6 mm.
- By the way, polycarbonate should be transparent. Bright greenhouse structures, of course, are on sale, but plants do not like unnatural lighting.
The smaller the step between the arcs, the more snow the greenhouse will withstand
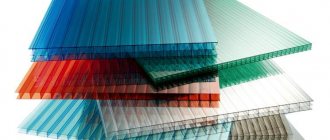
Diagram of the structure of a polycarbonate sheet
Now you know what a good greenhouse for a summer cottage should be like. The Dachnaya-Strelka greenhouse belongs precisely to such structures, despite the fact that it is a budget option.
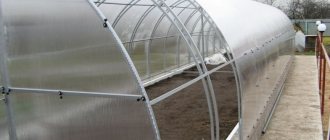
"Dachnaya-Strelka" is considered a budget greenhouse
Neutral conclusions about the manufacturer's models
It often happens that during the time of use, a person is not able to fully decide what is more in the purchase - pros or cons. User SolnceLychik became the owner of the Dachnaya-Strelka model. She chose the most expensive profile and polycarbonate options. During installation, it turned out that a perfectly flat area was needed for the greenhouse.
In the 2nd year after installation, rust began to appear in some places of the structure. The following season, the coating began to burst. In winter, summer residents have to come and clear off the snow, since it does not completely roll off the teardrop-shaped roof. But SolnceLychik praises the greenhouse for the presence of windows.
The Muscovite Snella80 has the “Dachnaya-Dvushka” model. The woman believes that this greenhouse is better than a film greenhouse, but worse than a steel one. The product maintains its temperature normally, but in winter it needs to be cleared of snow. The author of the review had to change an entire sheet of polycarbonate in the first year.
By the way. It is worth noting that many negative reviews about greenhouses were written by new, recently registered authors. It often turns out that for several years after that they no longer comment on any other products.
Vol's greenhouses are often criticized. Despite this, they remain one of the most popular designs and still compete with products from other factories.
Description and characteristics of the Dachnaya-Strelka greenhouse
The greenhouse design "Dachnaya-Strelka", produced by Moscow, was developed for regions suffering from heavy rainfall during the winter season. The greenhouse is also perfect for those who cannot constantly go to the dacha in winter and clean the roof of snow. This design has no analogues either abroad or within Russia.
is Russian
On a note! “Dachnaya-Strelka” will withstand the winter at the dacha area even without your intervention and regular snow removal. The snow load that the model can handle is within 700 kg per frame arc. And just one square meter of the structure copes with 450 kg of snow mass without much effort.
The graphic comparison includes greenhouses: “Dachnaya-Strelka 3.0”, “Dachnaya Ideal”, “Kremlevskaya”
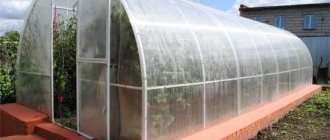
It’s not for nothing that the greenhouse got its name. The fact is that “Strelka” is a direct allusion to its special structure. If you look at the structure from the end, its shape will resemble an arrowhead. That is why the greenhouse has a lot of advantages over others, for example, conventional arched structures.
“Dachnaya-Strelka” didn’t get its name for nothing
The combined roof of Dachnaya Strelka is a kind of hybrid of two types of roofs, gable and arched. That is why snow practically does not linger on the structure in winter, easily rolling off from the surface to the ground. And there is still as much space inside the structure as in a regular arched greenhouse.
Design Features
The frame of the Dachnaya Strelka is made of galvanized profile with parameters 6*2 cm - the width is three times greater than that of other structures, which makes the structure much stronger and more durable. The material is not subject to corrosion, and with proper use, the frame can last up to 40 years - the service life of the Dachnaya Strelka is much longer than greenhouses with a metal frame coated with paint, which is easily peeled off. The structure is also strengthened by special ties and struts.
The greenhouse structure is reinforced with ties and struts
Features of Dachnaya Strelka
"Dachnaya-Strelka" is available in various sizes. Due to its sufficient height, it allows you to grow plants of almost any size. And inside the greenhouse, two large beds can easily fit in width.
Table. Some characteristics of the Dachnaya-Strelka greenhouse.
| Greenhouse length, m | Number of polycarbonate sheets (2100*6000), pcs. | Area, m2 | Width, m | Height, m | Weight, kg (without polycarbonate) |
| 2 | 2 | 5,2 | 2,6 | 2,5 | 62 |
| 4 | 3 | 10,4 | 2,6 | 2,5 | 93 |
| 6 | 4 | 15,6 | 2,6 | 2,5 | 124 |
| 8 | 5 | 20,8 | 2,6 | 2,5 | 155 |
"Dachnaya-Strelka" 2 meters long
Dachnaya-Strelka greenhouses have a door and a window at both ends, which allows achieving a sufficient level of ventilation.
Window window for the Dachnaya-Strelka greenhouse
On a note! At the buyer's request, Dachnaya-Strelka can be additionally equipped with transoms on the sides of the structure. It can also be equipped with mechanisms for automatic ventilation of the structure.
The covering of this version of the greenhouse is cellular polycarbonate “Sellex” with a thickness of 4 mm. However, at the request of the customer, the sheets can be thicker.
On a note! By the way, you can purchase “Dachnaya-Strelka” without a coating – just the frame.
The warranty period provided by the manufacturer for its product is 2 years. The greenhouse also provides the opportunity to increase the length due to extension inserts.
There is also a modification of the described greenhouse, “Dachnaya-Strelka 3.0”. This is an enhanced variation of the usual “Dachnaya Strelka”, differing in size. This design copes well with the impact of a layer of fresh snow up to 1.8 m thick, and compacted snow - almost 1 m. The width of the structure is 3 m, and the height is 2.4 m. The distance between the arcs is 1 m. At the same time, the length of the structure is as and the usual “Dachnaya Strelka” may have 2, 4, 6, 8 m.
"Dachnaya-Strelka 3.0"
“Dachnaya-Strelka” comes in several packages. The package includes: covering, frame, small parts. Polycarbonate is supplied rolled into rolls with a diameter of 120 cm and a length of just over 2 m.
Greenhouse equipment
Selection of optimal greenhouse sizes
The manufacturer offers several options for the size of the finished structure. This allows you to buy a greenhouse that is best suited for a particular site. But the height and width of the finished structure remain unchanged - 2.5 m and 2.6 m, respectively. These parameters were chosen taking into account the fact that a standard polycarbonate sheet has dimensions of 2.1x6 m, so it is easiest to use for covering a frame with exactly this width and height.
Important! When installing a greenhouse
"
Dacha Strelka
"
it is recommended to wear protective gloves to avoid scratching your hands on sharp structural elements.
A description of the possible length options for the Dachnaya Strelka greenhouse offered by the manufacturer is presented below:
- length 2 m - the kit includes a metal frame weighing 62 kg and 2 sheets of polycarbonate, and the area of the structure is 5.2 m²;
- length 4 m - the greenhouse area is 10.4 m², and for covering the frame weighing 93 kg, the kit includes 3 polycarbonate sheets;
- length 6 m - this structure is equipped with 4 sheets of polycarbonate, and its frame weighs 124 kg and covers an area of 15.6 m²;
- length 8 m - the kit consists of metal parts for a frame weighing 155 kg and 5 polycarbonate sheets, and the greenhouse area is 20.8 m².
Advantages and disadvantages
The advantages of this greenhouse model include the following:
The disadvantages of the greenhouse include the fact that, if you believe the reviews of some customers, despite the instructions, it is not always possible to assemble the “Dachnaya-Strelka” yourself - there are too many parts.
Prices for the Dachnaya Strelka greenhouse
greenhouse Dachnaya Strelka
Comparison table of characteristics
To make it easier for you to decide on the choice of a greenhouse for your homestead, we suggest taking a look at the comparative table of characteristics of the above-described models.
| Model | Size (HxW), cm | Snow load, kg/sq. m | Frame | Design form |
| Agrosfera Standard | 200x300 | 80 | prof. pipe, 20x20 mm | arched |
| Will of the Arrow | 250x260 | up to 340 | U-shaped galvanized. profile, 60x20 mm | lancet |
| Kremlevskaya | 210x300 | up to 250 | all-welded double pipe 20x20x1.2 mm | arched with opening roof |
| Sibirka Farm | 210x250 | up to 550 | square double pipe 40×20 and 20×20 mm | straight-walled |
| Vintage Classic | 210-250 | up to 200 | reinforced galvanized pipe 25×25 mm | house |
| Tulip Premium Antistorm | 202x308 | 140 | galvanized pipe 40×20 mm | arched with opening roof |
| Sibirka Strelka | 230x266 | 650 | galvanized pipe 25×25 mm | lancet |
Assembly and installation
So, you have become the happy owner of the Dachnaya-Strelka greenhouse. Now all that remains is to assemble it. Fortunately, all parts in the package are numbered, making the installation process easier. Assembly is carried out using nuts, screws, self-tapping screws and a screwdriver. Instructions for assembling the greenhouse are given below.
General view of the frame of the greenhouse “Dachnaya-Strelka 3.0”
Main stages of greenhouse assembly
Step 1. Unpack all packages containing greenhouse construction parts. Unfold the polycarbonate sheets.
Greenhouse "Dachnaya-Strelka" disassembled
Step 2. Assembling the frame begins with connecting the upper arches No. 4c. Connect them in pairs using a ridge cap.
Numbering of structural elements
Main parts for assembling the structure
Step 3. Using a bracket, attach the end top ties (parts No. 5) to the outer arches.
Step 4. Attach horizontal ties (No. 9) to the other arches.
Frame assembly
Step 5. Connect the assembled arcs with purlins (No. 2) in the ridge area and on the sides of the roof. By the way, the roof is almost ready.
Assembled roof structure (no rigidity yet)
Step 6. If you decide to install a greenhouse without a foundation, then assemble a structure from posts (1) and supports (3). Attach them to the lower arches (4n).
Step 7. Connect the upper and lower arcs. To begin, connect the parts on only one side of the structure.
Step 8. Attach the purlins remaining after assembling the roof onto the reinforced lower arches.
The photo shows a little trick - where the polycarbonate will lie (in this case, on the arc), it is better to connect it with a screw head to the polycarbonate, so as not to push it through later
Step 9. Now attach the lower arches themselves, and to them – the purlins on the other side of the greenhouse.
Advice! Assemble the greenhouse together with assistants. At some steps, the help of an outsider will be simply necessary for faster and safer assembly of the structure.
Step 10. The frame is almost ready. At the bottom of the lower arches, install the brackets that will be needed to later strengthen the end lower ties (No. 6).
Step 11. Attach the lower and upper pillars of the doorway (No. 7, 8) to the ends.
Step 12. Now install the struts inside the frame. Attach them to the junction of the horizontal tie and the upper arc. Connect the struts and lower arches to each other for strength using strut spacers (No. 11).
Greenhouse frame without ends
Step 13. Start assembling the door. Assemble it from parts No. 12, 13, 14, 15.
Door assembly
Step 14. Where you decide to place the greenhouse, dig a trench 20 cm deep.
Attention! Do not install the greenhouse near trees or the roofs of other buildings and structures so that pieces of ice and snow do not fall on it in winter.
An alternative option is to dig separate holes instead of a trench
Step 15. Install the greenhouse in the prepared trench. Using a cord and level, check the evenness of the installation and the diagonal of the frame.
The frame is installed in the trench
Step 16. Attach the lower bandage to the support. The frame is ready, it's time to start covering it.
Step 17. Take a sheet of polycarbonate and cut a piece from it equal to the width of the door.
Step 18: Attach this piece to the door using bolts and washers. Cover the end of the polycarbonate with tape to prevent moisture from getting in there.
Step 19. Install hinges, seals, and handle covers on the door.
When assembling doors and windows, the main thing is to press the rubber seals correctly
Step 20: Attach the doors to the end of the greenhouse.
Step 21. From the already cut polycarbonate sheet, measure and cut a piece 2 m long and attach it to the left side of the end, align it with the door jamb, secure with bolts and cut. Part of the end is sheathed.
Attaching polycarbonate to the end of the greenhouse
Step 22. Cover the right side and the top of the end with the remaining piece in the same way.
Example of polycarbonate fastening
Step 23. Cover the joints of the covering pieces with the end cap (No. 16).
Step 24. Install the end seal on the polycarbonate cut around the perimeter of the end.
Laying the seal (here it is additionally secured with tape for reliability)
Step 25. Attach handles to the doors, and hooks to the ends of the greenhouse.
Step 26: Cut all remaining polycarbonate sheets in half. Seal the ends with tape and cover the greenhouse with them.
Attention! Place polycarbonate sheets with the side facing up where there is a mark indicating protection of the coating from ultraviolet radiation.
The photo shows the finished façade of the greenhouse
Step 27. Attach a ridge profile connected lengthwise to the top of the greenhouse ridge.
Step 28. Using a wire band, pull the covering to the frame. Attach it (bandage) to the lower wire bandage using fasteners and bolts.
The greenhouse is covered
Step 29. From the inside, secure the covering along all the lower purlins using washers.
The steel ridge and polycarbonate are additionally secured with steel wire, which is tensioned by pulling screws on the brackets to which the wire is tightened. The result was a strong grip
Step 30: Dig the trench in which the greenhouse sits. Finally, the structure is assembled.
A trench is being dug
The Dachnaya-Strelka greenhouse is completely ready for operation
Instructions for assembling the Dachnaya-Strelka greenhouse. Downloadable file (click the link to open the PDF in a new window).
Instructions
Video - Assembling the Dachnaya-Strelka greenhouse
Greenhouse “Uralochka reinforced”
In this article you will find technical characteristics, types and instructions for installing the “Uralochka reinforced” greenhouse! We also recommend reading the article about what the Snowdrop greenhouse is.
Tips for use
To ensure that Dachnaya-Strelka serves for many years, we have prepared some useful tips.
- If you are installing a greenhouse on a timber foundation, be sure to anchor it in the ground. It is not recommended to install the structure on concrete - the greenhouse may “sink” after wintering. The ideal foundation option is a strip foundation, but this is a rather expensive method.
The foundation made of timber must be fixed in the ground
As we can see, assembling the “Dachnaya-Strelka” is not so difficult. Simply read the instructions carefully. And if the installation was successful and correct, Dachnaya-Strelka will delight you with a bountiful harvest for many years and will cope well even with heavy snowfalls.
