What kind of greenhouses have not already been invented by gardeners! Modern greenhouses differ in the shape of their roofs, type of construction, complexity of installation, resistance to various influences and many other factors. And the more interesting the design, the more people want to install it in their dacha. And if the greenhouse is also functional and brings benefits, then it certainly simply has to live on the garden plot. English greenhouses are not just buildings for growing various types of plants, but also structures that can emphasize a sense of style and give an aristocratic charm to your garden plot.
English greenhouse - beauty and practicality
Construction Materials
The next stage is the selection of building materials. The greenhouse frame is constructed from aluminum, wood, polyvinyl chloride or steel. Most gardeners prefer aluminum, as it is easy to maintain, not subject to deformation, and easy to install. True, it has one significant disadvantage: aluminum cools quickly, so condensation may appear on the inside of the frames.
You can pay attention to wooden frames. Wood will be cheaper than metal, but it can hardly tolerate high humidity, even with the use of an anti-corrosion coating.
For simple greenhouses, you can use plastic. It is inexpensive, strong, and tolerates humid climates well, but can become deformed at high temperatures. Therefore, if you live in a hot region, think twice.
And of course, glass. The most traditional material for a greenhouse. Glass outperforms plastic and film: it is more transparent, durable, resistant to humidity, and is not afraid of sudden temperature changes. Glass has one important advantage: it is not susceptible to corrosion by chemical means. This means that the greenhouse inside and outside can be treated with any available means without fear of damaging the material itself.
Daughters know who they treat better: the unusual upbringing of a father with many children
Oatmeal-honey pie with glaze: both prepared and eaten very quickly
Delicious lean dessert made from semolina and coconut flakes: no need to even bake
Design Features
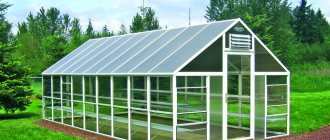
What is it about English greenhouses and why are they considered a real masterpiece of “garden building”, gaining more and more popularity? The fact is that this design in appearance resembles a beautiful greenhouse house, although in fact it is almost an ordinary greenhouse. Why "almost"? But because any English greenhouse has several characteristic features (external and structural), which makes it possible to distinguish it from any other structure.
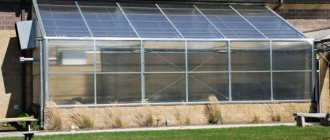
- The English greenhouse has a base. Yes, this design must have a foundation and a basement part installed, due to which the beds are raised significantly above the ground and are protected from freezing in winter, if the greenhouse is used for growing plants in winter and is equipped with a heating system. In addition, a beautiful, neat base gives the building a finished and neat look.
English greenhouses
- The English greenhouse is covered with glass. No films or polycarbonate - only smooth, beautiful, transparent glass. An English greenhouse covered with a different type of material no longer looks as neat and majestic as it should look in the original. In addition, the fact is that opaque polycarbonate will hide all the plantings behind it, but one of the main advantages of an English greenhouse is the opportunity not just to decorate your garden plot, but to turn it into a greenhouse or an English garden.
- An English greenhouse is a structure with a gable roof, reminiscent of a neat house. In this case, the slopes should be very steep - about 45 degrees. Due to this, snow does not accumulate on the structure.
- High walls are also one of the design features of the English greenhouse. Due to this feature, high varieties of plants can be grown.
- Often, but not always, an English greenhouse is adjacent to the wall of a residential building. Then it turns into a real greenhouse, which can be accessed directly from the house (as a rule, a door is equipped for this purpose).
- English greenhouses must be equipped with good ventilation and drainage systems, which ensures optimal conditions for growing plants - the level of humidity/temperature is easy to regulate. Therefore, even tropical plants can be grown in such greenhouses.
- The presence of high walls also provides the possibility of arranging shelves for pots or boxes with plants, which allows you to further decorate this structure.
- ordinary , glazed with single glass (beautiful and great for growing plants in winter);
- elite , expensive and at the same time very durable structures, although outwardly they look almost like traditional English greenhouses.
One of the features of English greenhouses is their high walls.
English greenhouse
English greenhouses are used, as a rule, to create winter gardens, grow tropical and capricious plants, fruits and heat-loving vegetables, flowers. Also, structures often become a real attraction due to their appearance.
There are two types of English greenhouses:
Winter greenhouse
Making the markings
Nowadays, construction stores offer a wide selection of industrial-made greenhouses. They are ideal in all technical matters, but the price is not always acceptable. Assembling a greenhouse with your own hands will take a little more time, but it will allow you to select high-quality materials at an affordable price.
So. After choosing a site for constructing a greenhouse, clear it of debris and large grass, if there is any on the site. Tall trees and shrubs should not be a barrier to access to sunlight. Then the area needs to be marked. Use twine or tape measure to mark the outline of the future greenhouse. Dig a trench, focusing solely on the markings. The standard foundation depth is about 80 cm deep. This is the average value by which the ground freezes. This type of foundation is called strip foundation and is most often used for the installation of garden greenhouses.
Advantages and disadvantages
An English greenhouse has its pros and cons, like any other structure. Let's talk about them in more detail.
Advantages of English greenhouses:
- perfectly lit and perfectly transmit the sun's rays;
- have the ability to retain heat well;
- perfectly protect plants from wind, cold, rain;
- Very beautiful;
- strong and durable.
The English greenhouse received some of its advantages precisely due to the fact that glass is used as a covering material. It has high transparency, which means it does not hide the green gardens located in the greenhouse from prying eyes. In addition, glass does not prevent sunlight from penetrating inside, so plants do not lack light. Another advantage of glass is its chemical inertness. The greenhouse can be treated with absolutely any disinfectants - nothing will harm the covering material. By the way, this material ages very slowly - glass can serve faithfully much longer than polycarbonate. It is also not afraid of heat, frost, and moisture.
Small English greenhouse
But the disadvantages of English greenhouses include the following.
- This is a very expensive design. And if you plan to grow simple tomatoes and don’t have a lot of money, then maybe you shouldn’t bother with an English greenhouse? It is much easier and cheaper to build this structure yourself than to purchase a ready-made one in a store. This is exactly how you can get around the assertion that only aristocrats can afford English greenhouses.
- The covering of English greenhouses is resistant to shock and is easily destroyed during a hailstorm. However, even a polycarbonate greenhouse will not survive large hail. In order to protect the English greenhouse as much as possible from damage, it should be covered with glass that has shockproof protection.
- Glass is a heavy material, and since it is used a lot for the roof of an English greenhouse, the structure turns out to be heavy. This is the reason for the mandatory presence of a foundation under it.
An English greenhouse requires a foundation
As you can see, English greenhouses still have more advantages than disadvantages. But still, think carefully before getting involved with this complex but beautiful design.
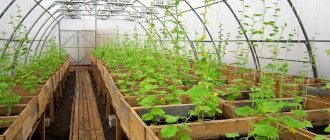
Beds in an English greenhouse
Pouring the foundation
Once you have dug the trench, you need to fill it with a mixture of sand and gravel to create a cushion. The materials are mixed in equal proportions. Then you need to put together formwork from old boards and strengthen it in the trench. Now you can pour the concrete. It is prepared using classical technology. Mix one part cement, three parts sand and five parts crushed stone. Mix everything thoroughly with water until you obtain a creamy consistency. Pouring the foundation is the longest part of the work, since it takes about a month for the concrete to completely dry. A word of advice: try to pour the concrete quickly and continuously to avoid uneven curing, which can lead to cracking in the future.
Kinchev, Garkusha, Stingray and others shared their memories of the rock club
Vertical flower bed made of PET bottles: a great idea for a small summer cottage
Hand training helps: causes and prevention of “mouse” hand
Base
When the foundation has completely hardened, lay several layers of roofing felt on it to create waterproofing. Now you can start building the basement. It is usually built of brick. This is the most accessible material. In some cases, concrete blocks are used. After the construction of the base, you can decorate it with additional decorative material. Don't forget to leave a notch for the door.
How to make a greenhouse with your own hands with a side entrance in the English style?
To save money, you can make an English greenhouse yourself, especially if you have the skills to work with tools. But beginners, following the step-by-step manufacturing instructions, can also cope with the task. Therefore, we will consider the entire process of building a foundation and assembling a structure at home in more detail.
Selection of foundation
The foundation is an integral part of an English greenhouse, since the weight of the entire structure is very large; it requires strong support in the form of a concrete base and a brick base (to maintain aesthetics).
The foundation is usually made of a layer of sand, which is placed as the bottom layer in the trench. For these purposes, choose wet sand, which is well compacted and maintains the strength of the foundation. The second integral component of the foundation is concrete, which is used to fill the empty space in the trench. To give a beautiful appearance to the foundation structure, the base is erected from brick or stone, depending on the landscape of the site.
English greenhouses are not installed without a foundation, since the structure simply cannot withstand extreme stress under the heavy weight of the structure. Only if the weight of the frame is ensured by replacing glass sheets with polycarbonate sheets and using lightweight aluminum, it is possible to do without a frame, but it will no longer be possible to call such a structure an English greenhouse.
To make it clear to a beginner how to make an English greenhouse from scratch, let’s look at a step-by-step guide to the entire process from pouring the foundation to finishing the frame with sheets of glass:
- In the selected area, they mark the place where the trench will be dug for the foundation. Between 4 stakes driven into the ground on all sides of the future structure, pull the cord, checking the correctness of the markings, additionally pulling the cord diagonally.
- After marking the territory, they dig a trench in accordance with the measurements, about 20 cm deep, the bottom of which is compacted and the walls are leveled. The strict parallelism of the trench walls to the bottom is checked with a level.
- The inside of the trench is covered with a 10 cm layer of sand and compacted well. The sand is covered with waterproofing - roofing felt or thick polyethylene, providing insulation not only of the bottom, but also of the walls of the trench.
- The base of the foundation will be a concrete mixture of grade M200, which is brought to working condition, based on the recommendations on the packaging. To strengthen the concrete, you can use reinforcement, which will make the foundation stronger to withstand the heavy weight of the frame. Reinforcement should only be used when constructing a wooden frame; aluminum is lighter and does not require additional reinforcement. The reinforced frame is made independently, subject to the appropriate skills; in their absence, they turn to specialists for help.
- After pouring the foundation, it is covered with waterproofing material, opening for ventilation every 10 hours for 30 minutes. After a week, the foundation should completely harden.
- Next, using a level, lay the brickwork of the base. The height of the base depends on the drawing of the greenhouse. The bricks should be connected together using a specially purchased concrete mixture for laying bricks. It is convenient to apply concrete with a spatula; it is also used to remove excess mixture from the seams.
- A layer of roofing material is laid on top of the base, which will protect the frame from excess moisture.
- To build the frame, beams with a cross-section measuring 10x15 cm are used. A rectangular base is made from the timber and secured to the base with nails.
- The corners of the wooden base are attached to the base with anchor bolts; they are also placed around the entire perimeter, maintaining a distance of 150 cm.
- The next step is to install the corner posts of the frame. To do this, use a beam with a cross-section of 10×15 cm. To ensure strict vertical installation, dowels and slopes are used. Having installed 4 corner posts, the required number of additional posts are installed along the perimeter of the wooden base at a distance of 75 cm. The joints of the racks and the base are secured with metal corners.
- They begin to manufacture the upper frame frame using a beam with a cross-section of 10x10 cm. To make the frame, a certain number of round-cut grooves are made in the beam at a distance of 75 cm. The resulting parts with recesses are installed on top of fixed vertical posts.
- In the center of the structure, 4 additional support posts are installed and connected with a long beam. Supports will be needed to attach the rafters and construct the roof.
- The roof is constructed using a rafter system; rafters (section 5.5×8 cm, length 2 m) are placed along the perimeter of the frame to the support posts. For reliable fastening, metal plates and corners are used.
- Side doors are made from the remains of the timber (section 6x6 cm), connecting them together with nails and attaching them to the frame with door hinges.
- Glass is a very fragile material, so cutting sheets of the appropriate size yourself is very difficult, especially for people who have not previously had experience working with glass. In order not to spoil the expensive material, it is better to turn to professionals; when the frame of the greenhouse is ready, they will take measurements and make sheets themselves. If you are confident in your abilities, you can cut the sheets to the desired size yourself using a glass cutter.
- It is better to fasten the glass to the frame using sealant, running it well at the joints of the glass sheets. When the frame is completely covered with sheets, it is left until the sealant has completely dried for several hours.
There are quite a lot of English greenhouses on the modern market that are sold disassembled, and all that is required of the owner is to build a solid foundation, assemble a pre-purchased frame and cover it with glass. As a rule, such prefabricated models are provided with detailed assembly instructions.
But, if you don’t want to spend extra money on buying a ready-made structure, you can always make it yourself, using high-quality building materials. As a rule, wood or metal is used for the frame, so we will dwell in more detail on these materials, and the finished drawing is shown in Figure 4.
READ MORE: How to feed geraniums - means for abundant flowering and growth
Since the main feature of the English greenhouse is that dense, impact-resistant glass is used to cover it, a key role in construction should be given to the construction of a durable frame.
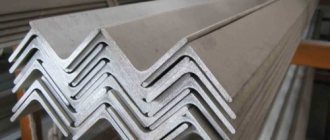
Wood is a more affordable material from a financial point of view, but if you decide to build a truly durable English greenhouse, it is better to make the frame from aluminum. To build it, you need to cut the aluminum pipe into pieces so that you end up with one central beam (its length should correspond to the length of the greenhouse), support posts of the required height and beams on which the glass roof covering will be supported in the future.
The parts of the future frame are connected to each other using a welding machine. To fasten the glass to a metal frame along the entire perimeter of the future fastening, you additionally need to install a metal profile, to which the glass will be attached in the future using special brackets.
Figure 4. Finished design drawing
Additionally, a drainage pipe must be installed around the building to remove excess rainwater from the foundation. It is necessary to provide vents and windows inside, or install an automatic ventilation system.
Frame installation
A wooden frame is an alternative option for an aluminum structure. Firstly, wood is much cheaper than aluminum pipes, but at the same time has high strength. Secondly, working with wood is much easier than working with metal. This condition can play a key role for those who do not know how to use a welding machine.
The only drawback of wood is its tendency to rot. But, if you spend a little money and time, and treat all structural elements with special primers, the building will serve you for a long time.
The construction of a wooden frame of an English greenhouse is carried out as follows:
- First you need to develop a detailed drawing, in which you should indicate all the elements of the future structure. This stage plays an important role, since the accuracy of the construction of the building will depend on the detail of the drawing.
- Next, you need to build a concrete foundation and cover it with bricks. Brickwork is optional, but it is still better not to neglect this stage, since bricks will give the structure additional strength.
- The pre-prepared timber needs to be used to make the main parts of the frame. For this purpose, it is better to take a beam with a cross-section of 10x10 cm, so that the finished frame can successfully withstand the weight of the glass. Wood must be treated with special primers against rot and mold.
- Next, you can begin assembling the frame. The advantage of a wooden structure is that special metal profiles and brackets are not needed to connect the parts together. Special fasteners will only be needed to connect wooden beams to the foundation.
READ MORE: Plasterboard figures on the ceiling: how to make it yourself, photos and videos
Figure 5. Stages of frame construction and glazing
To make the structure durable and comfortable, it is better not to make too large or small gaps between the support beams. The optimal dimensions are 45x50 cm for small greenhouses and 140x70 cm for large structures. Step-by-step construction of the structure is shown in Figure 5.
Connecting the parts
When the foundation is ready, you can begin building the greenhouse itself.
First of all, unpack all the frame parts. Assembly should begin from the side walls. To ensure that all the parts are in front of your eyes and the walls are smooth, it is recommended to carry out the assembly on a flat surface.
First, lay the longitudinal and transverse main parts on the ground. Connect the cross beams to the lower longitudinal beams using bolts. Leave the top ones unfixed for now. Fasten bolts only into special, already existing holes. There is no need to do them yourself.
Then assemble the end pieces. When all the parts are ready, you can begin the final assembly of the structure.
Why spend a lot of money on mouthwash? Homemade recipe without chemicals
The common people left the city: how the inhabitants of Ancient Rome retained their rights
Reading forums: things that young mothers waste time and energy on
Assembling the frame
To put the prepared parts together, you will most likely need an assistant.
To begin, install one wall and the end onto the plinth. Supporting with your hands, connect the walls with bolts. Then lift and connect the remaining parts in the same way. Connect all walls with pre-prepared bolts. You should end up with one large frame without a roof that sits firmly on a plinth, secured with dowels and angles.
Classic style
The most important condition when decorating a room in a classic style is not to overload the interior with details. Moderation is the sister of classics. The walls should be in light colors, and the furniture should be classic and not in flashy colors. Plants look advantageous against a light background. Statues, paintings, frescoes, and lamps would be appropriate. The classical style involves arches, pilasters, columns. But this is not a mandatory condition.
Communications
Now all that remains is to carry out internal communications, if any are included in the plan. Run wires, install heating elements. You will also need to cover the glass with a special film around the entire perimeter, which will keep you warm in winter and cool in summer.
We need to praise dads for staying at home with their children, but we shouldn’t forget about moms either
Andrei Ilyin said that Yakovleva’s son was wildly jealous of his mother’s on-screen husband
Why natural sounds not only lift your mood, but also relieve stress
A little history
It is believed that the first greenhouses appeared during the times of the Great Roman Empire. At that time, noble patricians preferred to grow rare types of flowers and fruits there. The orange was considered the most revered plant among the aristocracy. The first greenhouses, where they began to use the stove heating method, appeared in Holland in 1599.
Over time, English craftsmen took over the initiative to create greenhouses and in the 17th century in England they began to mass-produce heated greenhouses. Around this time, greenhouses began to appear throughout Europe. Glass began to be used in their construction and they were equipped with an internal heating system, water supply and lighting. And the growth of technological progress has made it possible to establish mass production of such structures.
There were several ways to obtain heat. For example, in Oxford, carts with burning coals were placed inside buildings and changed as they cooled. In Chelsea they went further and created an underground soil heating system in a greenhouse.
